


12 - FORM NO. 56041587 - Hydro-Retriever
™
3800, 2042 / BR 1100, 1100C, 1100C-XL
12 / ENGLISH
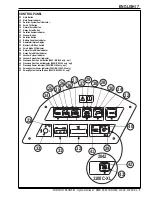
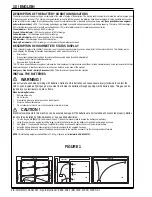
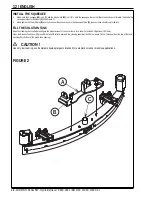
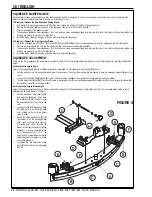
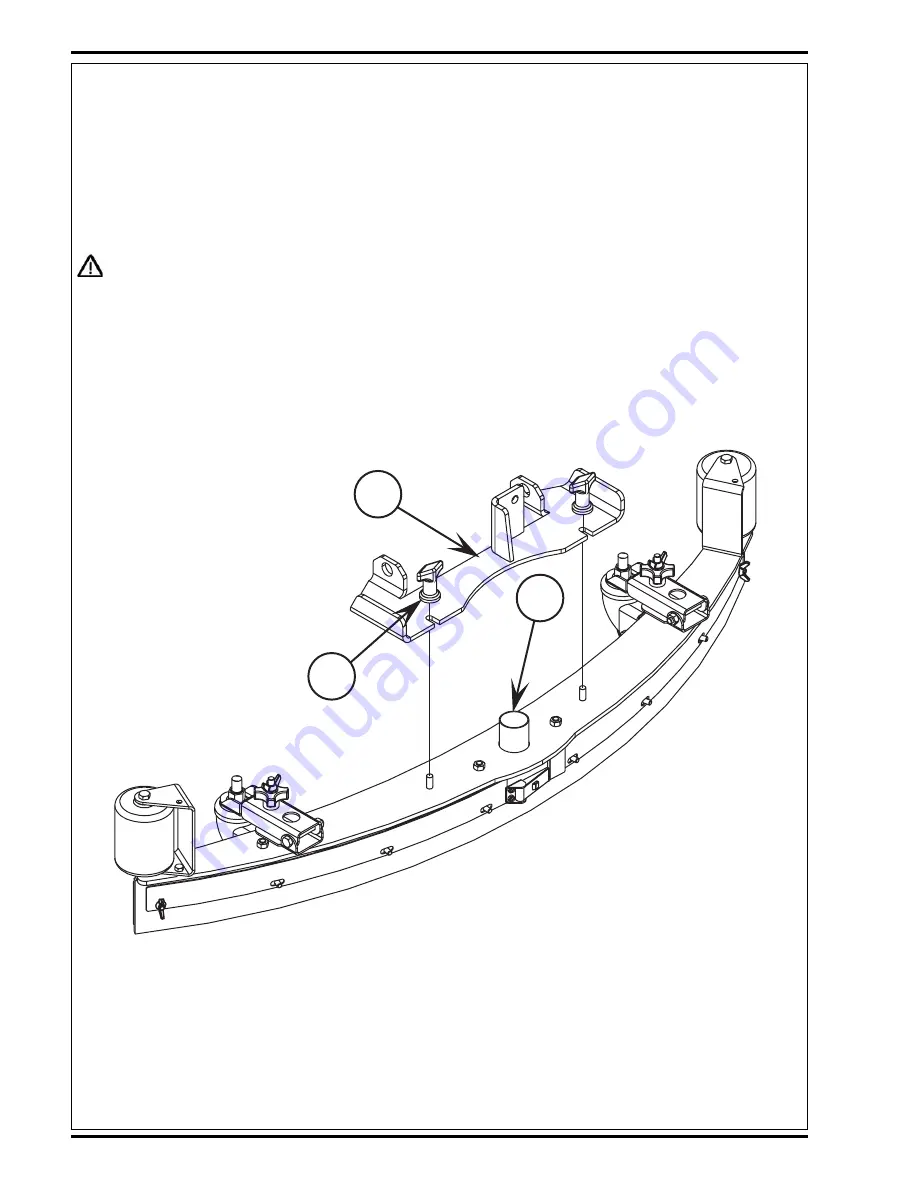
FIGURE 2
INSTALL THE SQUEEGEE
1
Make sure the Squeegee (18) is up (O) and the Key Switch (33) is off (O). Hold the squeegee tool so that the curved ends point forward, then slide the
squeegee tool onto the Mount (A) (See Figure 2).
2
Hand tighten the Thumb Nuts (B) and then connect the vacuum hose to the Squeegee Tube (C) (vacuum hose should loop to the left).
FILL THE SOLUTION TANK
Read the cleaning chemical label and fi gure the proper amount of chemical to mix for a tank that holds 53 US gallons (200 liters).
Open the Solution Tank Cover (2), then fi ll the tank 1/3 full of water, add the cleaning chemical, then fi ll the tank to 7.62cm (3 inches) from the top of the tank
opening (fi ll to bottom of the wall in tank opening).
CAUTION
!
Use only low-foaming, non-fl ammable liquid detergents intended for automatic scrubber machine applications.
A
B
C


