8/00 revised 6/01 Form No. 56040724 (page 2 of 13)
© 2001 Printed in USA, Nilfisk-Advance, Inc.
I
F
G
H
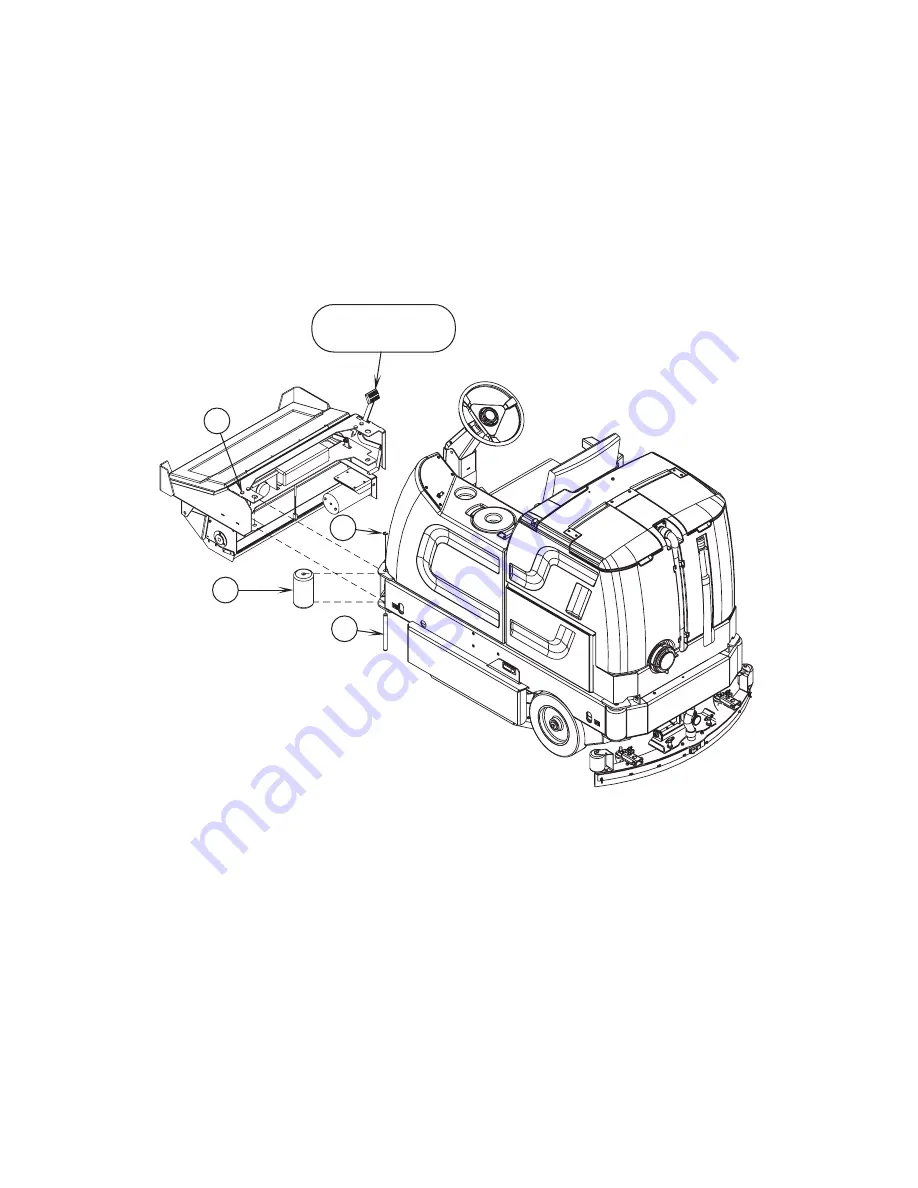
Foot Pedal Activates
Pre-sweep
5
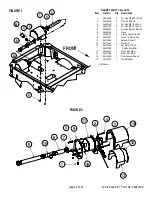
See Figure 2. Remove both front Roller Bumpers
(F)
. Do this by removing the top Retainer Ring
(G)
from the left Roller Bumper Pin
(H)
and drop
the pin out from the bottom, the Right Side Roller Bumper Pin can be removed from the top. Save these pins for installation of the presweep
assembly.
6
Slide the presweep assembly up to the front of the machine.
7
Remove the protective plug from presweep wiring connector under the right front corner of the machine. Plug the wiring harness from the
presweep assembly into this connector.
8
Loosen the (4)
(I)
Bolts. Lift the presweep assembly up into place where the roller bumpers used to mount, and re-install the (2)
(H)
Roller Bumper
Pins from the bottom up. Re-install the (2) Retainer Rings
(G)
on the Roller Bumper Pins.
9
Lift up on the front of the presweep assembly until it is firmly up against the front of the machine and then tighten the (4)
(I)
Bolts.
10
Before testing the presweep, check the height of the front skirt (the skirt on the hopper), it should be level to the floor and just lightly touching the
floor. If it drags the floor too much it will be pulled into the broom. Adjust if necessary.
11
Re-connect the batteries and follow the steps below under
Pre-Sweep / Dust Control Configuration
.
FIGURE 2
PRE-SWEEP / DUST CONTROL CONFIGURATION:
FACTORY DEFAULT: OFF
If the brush type option is properly selected this option will be automatically selected the first time that the pre-sweep/side-broom option is installed
and activated. This option can also be selected by performing the following steps:
A
Turn the master on/off key switch to the off position.
B
Press and hold the scrub off switch and the dust control switch.
C
While holding both switches turn the master on/off key switch to the on position.
D
Continue to hold both switches until the hourmeter/status display shows “OFF”, “PS” or “Sb” and the dust control yellow indicator is lit.
E
Release both switches.
F
Pressing and releasing the dust control switch will now select between “OFF”, “PS” or “Sb”. Use “OFF” to disable the pre-sweep/side-broom &
dust control feature, “PS” for the disc-type machine pre-sweep unit and “Sb” for the cylindrical scrub machine side-broom unit.
G
To save the new setting, turn the master on/off key switch to the off position.
H
The new setting will be saved and will remain in effect until it is changed again.


