background image

15

1) 

Optional accessories / Option depending on model

Original Instructions

IVB 9 H/M

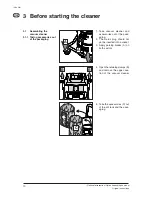
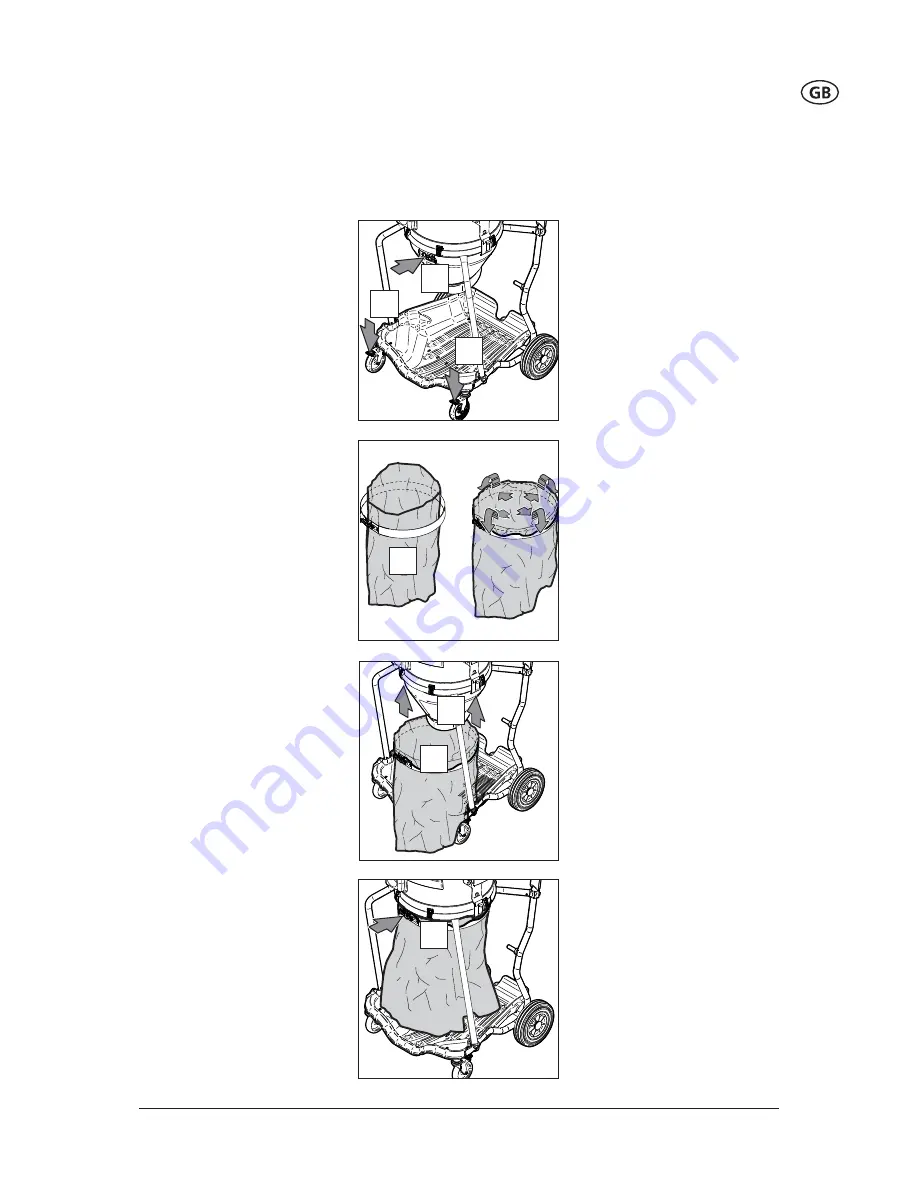
1.  The mains plug should not 

yet be inserted into a socket.

2.  Apply parking brakes (A) on 

both castors.

3.  Open clamping ring (B).

3.1.5 Inserting the 

disposal bag 
(IVB 963-2M ED XC)

4.  Insert disposal bag (C) into 

clamping ring.

5.  Fold the top edge of the dis-

posal bag over the rim of the 
clamping ring.

6.  Attach the new disposal bag 

(C) onto the storage contain-
er (D).

7.  Close clamping ring (B).

C

C

A

A

D

Summary of Contents for IVB 963-2M ED XC

Page 1: ...ledning K ytt ohje Navodilo za uporabo Uputstvo za rad Prev dzkov n vod Provozn n vod Instrukcja obs ugi Kezel si utas t s Instrucciones de manejo Instru es de opera o letme k lavuzu Naudojimo instruk...

Page 2: ......
Page 3: ...15 4 1 Connections 16 4 1 1 Electrical connection 16 4 2 Switching on the vacuum cleaner 16 4 2 1 Switch auto 0 I 16 4 2 2 Suction power control 16 4 2 3 Auto On Off Operation auto switch position 17...

Page 4: ...d up material 1 Do not use any unsafe work techniques 2 Never use the vacuum cleaner without a filter 3 Switch off the appliance and disconnect the mains plug in the following situations Prior to clea...

Page 5: ...ED XC to pick up liquids The vacuum cleaner IVB 965 2H M SD XC is suitable to pick up dry nonflammable dust non flammable liquids sawdust and haz ardous dusts with OEL values1 carcinogenic dusts dusts...

Page 6: ...minated with harmful substances 1 Clean the outside of the vacuum cleaner wipe it clean or pack the vacuum cleaner in well sealed packaging 2 and avoid spreading deposited harmful dust Warning Do not...

Page 7: ...ons for such waste removal At least once a year a Nilfisk ALTO technician or an instructed per son must perform a technical inspection including filters air tight ness and control mechanisms According...

Page 8: ...table mains voltage The appliance can be damaged as a result of being connected to an unsuitable mains voltage 1 Ensure that the voltage shown on the rating plate corre sponds to the voltage of the lo...

Page 9: ...r has been used with dust classified as H it is necessary to clean the machine thoroughly before using the machine with dust classified as M or lower Hazardous materials Spare parts and accessories CA...

Page 10: ...Option depending on model Original Instructions IVB 9 H M 2 Description 2 1 Operating elements aut o 3 2 17 3 4 7 8 14 13 12 11 18 1 15 aut o 0 3 6 1 2 3 5 6 15 14 13 12 11 10 9 8 7 4 16 16 IVB 965 2H...

Page 11: ...o remove dirt tank 6 Swivel bar to remove dirt tank 7 Bracket for floor nozzle 8 Castor with brake 9 Dirt tank 10 Inlet fitting H 11 Inlet fitting M 12 Receptacle for electrical lead 13 Applicance swi...

Page 12: ...3 1 1 Taking accessories out of the packaging 1 Take vacuum cleaner and accessories out of the pack aging 2 The mains plug should not yet be inserted into a socket 3 Apply parking brakes A on both ca...

Page 13: ...dust with OEL values 0 1 mg m observe any additional national regulations Waste bag Order No 965 2H M SD XC 302001480 5pcs 963 2M ED XC 302003723 25 pcs IVB 965 2H M SD XC All dusts with OEL values W...

Page 14: ...r bag D in the dirt tank 6 Fold the top edge of the disposal bag over the rim of the dirt tank D B C 7 Push the dirt tank as far as possible into the vacuum cleaner 8 Swing the bar B down wards withou...

Page 15: ...a socket 2 Apply parking brakes A on both castors 3 Swing the bar B upwards 4 Use the handle C to pull the dirt tank out of the vacuum cleaner A A B C D B C 5 Insert the disposal bag D in the dirt tan...

Page 16: ...14 1 Optional accessories Option depending on model Original Instructions IVB 9 H M E F 9 Close inlet fitting H bottom with plug E 10 Connect suction hose to inlet fitting M top F...

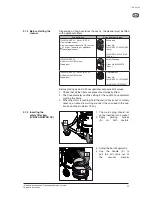
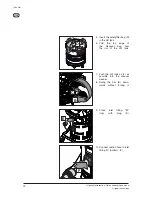
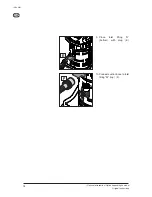
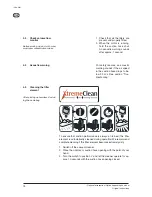
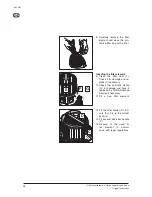
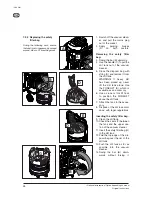
Page 17: ...cket 2 Apply parking brakes A on both castors 3 Open clamping ring B 3 1 5 Inserting the disposal bag IVB 963 2M ED XC 4 Insert disposal bag C into clamping ring 5 Fold the top edge of the dis posal b...

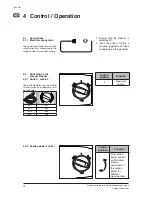
Page 18: ...er is switched off 2 Insert the power cord into a properly installed and fused socket with earthing contact 4 2 Switching on the vacuum cleaner 4 2 1 Switch auto 0 I The hose diameter and the setting...

Page 19: ...e switch to posi tion auto ensure that the tool con nected to the appliance socket is switched off 1 Switch off the vacuum clean er 2 Switch off the power tool auto 0 3 3 6 5 2 2 7 3 Connect the power...

Page 20: ...ounds if the air speed in the suction hose drops to be low 20 m s See section Trou bleshooting 4 5 Cleaning the filter element After picking up harmless dust us ing the waste bag 10 sec To ensure that...

Page 21: ...r ordering number To pick up harmless dust we recommend the use of a waste bag See section Accessories for ordering number Disposal of the picked up material is then simple and hygienic After picking...

Page 22: ...tch off the vacuum clean er and pull the mains plug out of the socket 3 Make sure that both plugs are inserted in fittings 4 Wind up the power cord and hang it on the handle 5 Empty the tank and clean...

Page 23: ...ance plan IVB 965 2H M SD XC After finishing work When required 7 2 1 Emptying dirt tank 7 2 2 Replacing the disposal bag 7 2 3 Replacing the safety filter bag 7 2 4 Replacing filter element H IVBw 96...

Page 24: ...out the collected dirt WARNING If heavy dirt has been picked up never lift the dirt tank alone Use the FORKLIFT D which is available as an accessory 6 Use a crane or fork lift truck to position the FO...

Page 25: ...en picked up never lift the dirt tank alone Use the FORKLIFT E which is available as an accessory 6 Use a crane or fork lift truck to position the FORKLIFT above the dirt tank 7 Attach the tank to the...

Page 26: ...it from the dirt tank WARNING If heavy dirt has been picked up never lift the dirt tank alone Use the FORKLIFT E which is available as an accessory 6 Use a crane or fork lift truck to position the FOR...

Page 27: ...e upper sec tion of the vacuum cleaner Remove the filter element 4 Lay the upper section of the cleaner down with the filter element facing upwards 5 Unscrew the screw C open the bar handle and remove...

Page 28: ...er element 9 Clean the filter seal F Check it for damage and re place it if necessary 10 Check the antistatic clamp G for damage and have it replaced by Nilfisk Advance Service if necessary 11 Fit a n...

Page 29: ...n both castors Remove the disposal bag 3 Open clamping ring B 4 Detach the disposal bag C from the storage container and seal it 5 Dispose of the dirt in accord ance with legal regulations Inserting t...

Page 30: ...imum power rating is P 40W The acoustic warning sounds Reduced suction power Suction power selected with suction power control is too low Set suction power in accordance with section Setting suction p...

Page 31: ...e 9 3 Tests and approvals Electrical tests must be performed in accordance with the provisions of safety regulations VBG4 and to DIN VDE 0701 Part 1 and Part 3 In accordance with DIN VDE 0702 these te...

Page 32: ...e level at a distance of 1m EN 60704 1 dB A 70 2 Working sound pressure level dB A 67 2 Power cord Length m 10 Power cord Type H07RN F3G1 5 mm Protection class I Type of protection splash water protec...

Page 33: ...Nilfisk Advance A S Sognevej 25 DK 2605 Br ndby Denmark Tel 45 43 23 81 00 Fax 45 43 43 77 00 www nilfisk advance com...

Reviews: