46
C316
02/2013
main.
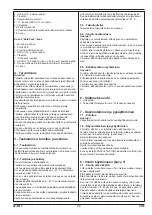
The suction unit needs no particular maintenance or lubrica
-
tion.
Remember, however, that correct use and servicing arees
-
sential if the safety and efficiency of the vacuum are to be
guaranteed.
To ensure regular and constant operation and to prevent the
warranty from becoming void,
only ever use genuine A/S
spare parts when repairs are needed.
11.2 - Checks and inspections on start-up
The customer should proceed with the following inspections
to ensure that the vacuum has not been damaged during
transportation.
11.2.1 - Before starting:
Check that the mains voltage value corresponds to that for which
the machine is preset (see data plate in paragraph 3.1 fig. 1);
11.2.2 - With the vacuum operating
check that all the air seals are perfectly tight; check that all
fixed protections are efficient; proceed with suction tests
using the same materials as those used during work.
This will ascertain whether all parts of the vacuum operate
correctly.
General recommendations
WARNING
If an emergency situation occurs:
■
filter breakage
■
fire outbreak
■
short-circuit
■
motor block
■
electric shock
■
etc.
Turn the vacuum cleaner off, unplug it and request assistance
from qualified personnel.
11.3 - Routine maintenance
Strictly comply with the following operations to ensure that the
vacuum remains in a constantly reliable condition.
11.3.1 - Before each work shift:
Check that all warning and danger plates are fixed and legi
-
ble.
Replace them if they are damaged or incomplete.
Check that the waste container is empty.
Empty it if this is not the case.
See paragraph 8.3.
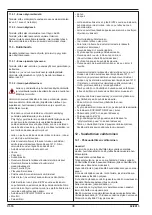
11.3.2 - Cleaning the vacuum unit:
Cleaning and service of the appliance must be carried
out in a practical and safe manor without causing risk
to the maintenance staff or others.
Suitable precautions include, decontamination before dis
-
mantling, provision for local filtered exhaust ventilation where
the appliance is dismantled, cleaning of the maintenance
area and suitable personal protection.
- For M and H class certified appliances the outside of the
appliance shall be decontaminated by vacuum cleaning
methods and wiped clean or treated with sealant before
being taken out of the hazardous area.
All the appliance parts shall be regarded as contaminated
when removed from the hazardous area and appropriate
action taken to prevent dust dispersal.
- The appliance is devided in autoclavable and NON
autoclavable parts.
- All stainless steel parts can be cleaned / decontaminated
by means of an autoclave at 121 C – this will secure an
absolute decontamination of the parts.
- The autoclavable parts are:
• Trolleyo Dust container
• Filter container
• Stainless steel clamps
• Stainless steel grounding cables
• Screws, nuts etc.
• Top filter cover
• Silicone rubber gaskets for the exhaust filter
• All Acc. Tubes, nozzles and white silicone hose.
- All NON autoclavalbe parts shall be cleaned by means a
appropriate detergents / sanitizers, to ensure an absolute
clean surface and to prevent any backteria growth or the
like.
- The NON autoclavable parts are:
• Motor unit
• Vacuum gauge
• Handle
• Cable
- In order to secure a complete cleaning of the NON
autoclvable parts the appliance needs to be dismantled
before the cleaning operation.
- Dismantling of the appliance has to take place according to
the instructions mentioned earlier in this paragraph.
- Cleaning the motor head:
• Vacuum clean the outside of the complete appliance
• Dismount the appliance by loosening the stainless steel
clamps
• Unscrew the cable from the motor head
- wipe down the cable with a suitable detergent.
• Unscrew the 2 screws fixing the handle.
(screws can be autoclaved)
- Wipe down the handle with a suitable detergento
Unscrew the cover for the exhaust filter – fixed with 4
screws
- The stainless steel cover and screws can be autoclaved at
121 C
- The gaskets used to seal between the motor unit and the
exhaust filter can also be cleaned in the Autoclave at 121
C.
(The gaskets are made from a special grade silicone
rubber)
- The Exhaust filter ULPA cannot be cleaned!
This will have to be disposed off in an impervious bag in
accordance with any current regulation for the disposal of
such waste.
• The mounting plate for the exhaust filter and the top cover
of the motor shall be wiped down with a suitable detergent.
• The vacuum gauge has to dismounted from the top
container before cleaning
• Wipe down the vacuum gauge (manometer) with a suitable
detergent
• All NON cleanable parts such as
• Main filter (HEPA in the H-class appliance)
• Exhaust filter (ULPA)
• Dust handling media (dust bag in std. appliance or ”Dust
safe Bag” in the H-class appliance)
Summary of Contents for IVT 1000 CR
Page 2: ......
Page 5: ...5 C316 02 2013 Fig 12 Fig 11 Fig 9 1 2 3 Fig 10...
Page 6: ......
Page 8: ......
Page 104: ...104 C316 02 2013 2 2 1 2 3 4 5 2 3...
Page 109: ...109 C316 02 2013 8 3 11 3 2 M H 121 C 2 4 121 C 121 C ULPA HEPA H ULPA Safe Bag H 12 12 1 P3...
Page 181: ...181 C316 02 2013 2 2 1 2 3 4 5 2 3...
Page 183: ...183 C316 02 2013 5 5 3 1 6 5 1 2 H 7 7 1 7 2 1 8 7 8 1 7 2 4 6 H H BIA M 8 2 H 100...
Page 186: ...186 C316 02 2013 M H 121 C 2 4 121 C 121 C ULPA HEPA H ULPA H 12 12 1 H 3...
Page 198: ...198 C316 02 2013...
Page 203: ...203 C316 02 2013...


