background image

7

1

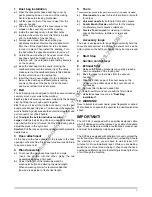
Dust bag installation

a)

Open the triangular shaped dust bag cover by
gently pressing down on one end of the locking
bar to release the locking mechanism.

b) Lift the upper corner of the cover away from the

vacuum housing.

c)

Slide the bottom edge of the cover away so the
hinges on the cover slip out of the housing.

d) Inside the dust bag cavity a foam filter helps

to protect the motor. Be sure this filter is in place
prior to installation of the dust bag.

e)

Always use a Hepa-filter when picking up
hazardous material. Remove the standard motor
filter, then fit the Hepa-filter and  turn clockwise
to lock it in place. Then install the  dustbag. Turn
the hepa-filter the opposite direction to remove it.

f)

Unfold the new dust bag. The upper corner of the
dust bag should be folded in so they do not
interfere  with  the cardboard plate resting securely
on the housing.

g) Ease the dust bag into the cavity, placing the

cardboard plate onto the exterior lip of the cavity,
make sure that the cardboard plate is fitted behind
the two small clips on the exterior lip.

h) Insert the lower cover hinges into the indentations.

Be sure the dust bag cardboard plate is resting
evenly on the lips of the cavity. Close the cover,
and make certain it clicks into place.

2

Belt

The belt locking clip is designed to hold the vacuum cleaner
securely around your waist while working.
2a) Wrap the belt around your waist. Adjust it to the desired
size, by fitting the two nylon parts together.
2b) Then you´ll insert the toothed connector into the belt
buckle until it snaps into place. To disconnect the belt when
work is finished, gently squeeze the outer clips together, and
pull connector out of belt buckle.
2c) To adjust the belt for individual comfort:
Larger
: Hold the belt locking clip in one hand and slide the
nylon belt until a loop is formed. Pull the belt locking clip to
adjust the slack in the nylon belt.
Smaller: Pull the loose end of the nylonbelt until adjusted to
desired size.

3

Hose attachment

Fit the hook on the hose adapter in the recess in the hose
opening on the machine. Press and turn about one half-turn
to ensure a secure fit.

4

Wand assembly

a)   To connect the wand sections together, simply

  insert one section into the other, giving the two
    assembled sections a firm push.

b)   Adjust the length of the telescopic wand by

   pressing its button and altering the wand length.
   When vacuuming stairs it is recommended that
   the wand is adjusted to its shortest length.

5

Tools

The accessories shown in the pictures may vary from model to model.

a)

Floor nozzle, one way for brush (hard floor) or smooth
for carpet.

b)

Universal nozzle for both hard floors and carpets

c)

Combi Brush / Nozzle useful tool for the cleaning
of upholstery, stair carpets, curtains etc.

d)

Crevice Tool designed for cleaning in narrow
spaces like furniture, radiators, corners and
joints.

6

Accessory loops

The belt is equipped with loops to conveniently hold the
vacuum's accessories. In addition, the power cord can be
held in place on the belt by snapping the nylon loop around
it.

7

Start Stop

8

Suction control lever

9

Exhaust filter

a)

Release the locking mechanism by gently pressing
down on one end of the locking bar.

b)

Ease the upper corner away from the vacuum
housing.

c)

Slide the bottom edge of the cover away so the
hinges on the bottom edge of the cover slip out of
the housing.

d)

Remove filter holder and used filter.

e)

Install new filter and secure with the filter holder.

f)

Reinstall exhaust cover as in "Dust Bag
installation"

10 WARNING!

Never attempt to vacuum liquid, glass fragments or ashes!
Wet surfaces can expose the operator to possible electrical
shock.

IMPORTANT!

The UZ 964 is equipped with a specially designed cable,
which if damaged, must be replaced by a cable of the same
type. These cables are avaible at authorized service shops
and must be installed by trained personnel.

The UZ 964 is equipped with a thermal cut-out to protect the
motor and other vital machine parts from overheating. Should
the machine cut out, you will have to wait at least 5-10
minutes for it to automatically reset. While you are waiting,
switch the machine off and unplug it, then check the hose,
dust bag and filters to be sure that nothing is blocking the flow
of air through the machine.

https://harrissupplyind.com - To Order Parts Call 608-268-8080

Summary of Contents for UZ 964 Ergoclean

Page 1: ...T OHJE INSTRUCTIONS FOR USE MODE D EMPLOI BEDIENUNGSANLEITUNG INSTRUCCIONES DE USO ISTRUZIONI PER L USO INSTRU ES DE MANEJO GEBRUIKSAANWIJZING Instrukcii po kspluatacii Printed in Hungary h t t p s h...

Page 2: ...______16 17 ITALIANO __________________________________18 19 NEDERLANDS ______________________________20 21 SVENSKA__________________________________22 23 NORSK ____________________________________24...

Page 3: ...3 WEE Waste of Electric and Electronic Equipment h t t p s h a r r i s s u p p l y i n d c o m T o O r d e r P a r t s C a l l 6 0 8 2 6 8 8 0 8 0...

Page 4: ...b c 5a 4 2a 3 a b 2b a e f d g h 1 2c h t t p s h a r r i s s u p p l y i n d c o m T o O r d e r P a r t s C a l l 6 0 8 2 6 8 8 0 8 0...

Page 5: ...5d 8 9 a b c d 5b 7 5c 10 6 h t t p s h a r r i s s u p p l y i n d c o m T o O r d e r P a r t s C a l l 6 0 8 2 6 8 8 0 8 0...

Page 6: ...ance Caution Do not vacuuming hazardous material unless HEPA filter are fitted Do not use unless filters are in place If cleaner is not working properly or has been dropped damaged left outdoors or dr...

Page 7: ...Press and turn about one half turn to ensure a secure fit 4 Wand assembly a To connect the wand sections together simply insert one section into the other giving the two assembled sections a firm push...

Page 8: ...only be connected to an electrical supply of the same voltage and frequency as indicated on the rating plate Ensure that the plug fitted to the end of the power supply cord is suitable for your supply...

Page 9: ...orm to the above notation then consult a qualified electrician ELECTRICAL CONNECTIONS Only applicable to UK GROUNDED MACHINES IMPORTANT 240 volt 50 Hz machines are fitted with a 13 amp 3 pin moulded p...

Page 10: ...Lappen benutzen Ger t immer abschalten und ausstecken Keine brennenden gl henden rauchenden Gegenst nde wie Zigaretten Streichh lzer heisse Asche oder entz ndbare Fl ssigkeiten und Gase einsaugen Kei...

Page 11: ...ohr Durch anhaltendes Dr cken des Knopfes kann das Teleskoprohr auf die richtige L nge eingestellt werden Bei Treppenreinigung empfehlen wir das Rohr auf die k rzeste L nge einzurasten 5 Zubeh r Das Z...

Page 12: ...L utilisation d un appareil lectrique demande certaines pr cautions LIRE TOUTES LES INSTRUCTIONS AVANT DE FAIRE FONCTIONNER CET APPAREIL AVERTISSEMENT Pour r duire les risques de choc lectrique ne pa...

Page 13: ...ssant fermement b Votre tube t l scopique est livr sur sa longueur minimum vous devez donc l adapter vos besoins voir dessin Pour l aspiration des marches d escalier vous assurer que le tube est sur s...

Page 14: ...comuni taria CEE 89 336 CEE93 31 CEE73 23 CEE93 68 Los accidentes debidos al mal uso s lo pueden ser prevenidos por aquellos que est n utilizando la m quina LEA Y SIGA TODAS LAS INSTRUCCIONES DE SEGUR...

Page 15: ...de recoger polvo a Abra la tapa triangular de la bolsa presionandsuavemente un extremo de la barra de fijaci n para liberar el mecanismo de traba b Tome la tapa en su mano levantando la esquina super...

Page 16: ...ontado Qualquer contacto com o equipamento saco de p filtro e acess rios usados para aspirar materiais perigosos deve ser feito segundo os normas que se aplicam ao material aspirado N o aspira l quido...

Page 17: ...agem dos tubos r gidos Tubos standard Juntar as partes enroscando as Tubos telesc picos Pressionar a patilha para permitir lhe ajustar os tubos ao comprimento desejado 5 Acess rios Os acess rios repre...

Page 18: ...ta per usi privati o professionali in interni Non lasciare mai l aspirapolvere collegato alla rete elettrica Disinserire sempre la spina quando non si utilizza l aspirapolvere oppure prima di effettua...

Page 19: ...ire i tubi e ruotarli per ottenere un fissaggio sicuro Tubo telescopico Premere il fermo verso il basso e regolare il tubo alla lunghezza desiderata compresa fra max 950 mm e min 630 mm Quando si puli...

Page 20: ...is bedoeld voor priv of professioneel gebruik binnenshuis Laat de stofzuiger niet aangesloten op het elektriciteitsnet staan Haal de stekker altijd uit het stopcontact als de stofzuigerniet wordt gebr...

Page 21: ...e naar beneden en pas vervolgens de lengte aan Max 950 mm min 630 mm Bij het stofzuigen van een trap wordt een ineengeschoven telescoopbuis aanbevolen 5 Mondstukken De hulpstukken op de afbeeldingen v...

Page 22: ...xter innan maskinen anv nds VARNING Denna maskin r avsedd f r inomhusbruk privat eller professionellt L mna inte dammsugaren ansluten till n tet Dra alltid ur sladden n r dammsugaren inte anv nds samt...

Page 23: ...rial utan Hepa filter monterat Ta bort motorfiltret Passa in Hepa filtret i urtaget i botten av p sutrymmet vrid t h ger f r att l sa filtret p plats Montera dammp sen Vrid filtret t motsatt h ll f r...

Page 24: ...tilkoblet str m Bruk t rr klut ved rengj ringen Bruk aldri st vsugeren til suge opp brennende gl dende eller rykende materialer slikt som sigaretter fyrstikker varm aske eller brennbar gass eller v sk...

Page 25: ...i ca en halv omdreining for sikker l sing 4 Forlengelsesr r Standard Sett sammen r rene og vri slik at de l ses p plass Teleskopr r Trykk sperren nedover deretter tilpasses lengden Maks 950 mm min 630...

Page 26: ...ug Sluk p st vsugeren og tr k stikket ud n r st vsugeren efterlades Tag stikket ud f r vedligeholdelse og reparation Lad aldrig b rn lege med st vsugeren St vsugeren er kun beregnet til brug af voksne...

Page 27: ...askinens slange bning Tryk ind og drej ca en halv omgang til den l ser sikkert 4 R r Standard S t de to r r sammen og drej dem modsat s de l ses fast Teleskopr r Just r teleskopr ret til den nskede l...

Page 28: ...a johdosta kiinni pit en Tartu pistotulppaan l johtoon l imuroi nesteit l k yt imuria kosteassa ymp rist ss l k sittele pistotulppaa tai imuria m rin k sin Puhdista imuri kuivalla rievulla l imuroi mi...

Page 29: ...aikalleen 4 Imuputket a Vakiovaruste Liit imuputket yhteen ja kirist liitos kiert m ll b Teleskooppiputki lis varuste S d teleskooppiputken pituus ty nt m ll nuppia ja siirt m ll putkea Portaiden imur...

Page 30: ...89 336 EEG 93 31 EEG 73 23 EEG 93 68 EEG h t t p s h a r r i s s u p p l y i n d c o m T o O r d e r P a r t s C a l l 6 0 8 2 6 8 8 0 8 0...

Page 31: ...i povernuth po qasovo strelke qtoby prikrepith ego xorowo na meste Zatem ustanovith mewoqek dl pyli Povernuth filhtr HEPA v obratnu storonu qtoby ego sn th d 2 2a Velcro 2b 2c 3 4 T 950 630 5 b c d 6...

Page 32: ...h t t p s h a r r i s s u p p l y i n d c o m T o O r d e r P a r t s C a l l 6 0 8 2 6 8 8 0 8 0...

Reviews: