background image

17

english

ATTIX 9 STD

1) 

Optional accessories / Option depending on model

7  Maintenance

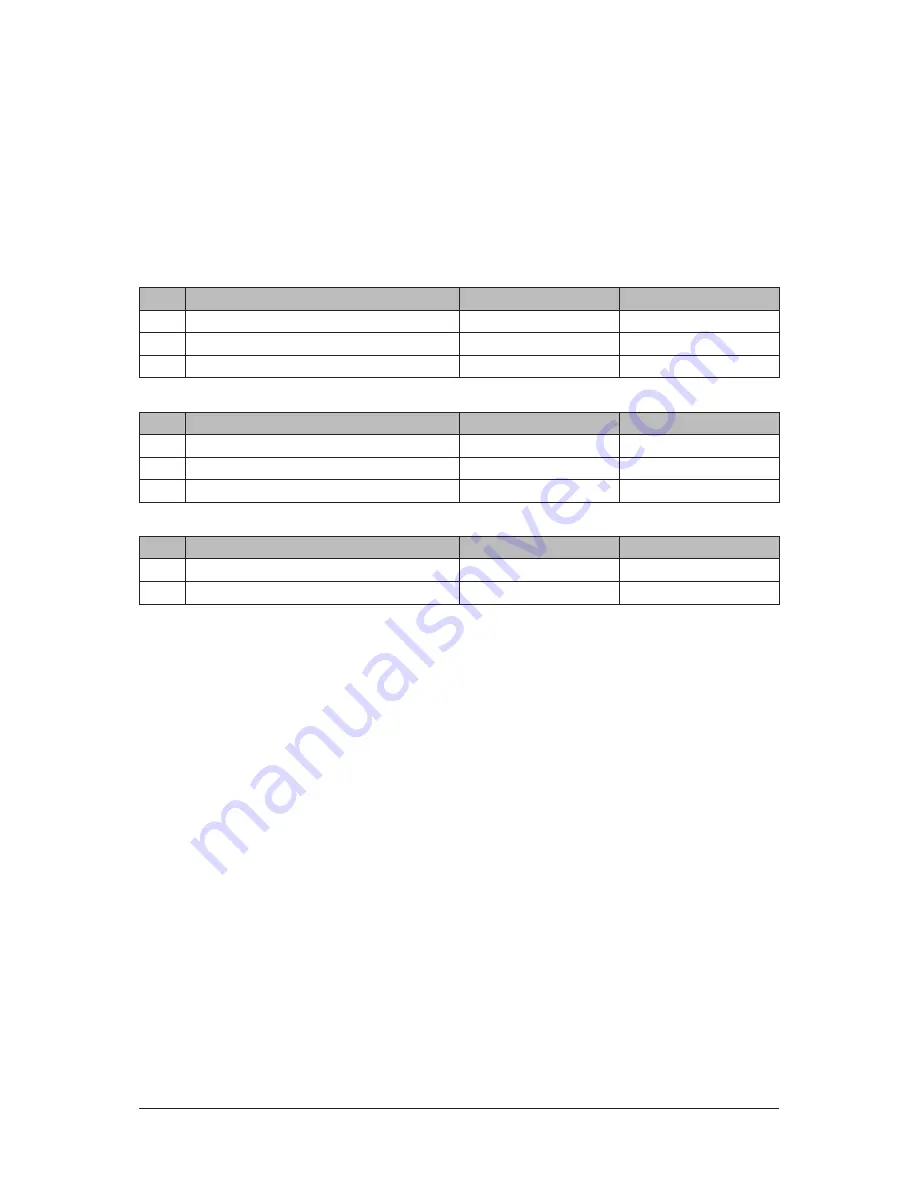
7.1  Maintenance plan

ATTIX 961-01:

After finishing work

When required

7.2.1 Emptying dirt tank

=

7.2.3 Replacing the filter bag

=

7.2.6 Replacing filter element

=

ATTIX 965-21 SD XC:

After finishing work

When required

7.2.2 Emptying dirt tank

=

7.2.4 Replacing the disposal bag

=

7.2.6 Replacing filter element

=

ATTIX 963-21 ED XC:

After finishing work

When required

7.2.5 Replacing the disposal bag

=

7.2.6 Replacing filter element

=

Summary of Contents for ATTIX 961-01

Page 1: ...ATTIX 961 01 ATTIX 963 21 ED XC ATTIX 965 21 SD XC auto um_attix9 std_en_2008 05 15 Operating Instructions ...

Page 2: ......

Page 3: ... 12 4 2 1 Switch I 0 II 1 12 4 2 2 Switch auto 0 I 1 12 4 2 3 Suction power control 1 13 4 2 4 Auto On Off Operation auto switch position 1 13 4 3 Cleaning the filter element 14 4 3 1 Cleaning the filter element Push Clean System 1 14 4 3 2 Cleaning the filter element XtremeClean ATTIX 963 21 ED XC ATTIX 965 21 SD XC 14 5 1 Techniques 15 5 1 1 Picking up dry substances 15 5 1 2 Picking up liquids ...

Page 4: ...eaner without a filter Switch off the appliance and disconnect the mains plug in the following situations Prior to cleaning and servicing Prior to replacing components If foam develops or liquid emerges Besides the operating instructions and the binding accident preven tion regulations valid in the country of use observe recognised regu lations for safety and proper use 1 2 3 Purpose and intended ...

Page 5: ...ion class is main tained Connectors and couplings of power supply cords and extension leads must be watertight 1 2 3 Extension lead As an extension lead only use the version specified by the man ufacturer or one of a higher quality See operating instructions When using an extension lead check the minimum cross sec tions of the cable Cable lenth Cross section 16 A 25 A up to 20 m 1 5 mm2 2 5 mm2 20...

Page 6: ...t with live components leads to serious or even fatal injuries Never spray water on to the upper section of the vacuum cleaner 1 CAUTION Appliance socket 1 The appliance socket is only designed for the purposes de fined in the operating instructions The connection of different appliances can result in dam age Prior to plugging in an appliance always switch off the vac uum cleaner and the appliance...

Page 7: ...cids alkalis etc flammable explosive dust e g magnesium or alumini um dust etc 1 Spare parts and accessories CAUTION Spare parts and accessories The use of non genuine spare parts and accessories can impair the safety of the appliance Only use spare parts and accessories from Nilfisk Alto Use only the brushes supplied with the vacuum cleaner or specified in the operating manual 1 2 Picking up liqu...

Page 8: ... ATTIX 9 STD 1 Optional accessories Option depending on model 2 Description 2 1 Operating elements aut o 13 1 19 18 12 14 16 15 17 3 5 7 6 8 10 15 19 13 18 12 14 8 2 4 5 6 20 1 2 4 5 6 8 7 14 1 19 18 12 9 11 15 ...

Page 9: ...ting 7 Dirt tank 8 Castor with brake 9 Swivel bar to remove dirt tank 1 10 Grip to empty tank 1 11 Handle to remove dirt tank 1 12 Retaining clamp 13 Suction pipe support 1 14 Bracket for floor nozzle 1 15 Accessory holder 16 Clamps and hinges for dirt tank 1 17 Operating knob for filter cleaning 1 18 Inlet for fresh air 19 Outlet for waste air 20 Disposal bag 2 2 Operating panel ATTIX 961 01 ATTI...

Page 10: ... a socket Apply parking brakes A on both castors Open the retaining clamps B and remove the upper section of the vacuum clean er Take the accessories 1 out of the dirt tank and the packag ing 1 2 3 4 5 auto x auto Attach the suction pipe hold er to the suction pipe Accessory diameter Distance x from pivot joint to the floor nozzle cm 38 52 50 47 1 3 1 2 Attaching the suction pipe holder to the suc...

Page 11: ... yet be inserted into a socket Apply parking brakes A on both castors Open the retaining clamps B and remove the upper section of the vacuum clean er 1 2 3 auto A A B B B B Insert the filter bag C in the dirt tank 4 Attach the upper section of the vacuum cleaner Close the retaining clamps B Ensure that the retaining clamps fit properly 5 6 ...

Page 12: ...Apply parking brakes A on both castors Swing the bar B upwards Use the handle C to pull the dirt tank out of the vacuum cleaner Insert the disposal bag D in the dirt tank Fold the top edge of the dis posal bag over the rim of the dirt tank Push the dirt tank as far as possible into the vacuum cleaner Swing the bar B downwards without forcing it 1 2 3 4 5 6 7 8 auto A A B C D B C ...

Page 13: ...ply parking brakes A on both castors Open clamping ring B 1 2 3 3 1 5 Inserting the disposal bag ATTIX 963 21 ED XC Insert disposal bag C into clamping ring Fold the top edge of the dis posal bag over the rim of the clamping ring 4 5 Attach the new disposal bag C onto the storage contain er D 6 Close clamping ring B 7 C C A A B D ...

Page 14: ... 0 Off II Maximum suction 4 2 2 Switch auto 0 I 1 4 Control Operation 4 1 Connections 4 1 1 Connecting the suction hose 4 1 2 Electrical connection The operating voltage shown on the rating plate must corres pond to the voltage of the mains power supply 1 Ensure that the cleaner is switched off 2 Insert the power cord into a properly installed and fused socket with earthing contact Connect the suc...

Page 15: ...cted electrical appli ance is stated in section 9 5 Tech nical data Before switching the switch to po sition auto ensure that the tool connected to the appliance socket is switched off Switch off the vacuum clean er Switch off the power tool Connect the power tool and the vacuum cleaner with a suction hose Insert the plug of the power tool into the tool socket on the operating panel of the vacuum ...

Page 16: ...lting stream of air removes attached dust from the slats of the filter elements 1 2 3 4 3 2 Cleaning the filter element XtremeClean ATTIX 963 21 ED XC ATTIX 965 21 SD XC Only for vacuum cleaning without a cloth insert filter 10 sec To ensure that suction performance is always at its best the filter element is automatically cleaned during operation We recommend complete cleaning if the filter eleme...

Page 17: ...see section 9 6 Accessories for order number Disposal of the picked up material is then simple and hygienic After picking up liquids the filter element is wet A damp filter ele ment clogs more quickly when dry substances are picked up For this reason the filter element should be washed and dried or replaced by a dry element before dry substances are picked up 5 1 2 Picking up liquids CAUTION Do no...

Page 18: ...n winding up the cord at the cleaner end and not the plug end to prevent the pow er cord from tangling up Empty the dirt tank and clean the vacuum cleaner After picking up liquids Store the upper section of the vac uum cleaner separately so that the filter element can dry Hang the suction hose with the floor nozzle B in the brackets and pack the acces sories C away Store the cleaner in a dry room ...

Page 19: ...ired 7 2 1 Emptying dirt tank 7 2 3 Replacing the filter bag 7 2 6 Replacing filter element ATTIX 965 21 SD XC After finishing work When required 7 2 2 Emptying dirt tank 7 2 4 Replacing the disposal bag 7 2 6 Replacing filter element ATTIX 963 21 ED XC After finishing work When required 7 2 5 Replacing the disposal bag 7 2 6 Replacing filter element ...

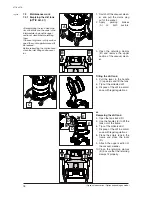
Page 20: ... retaining clamps B and remove the upper section of the vacuum clean er Tilting the dirt tank Pull the lever in the handle C upwards and tilt the tank Tip out the collected dirt Dispose of the dirt in accord ance with legal regulations or Removing the dirt tank Open the tank locks D Use the handles E to lift the tank out of the frame Tip out the collected dirt Dispose of the dirt in accord ance wi...

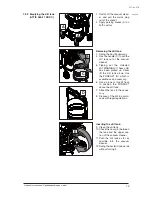
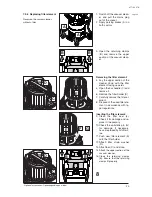
Page 21: ...ed dirt WARNING If heavy dirt has been picked up never lift the dirt tank alone Use the FORKLIFT D which is available as an accessory Use a crane or fork lift truck to position the FORKLIFT above the dirt tank Attach the tank to the acces sory Dispose of the dirt in accord ance with legal regulations 3 4 5 6 7 8 Inserting the dirt tank Clean the dirt tank Check the seals E between the tank and the...

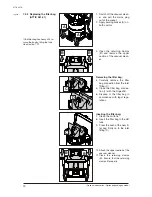
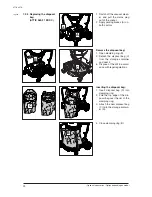
Page 22: ...nk Press the bush of the new fil ter bag firmly on to the inlet fitting C 4 5 6 7 8 9 7 2 3 Replacing the filter bag ATTIX 961 01 If the filter bag has heavy dirt re move the bag by tilting the tank See Section 7 2 1 Switch off the vacuum clean er and pull the mains plug out of the socket Apply parking brakes A on both castors Open the retaining clamps B and remove the upper section of the vacuum ...

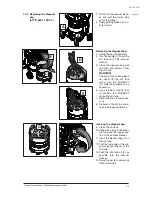
Page 23: ...icked up never lift the dirt tank alone Use the FORKLIFT D which is available as an accessory Use a crane or fork lift truck to position the FORKLIFT above the dirt tank Attach the tank to the acces sory Dispose of the dirt in accord ance with legal regulations 3 4 5 6 7 8 Inserting the disposal bag Clean the dirt tank Check the seals F between the tank and the upper sec tion of the vacuum cleaner...

Page 24: ...ors 1 2 Remove the disposal bag Open clamping ring B Detach the disposal bag C from the storage container and seal it Dispose of the dirt in accord ance with legal regulations 1 2 6 Inserting the disposal bag Insert disposal bag C into clamping ring Fold the top edge of the dis posal bag over the rim of the clamping ring Attach the new disposal bag C onto the storage contain er D 1 2 3 aut o C B C...

Page 25: ...rds Open the bar handle C and remove it Remove the filter holder D Carefully remove the filter el ement Dispose of the used filter ele ment in accordance with le gal regulations Inserting the filter element Clean the filter seal 4 Check it for damage and re place it if necessary Check the antistatic pin G for damage If necessary have it replaced by Alto Serv ice Push new filter element E onto the ...

Page 26: ...rating is P 40W Reduced suction power Suction power selected with suction power control is too low Set suction power in accordance with section Setting suction power Clogged suction hose nozzle Clean suction hose nozzle Tank disposal bag or filter bag is full See Emptying tank or Replacing disposal bag filter bag sections Filter element is clogged See section Cleaning filter element and Replacing ...

Page 27: ...ons of safety regulations VBG4 and to DIN VDE 0701 Part 1 and Part 3 In accordance with DIN VDE 0702 these tests must be performed at regular intervals and after repairs or modifications The vacuum cleaner has been approved in accordance with IEC EN 60335 2 69 EC declaration of conformity ALTO Deutschland GmbH Guido Oberdorfer Straße 2 8 D 89287 Bellenberg Product Model Description The design of t...

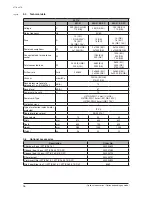
Page 28: ... EU 2x2900 DK GB Vacuum mbar kPa 230 23 EU GB 210 21 DK Sound pressure level at a distance of 1 m EN 60704 1 dB A 70 Sound level dB A 67 Power cord Length m 10 Power cord Type H07RN F3G1 0 mm CH DK H07RN F3G1 5 mm EU GB 230 V H07BQ F3G2 5 mm GB 110 V Protection class I Type of protection splash water protected IP X4 Radio interference level EN 55014 1 Tank volume l 70 50 30 Width mm 610 640 620 De...

Page 29: ......

Page 30: ...isk advance hu ITALY Nilfisk ALTO Divisione di Nilfisk Advance A S Località Novella Terza 26862 Guardamiglio LO Italy E mail d puglia nilfisk advance it JAPAN Nilfisk Advance Inc 1 6 6 Kita shinyokohama Kouhoku ku Yokohama 223 0059 Japan Tel 81 45 548 2571 Fax 81 45 548 2541 MALAYSIA Nilfisk Advance Sdn Bhd Sd 14 Jalan KIP 11 Taman Perindustrian KIP Sri Damansara 52200 Kuala Lumpur Malaysia Tel 60...

Reviews: