


909 6313 000(2)2007-06 A
SCRUBTEC 343B
13
USER MANUAL
ENGLISH
MACHINE START AND STOP
Starting the machine
Prepare the machine as shown in the previous paragraph.
Lower the squeegee (11) with the lever (19).
Turn the solution fl ow control lever (4) to one of the following positions, according to the type of cleaning to be performed:
ECO system: when the lever (4) is turned to ECO position (5), the machine works in a special condition of programmed
water "economy" usage; as the water fl ow is set and constant, the machine can work with a washing autonomy of 70-80
minutes (0.3 litres/min average).
Variable system: when the lever is turned to the left (variable fl ow) the fl ow rate can increase up to 1 litres/min.
In no case it is possible to close completely the water fl ow to the brushes during operation.
While keeping the hand on the handlebar (2), start the machine by turning the brush/pad-holder switch and the vacuum system
switch (65 and 66) to "I".
NOTE
If the green warning light (62) turns on, the batteries are ready to be used. If the yellow or red warning light (63 or 64)
turns on, the batteries must be charged (see the procedure in the Maintenance chapter).
Stopping the machine
Turn the brush/pad-holder switch and the vacuum system switch (65 and 66) to “0”.
Lift the squeegee with the lever (19).
Insert the positioning pin (24) and lift the brush/pad-holder by engaging the transport/parking device (23a).
MACHINE OPERATION (SCRUBBING/DRYING)
Start the machine as shown in the previous paragraph.
While keeping both hands on the handlebar (2), maneuver the machine and start scrubbing/drying the fl oor.
If necessary, vary the solution quantity by using the lever (4).
CAUTION!
To avoid damaging the fl oor surface, do not use the brushes without the solution and, when the machine is
not operating, stop the brush/pad-holder by pressing the switch (65).
CAUTION!
Before lifting the brush/pad, turn it off by pressing the switch (65).
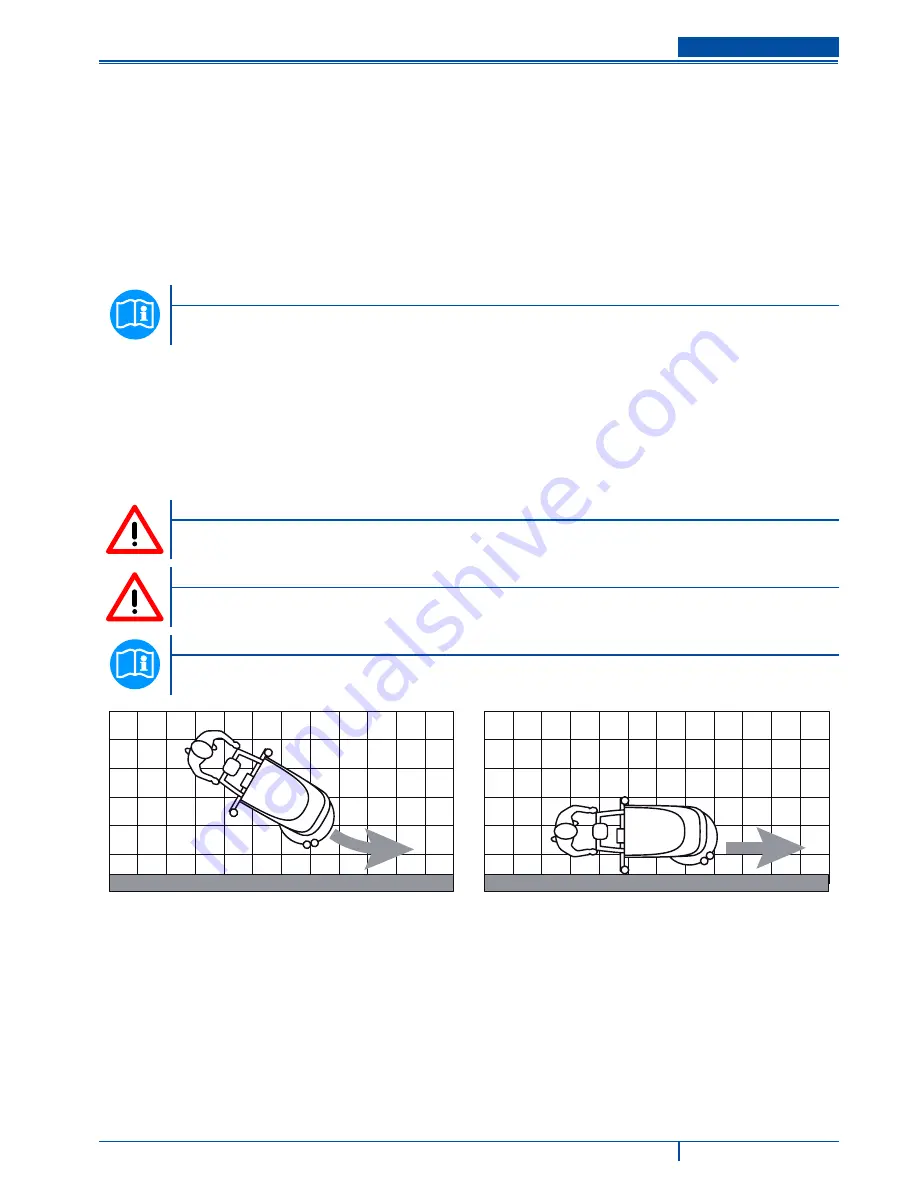
NOTE
For correct scrubbing/drying of fl oors at the sides of the walls, Alto suggests to go near the walls with the right side of
the machine as shown in fi gure 3.
B
A
Figure 3
P100160A
1.
2.
3.
•
•
•
4.
5.
6.
7.
1.
2.
3.
Summary of Contents for SCRUBTEC 343B
Page 2: ......


