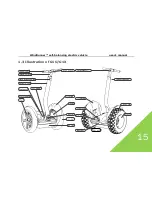
Ninebot WindRunner, User Manual
The Ninebot WindRunner is a cutting-edge electric scooter designed for optimal performance and comfort. Ensure you get the most out of your ride by downloading the free User Manual from 88.208.23.73:8080. This comprehensive manual will guide you on how to operate and maintain your scooter for a seamless riding experience.
Share
Download


Reviews:
No comments
Related manuals for WindRunner

ZX
Brand: Fairplay Pages: 168

IM4
Brand: I-Motioncaddys Pages: 16

FLEET PDS GOLF CAR
Brand: E-Z-GO Pages: 82

FREEDOM
Brand: E-Z-GO Pages: 156

SDB
Brand: ECAR GOLF Pages: 21

TROPHY 20
Brand: Sunrise Medical Pages: 104

RXV GOLF CAR 2008
Brand: E-Z-GO Pages: 122

39Roadster eGC 2013
Brand: ACG Pages: 62

ST SHUTTLE 4/6 2009
Brand: E-Z-GO Pages: 196
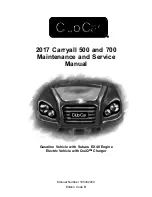
Carryall 500
Brand: Club Car Pages: 456

GR11000C
Brand: Tru-Turf Pages: 40

Gold Standard Gasoline 2005
Brand: Club Car Pages: 40

1999
Brand: Club Car Pages: 40

EZGO TXT FLEET
Brand: Textron Pages: 120

2500 EV
Brand: Intimidator Pages: 60

TXT FREEDOM
Brand: E-Z-GO Pages: 82

DRIVE 2 EFI 2019
Brand: Yamaha Pages: 52

DFV03
Brand: Power Wheels Pages: 16


