9
8
Component Names and Functions
Nintendo DSi system
(TWL-001(AUS))
1
2
3
4
5
1
6
7
8
9
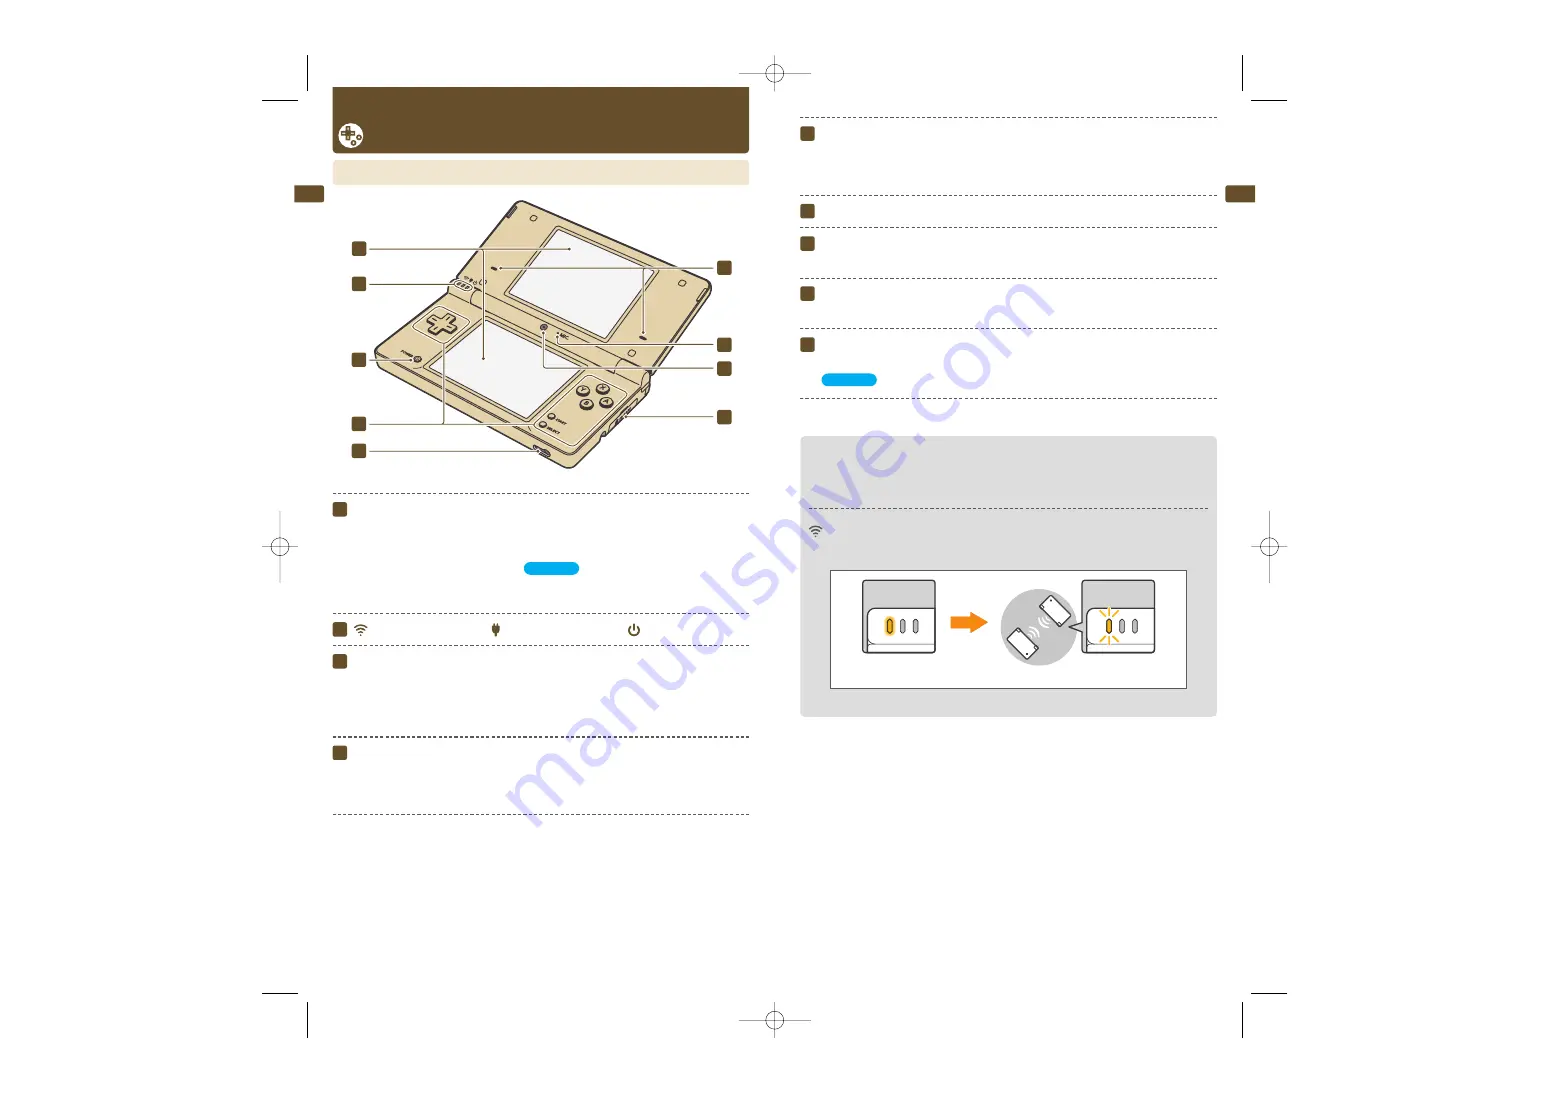
Front of the system
LCD screens
Twin backlit colour liquid crystal displays. The lower screen (the Touch Screen)
is touch sensitive. Software which makes use of this control feature should be
operated with the Nintendo DSi stylus that is included. The screen brightness
can be adjusted to one of 5 levels.
CAUTION:
When opening the Nintendo DSi, keep your fingers away from the
hinge to avoid pinching them.
2
Wireless indicator LED Recharge indicator LED Power indicator LED
3
POWER Button
• When the power is off:
Press to turn on the system.
• When the power is on:
Press to reset the system and return to the
Nintendo DSi
Menu Screen
. Press and hold (0.5 seconds or more) to
turn off the power.
4
Control Buttons
The
✚
Control Pad, A, B, X and Y Buttons, and START and SELECT. Used for
game play control. See the Instruction Booklet for the game you are playing for
specific game control information.
Page 16
➜
5
Audio Jack
For connection of commercially-available stereo headphones, external microphone
or headset. When one of these is connected, no sound will be played through the
speakers.
6
Speakers
7
Microphone (MIC.)
Used by games and software with microphone functionality.
8
Inner Camera
Used by games and software with camera functionality.
9
SD Memory Card Slot
For inserting SD Memory Cards (a.k.a. “SD Cards”), which are sold separately.
Page 17
➜
Functions of Each LED
Indicates various system statuses, depending on the colour of each LED, and
whether these LEDs are solidly lit or blinking.
Wireless Indicator LED
Lights up yellow when DS Wireless Communications are enabled for use.
When communication
is enabled
Data being sent
Lit
Blinking
TWL_MAN_AUS_BasicsSection.qxp 09.1.8 4:12 PM Page 8


