30
Manual ref: XND-HD-01
Getting The Most Out Of The NiteDevil HD-SDI Range
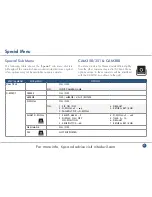
What the menu options do
switching to a black & white image could produce a better
quality image.
Auto
Auto is the most commonly used option. The camera will
automatically switch to a black & white image when it detects
light levels have dropped below a usable level.
A delay can be set of up to 60 seconds which will instruct
the camera to wait for the set length of time before switching.
This accommodates for any temporary drops in light such as
passing clouds.
The gain can also be telling the camera to increase or decrease
the video amplitude when switching from day to night and night
to day.
Colour
The camera is forced to permanently produce a colour image.
This is great in environments where there is constant light but
could result in poor quality images in low light situations. As
long as the camera is in colour mode the IR LEDs will not turn on.
B & W (Black & White)
The camera will permanently produce a black & white image.
This is only recommended in areas where the light levels are
always extremely low.
There are various settings to ensure the camera produces the
best B & W image possible. Burst compensates for sudden
changes in light levels. IR Smart closes the iris when a subject
is close to the camera to darken the image and prevent over
saturation. You also have the option to enable and disable the
IR LEDs.
Ext (External)
The switch between colour and black & white is controlled by an
external trigger such as a photocell.
Again a delay can be set which will instruct the camera to wait
for a set length of time before switching. This accommodates for
any temporary drops in light
Privacy
Allows the user to “block out” up to 8 areas in the picture so that
the installation complies with the Data Protection Act and avoids
infringing other people’s privacy rights. This could be used to
block out windows on a neighbouring property or screens and
signs that display sensitive information.


