Using Call Adaptation Options
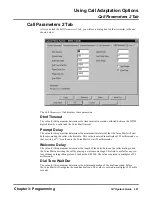
Call Parameters 2 Tab
398
NT System Guide
Chapter 3: Programming
Pcpm Pause Dur
The value for this parameter determines how the minimum duration in milliseconds of the PCPM
pause in the dial string, before the Voice Mail will recognize the pause as a PCPM pause.
Pcpm Wait Dur
The value for this parameter determines the minimum time interval that the Voice Mail will wait
before beginning the PCPM analysis for making calls into the integrated PBX. This value is entered
in Multiples of 55 milliseconds, so that a setting of “1” would cause the Voice Mail to wait
55 milliseconds.
Start PCPM
The value for this parameter determines the delay in milliseconds between the offhook condition
and the beginning of PCPM analysis.
Normal Gain
The value for this parameter determines whether Normal Gain will be enabled or disabled. A “0”
setting will enable it. A “1” setting will disable it.
Dial Tone String
The value for this parameter determines which string the caller should dial in order to produce a
dial tone. In most phone systems, the default is a “W” (Wait). But if you have already changed the
UseSoundAsDialTone on the Call Parameters 1 tab to use sound as dial tone, you must change this
value to an “S” (Sound). Then in System Parameters programming, change every instance of a “W”
to an “S.”
Flash String
The value for this parameter determines which string must be dialed in order to perform a hook-
flash (F).
Agc Disable
A check mark in this parameter’s check box specifies that Automatic Gain Control (AGC) will be
disabled.
Loop Drop
A check mark in this parameter’s check box specifies that Loop Drop will be enabled. When Loop
Drop is enabled, the Voice Mail will terminate the call as soon as it detects a loop current drop.
If you have finished making any changes on the Call Parameters 2
tab:
Click the
button to save your changes and display the confirmation message:All
data loaded to the board(s) successfully.
When you see this message, click the
button on the message box. Then you will
return to the CTL Logo window shown below:
All data loaded to the board(s) successfully.
When you see this message, click the
button on the message box.
Then you will return to the Voice Mail Main window.
Summary of Contents for NVM-NT
Page 28: ...Table of Contents Chapter 5 Maintenance xxvi NT System Guide ...
Page 130: ...Installing SMDI 102 NT System Guide Chapter 3 Programming ...
Page 146: ...Customizing Caller I D Tables General Tab 118 NT System Guide Chapter 3 Programming ...
Page 156: ...Customizing Callout Options Optional Tab 128 NT System Guide Chapter 3 Programming ...
Page 182: ...Customizing Distribution Lists General Tab 154 NT System Guide Chapter 3 Programming ...
Page 338: ...Customizing Port Options General Tab 310 NT System Guide Chapter 3 Programming ...
Page 358: ...Customizing System Options Timers Tab 330 NT System Guide Chapter 3 Programming ...
Page 362: ...Customizing System Options Timers Tab 334 NT System Guide Chapter 3 Programming ...
Page 367: ...Customizing Tenant Options General Tab Chapter 3 Programming NT System Guide 339 ...
Page 396: ...Viewing and Printing Reports System Options Report 368 NT System Guide Chapter 3 Programming ...
Page 400: ...Performing a Local Backup Backup Dialog Box 372 NT System Guide Chapter 3 Programming ...
Page 440: ...Using Port Activities 412 NT System Guide Chapter 3 Programming ...
Page 454: ...Using Message Status Message Status Dialog Box 426 NT System Guide Chapter 3 Programming ...


