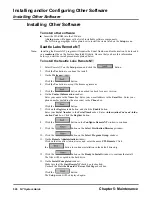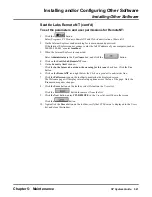
Maintenance
Windows NT Server Version 4.0 Setup Procedure
Chapter 5: Maintenance
NT System Guide
507
To use the floppy diskettes for setup (cont’d):
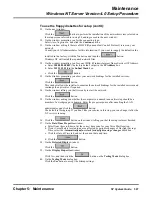
29. On the next window:
Click the
button to perform the installation of the network services selected on
the setup screen referred to in step 28 and to proceed to the next window.
30. On the window prompting you for the connection type:
Select Auto-Negotiation, and click the Continue button.
31. On the window asking if there is a DHCP (Dynamic Host Control Protocol) server on your
network:
Consult your LAN administrator for this information. If you want to reapply the default value
installed in the factory, click the No button and then the
button.
Windows NT will install the required network files.
32. On the window prompting you for your WINS (Windows Internet Name Services) IP Address:
a. Enter 200 000 000 001 (the factory default value) in the IP Address box.
b. Enter 255 255 255 0 in the Subnet Mask box.
c. Click the
button.
33. On the window prompting you show your network bindings for the installed services:
Click the
button.
This window allows the installer to examine the network bindings for the installed services and
rearrange their priorities, if required.
34. On the window telling you that it is ready to start the network:
Click the
button.
35. On the window asking you whether the computer you named in an earlier step should be a
member of a workgroup or a domain. Enter the proper response after onsulting the LAN
administrator, and click the
button.
The default is Workgroup. If you don’t like your choice in this step, you can change it after the
NT server is running.
36. Click the
button on the window telling you that the setup is almost finished.
37. On the Date/Time Properties window:
a. Select from the scroll-down list the correct time zone for your Voice Mail location.
b. If your Voice Mail is located in an area affected by periodic changes of Daylight Savings
Time, select the Automatically adjust clock for daylight savings changes check box.
c. Click the Date & Time tab, and set the current date and time.
d. Click the
button.
38. On the Detected Display window:
Click the
button.
39. On the Display Properties window:
Click Test, and then click the
button on the Testing Mode dialog box.
40. On the Testing Mode dialog box:
Click the Yes button to accept the bitmap settings.
Summary of Contents for NVM-NT
Page 28: ...Table of Contents Chapter 5 Maintenance xxvi NT System Guide ...
Page 130: ...Installing SMDI 102 NT System Guide Chapter 3 Programming ...
Page 146: ...Customizing Caller I D Tables General Tab 118 NT System Guide Chapter 3 Programming ...
Page 156: ...Customizing Callout Options Optional Tab 128 NT System Guide Chapter 3 Programming ...
Page 182: ...Customizing Distribution Lists General Tab 154 NT System Guide Chapter 3 Programming ...
Page 338: ...Customizing Port Options General Tab 310 NT System Guide Chapter 3 Programming ...
Page 358: ...Customizing System Options Timers Tab 330 NT System Guide Chapter 3 Programming ...
Page 362: ...Customizing System Options Timers Tab 334 NT System Guide Chapter 3 Programming ...
Page 367: ...Customizing Tenant Options General Tab Chapter 3 Programming NT System Guide 339 ...
Page 396: ...Viewing and Printing Reports System Options Report 368 NT System Guide Chapter 3 Programming ...
Page 400: ...Performing a Local Backup Backup Dialog Box 372 NT System Guide Chapter 3 Programming ...
Page 440: ...Using Port Activities 412 NT System Guide Chapter 3 Programming ...
Page 454: ...Using Message Status Message Status Dialog Box 426 NT System Guide Chapter 3 Programming ...


