21
EN
1
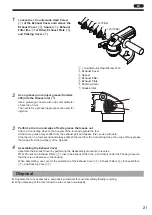
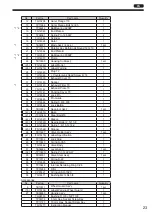
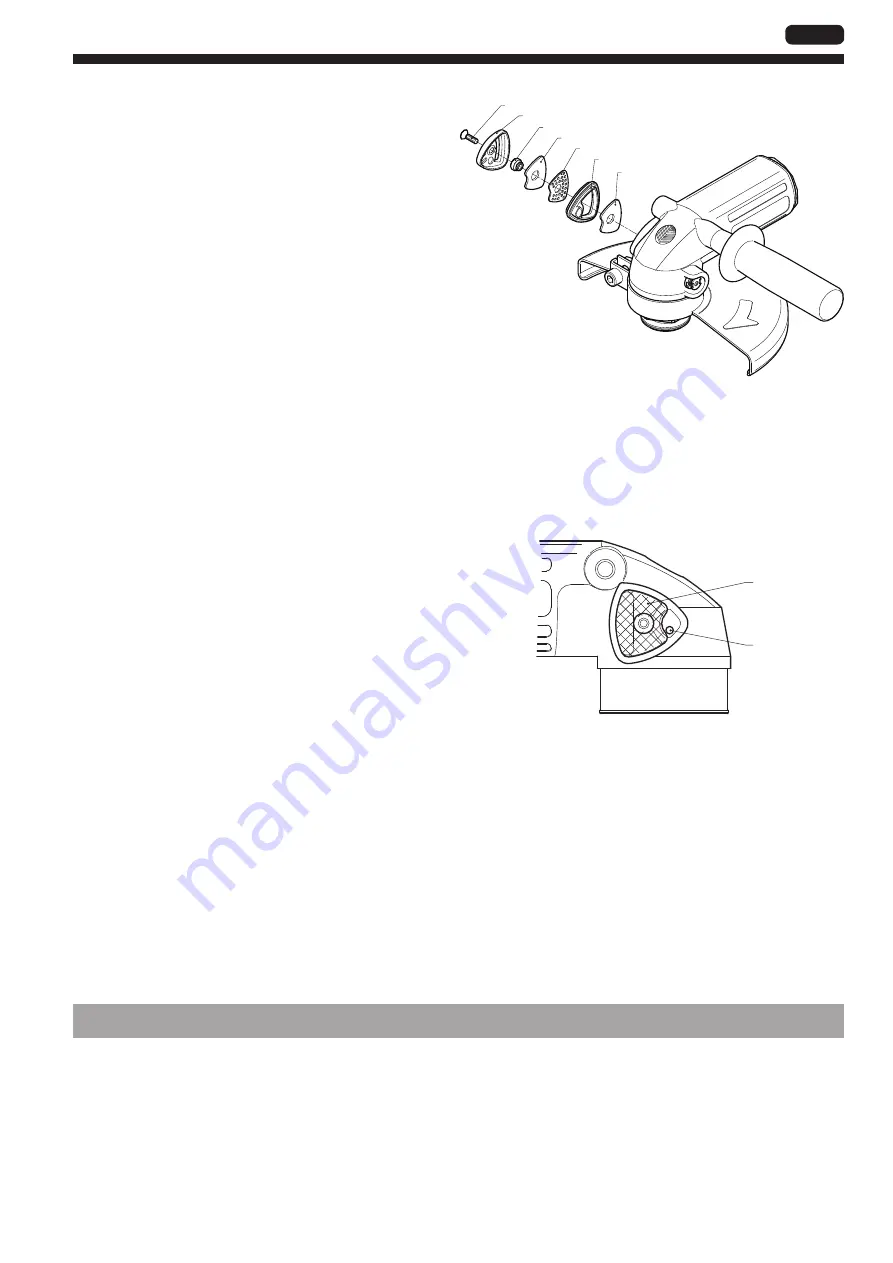
Loosen the + Countersunk Head Screw
(
1
) of the Exhaust Cover and remove the
Exhaust Cover (
2
), Spacer (
3
), Exhaust
Filter (the
4
1st Filter), Exhaust Plate (
5
),
and Packing Cover (
6
)
5
4
3
2
1
4
6
1st Filter
2nd Filter
1
+ Countersunk Head Screw 4×14
2
Exhaust Cover
3
Spacer
4
Exhaust Filter
5
Exhaust Plate
6
Packing Cover
7
Grease Inlet
2
Use a grease gun to inject grease (Sumitec
305) into the Grease Inlet (
7
)
Use a grease gun nozzle with a tip outer diameter
of less than 3 mm.
The nozzle for a grease nipple cannot be used for
injection.
4
7
3
Perform a trial run and wipe off extra grease that seeps out
Attach a Connecting Hose to the Coupler of the tool and operate the tool.
At that time, grease may scatter from the exhaust part and Grease Inlet, so use with care.
Stop the tool in a few seconds and always detach the tool from the Connecting Hose, then wipe off any grease
that seeps from the periphery of the Spindle.
4
Assembling the Exhaust Cover
Assemble the Exhaust Cover by performing the disassembly procedure in reverse.
MYG-70 uses two Exhaust Filters (
4
). Insert the Exhaust Filter (the
4
2nd Filter) under the Packing Cover so
that there is no clearance in the housing.
When assembling, use care for the orientation of the Exhaust Cover (
2
), Exhaust Filters (
4
), Exhaust Plate
(
5
), and Packing Cover (
6
).
Disposal
Separate the tool, accessories, and packing materials for environmentally-friendly recycling.
When disposing of the tool, follow the rules of each municipality.
TQ15277-0̲MYG-70̲en.indb 21
2017/08/07 13:23:45


