background image

14

a rucksack and in the sunlight temperatures can reach 60ºC. Weight 
should not be laid on top of the equipment.

If the flying gear is stored with organic material (such as leaves or insects) 
inside, the chemical reaction can cause irreparable damage.

8.3 CHeCKs aNd CoNTrols

We strongly recommend that all actions on the glider were advised for 
professionals.

always check all the flying equipment before every flight. 

In spite of providing much more benefits to the pilots, 2 liner gliders need 
more care and control of the calibration. The ICepeaK 8 mechanic and 
UV resistance are one of the highest for this type of line. With a 2 liner 
glider every little variation on the calibration of the lines has a directly 
effect on the performance of the wing.

We recommend checking the lines calibration after the first 30 hours +/- 
of flight. This examination must be taken apart from the regular checking 
every 100 hours of use or every two years (whichever happens first).

Why is it necessary?

Thanks to the experience acquired with the 2 liner gliders on the previous 
seasons and to the incessant control task of our r&d team over the abac 
Team gliders, we are capable now of predicting how to take appropriately 
care of this kind of lines to assure the best performance of the profile. 
Following the controls recommended the glider will keep its original 
features for longer.

The conditions of the flight zone, the climate area, temperature, humidity, 
wing load, …cause a different impact over the wing. That’s why the 
calibration would be set taking in consideration these factors.

only qualified professionals should realize it. do not modify the wing 
considering the calibration required for other pilots before being sure that 
it is really necessary for us.

8.4 repaIrs

If the wing is damaged, you can temporarily repair it by using the rip stop 
found in the repair kit, so long as no stitches are involved in the tear. any 
other type of tear must be repaired in a specialized repair shop or by 
qualified personnel. do not accept a home repair.

8.5 lINe replaCeMeNT

The use of new high performance materials in modern wings is now 
a reality. The achievements made using these materials in terms of 
performance are widely accepted by all as part of the evolution of 
our sport. However, along with these advances in technology and 
achievements there are added responsibilities which cannot be avoided
The revision and replacement of the lines must now be carried out on 
a more frequent basis and that increased frequency appears to be 
encouraging many pilots to try and replace the line set themselves. 

We sTroNGlY reCoMMeNd THaT aNY lINe replaCeMeNT Is oNlY 
CarrIed oUT BY aN aUTHorIsed aNd speCIalIsed persoN.

However that choice is ultimately the responsibility of the pilot and if 
the pilot chooses to carry out any line replacement themselves without 
guidance from a professional then we suggest the following guidelines are 
applied.

Before removing any lines, check:

• That the line plan is correct
• That the lines in the supplied set are present and correct.
• Never assume, check every line individually.

Summary of Contents for ICEPEAK 8

Page 1: ...USER S MANUAL ICEPEAK 8...

Page 2: ...at you will soon understand the meaning of our slogan The importance of small details This is the user s manual that we recommend you to read in detail The NIVIUK Gliders Team USER S MANUAL NIVIUK Gli...

Page 3: ...FLYING WITHOUT BRAKE LINES 10 4 5 KNOTS IN FLIGHT 10 5 LOSING HEIGHT 11 5 1 EARS 11 5 2 4C3 TECHNIQUE 11 5 3 B LINE STALL 12 5 4 SPIRAL DIVE 12 5 5 SLOW DESCENT TECHNIQUE 12 6 SPECIAL METHODS 13 6 1...

Page 4: ...sted It is important to take into account that each size can have a different reaction on the same manoeuvre Furthermore the same size on maximum load or minimum load can experiment a different behavi...

Page 5: ...An automatic process controlled by a laser cutting program cuts each of the sections that compose the different parts of the wing This program not only cuts the pieces of fabric but it also paints the...

Page 6: ...ere to inflate it Check the condition of the fabric and the lines making sure there are no abnormalities Check the maillons which attach the lines to the risers are properly closed Identify and if nec...

Page 7: ...ICEPEAK 8 will sit over your head 2 7 ADJUSTING THE BRAKES The length of the main brake lines is adjusted at the factory to the length established during certification However the length can be chang...

Page 8: ...BULENCE The ICEPEAK 8 has an excellent profile to withstand the very different aero logical conditions so allowing the best possible piloting and stability It reacts admirably in passive flight thus o...

Page 9: ...r to be correctly inflated The correct reaction would be to release the pressure on the brake lines and push the A lines forward or rather lean your body to any side WITHOUT PULLING ON THE BRAKE LINES...

Page 10: ...the accelerator and pull slightly on the brake lines to increase the angle of incidence Remember that you have to re establish the flight speed after correcting the incidence It is NOT recommended to...

Page 11: ...e to apply brake pressure without realising it The same happens whilst pulling down the 4a3 line to make the ears This can obviously lead to a significant speed decrease The ICEPEAK 8 has a new high a...

Page 12: ...an cause a loss of orientation and consciousness blac kouts These are the reasons why it is best to carry out this manoeuvre gradually so your capacity to resist the G forces increases and you will le...

Page 13: ...ribs on the trailing edge and when complete the cell structures along the entire chord of the wing should lay parallel and neatly alongside each other The wing should then be folded into three sectio...

Page 14: ...load cause a different impact over the wing That s why the calibration would be set taking in consideration these factors Only qualified professionals should realize it Do not modify the wing conside...

Page 15: ...ETY AND RESPONSIBILITY It is well known that paragliding is considered a high risk sport where safety depends on the person who is practising it Wrong use of this equipment may cause severe injuries t...

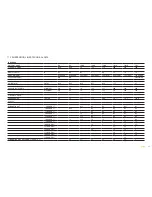
Page 16: ...8 1 83 lINes ToTal MeTers M 220 227 235 HeIGHT M 8 8 26 8 52 NUMBer 230 230 230 MaIN 6 BraKe 2 1 3 B 2 1 3 B 2 1 3 B rIsers NUMBer 3 a B B a B B a B B TrIMs No No No aCCeleraTor M M 120 120 130 ToTal...

Page 17: ...60 70 145 115 200 405 280 MAXIMUM 48 84 74 153 122 215 430 320 STRENGTH AFTER 5 000 BENDING TEST EN 33 74 31 77 5 60 9 112 1 237 5 138 6 CYCLES ELONGATION AT 5 daN en 0 75 0 2 0 2 0 2 0 35 0 2 10 daN...

Page 18: ...8 d7 d8 c13 c14 c15 c16 c17 c18 c19 c20 C1 C2 c21 c22 a14 a13 a12 a11 a10 a9 4c3 St ab A 10 A9 3 a 3 a8 b8 a7 b7 A 8 A 7 A5 A 6 2a3 2a4 3a2 4c2 b5 a5 b6 a6 b4 b3 a3 a4 b2 a2 A 4 A 3 b1 a1 A 2 A 1 2a2...

Page 19: ...C 60 wht 574 c13 DC 40 wht 219 a14 DC 60 wht 562 c14 DC 40 wht 204 c15 DC 40 wht 178 c16 DC 40 wht 211 c17 DC 40 wht 678 c18 DC 40 wht 571 c19 DC 40 wht 552 c20 DC 40 wht 592 c21 DC 40 wht 576 c22 DC...

Page 20: ...DC 60 wht 593 c13 DC 40 wht 226 a14 DC 60 wht 581 c14 DC 40 wht 211 c15 DC 40 wht 184 c16 DC 40 wht 218 c17 DC 40 wht 700 c18 DC 40 wht 589 c19 DC 40 wht 570 c20 DC 40 wht 611 c21 DC 40 wht 595 c22 DC...

Page 21: ...0 wht 612 c13 DC 40 wht 233 a14 DC 60 wht 598 c14 DC 40 wht 217 c15 DC 40 wht 189 c16 DC 40 wht 225 c17 DC 40 wht 721 c18 DC 40 wht 607 c19 DC 40 wht 588 c20 DC 40 wht 630 c21 DC 40 wht 613 c22 DC 40...

Page 22: ...22 11 8 FOLDING LINES PLAN...

Page 23: ...3 TNL 80 Red 2F5 1132 TNL 80 Red 2F6 700 TNL 80 Red 3FI 4701 TNL 80 Red 3FII 4812 TNL 80 Red 3FIII 5333 TNL 80 Red NAME Length Material Colour f1 1603 TNL 80 Red f2 1473 TNL 80 Red f3 1504 TNL 80 Red...

Page 24: ...0 Red f9 648 TNL 80 Red f10 532 TNL 80 Red f11 897 TNL 80 Red f12 855 TNL 80 Red f13 951 TNL 80 Red 2F1 1500 TNL 80 Red 2F2 1422 TNL 80 Red 2F3 1289 TNL 80 Red 2F4 1250 TNL 80 Red 2F5 1205 TNL 80 Red...

Page 25: ...0 12 7 341 7 712 7 873 13 7 237 7 675 14 7 224 7 660 15 7 698 16 7 731 17 7 494 18 7 387 19 7 339 20 7 379 21 7 244 22 7 252 LINES HEIGHT riser maillonm m A B C D br handle 1 8 321 8 309 8 360 8 366 8...

Page 26: ...3 8 399 4 8 442 8 428 8 422 8 555 8 506 5 8 369 8 354 8 393 8 383 8 345 6 8 240 8 224 8 377 8 275 8 131 7 8 178 8 163 8 439 8 217 8 045 8 8 184 8 172 8 486 8 283 8 140 9 8 012 8 383 8 041 10 7 893 8 3...

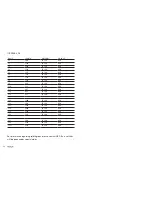
Page 27: ...461 522 aCCeleraTed 120 60 0 TraVel ICEPEAK 8 24 rIsers leNGHT MaIlloN m m a a B 521 520 523 sTaNdard 401 460 523 aCCeleraTed 120 60 0 TraVel ICEPEAK 8 26 rIsers leNGHT MaIlloN m m a a B 525 525 525...

Page 28: ...28 11 11 ATTACHMENT POINTS POSITION...

Page 29: ...29 11 12 TENSION BANDS...

Page 30: ...30 11 13 MINIRIBS...

Page 31: ...31 11 14 DIAGONALS...

Page 32: ...32 11 15 INLET SHAPE...

Page 33: ...33 12 CERTIFICATION SPECIMEN TEST ICEPEAK 8 22 ICEPEAK 8 24...

Page 34: ...34 ICEPEAK 8 26...

Page 35: ...The importance of small details niviuk com...

Reviews: