Chapter 7 Installation
2. Drilling the holes for mounting:
If you want to use the tapping screws (4) included in the equipment set to secure the assembly loop
(3) to the wall, drill four 6-mm holes in the wall using the drill template as a guide in accordance with
the dimensions in the diagram "Step 2 of the wall mounting" on page 22.
If you want to use your own fastening screws you can use the drill guide provided in the equipment
set to determine the position of the holes. The diameters are then determined by the screws that are
being used and any wall plugs that may be required.
3. Securing the NivuLog Easy to the wall:
If you want to use the tapping screws (4) included in the equipment set, first of all insert the supplied
wall plugs into each of the four drill holes before screwing the NivuLog Easy with the attached
assembly loop (3) to the wall (see "Step 2 of the wall mounting" on page 22).
If you are using your own screws, you must also insert the wall plugs into the holes before mounting
the NivuLog Easy with the attached assembly loop (3) to the wall (see "Step 2 of the wall mounting"
on page 22).
7.3 Safety instructions for the cabling
Important note:
To avoid any damage, always switch off the voltage supply to the device when
performing electrical connections.
When connections are made to the NivuLog Easy , the following warnings and information must be observed,
in addition to the warnings and information found in the individual chapters on the installation. Further safety
information is included in "Safety instructions" on page 11.
If present, disconnect the external charging voltage from the device and remove the accu or battery pack
before completing any wiring work.
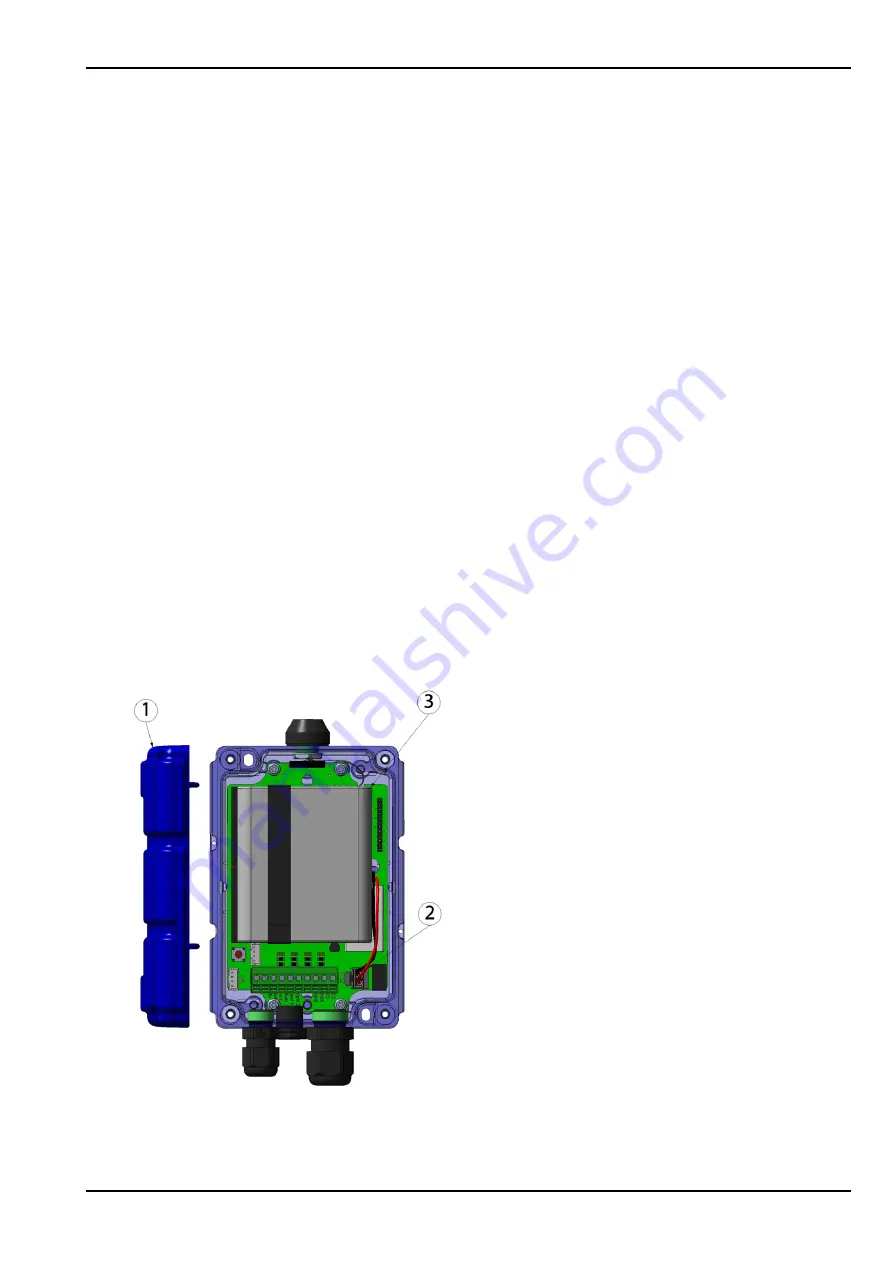
Removing the accu or battery pack
NivuLog Easy - Rev. 05 as of 02.07.2012
23 of 73


