background image

ASSEMBLY INSTRUCTIONS 


1.


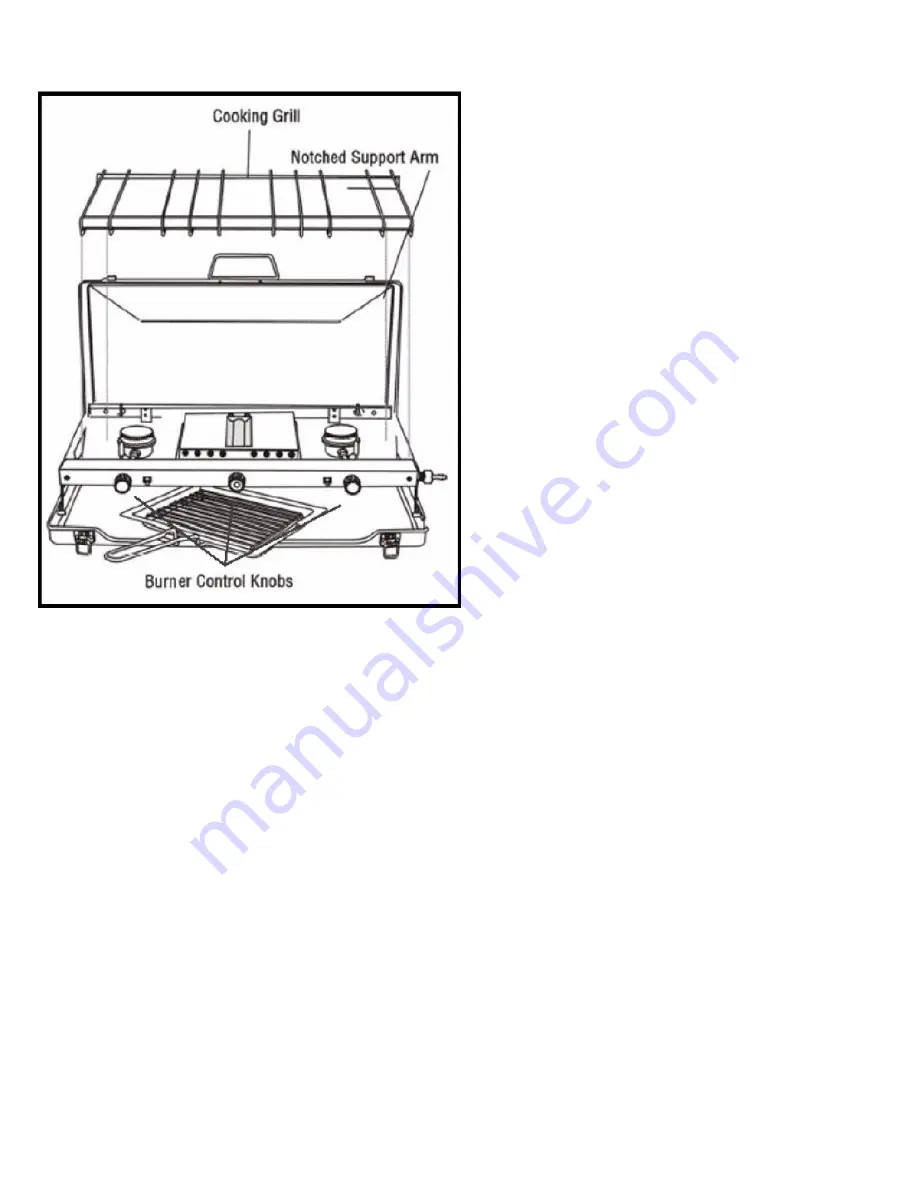
Release the two catches on the front of the 
appliance and open the lid.  


2.


Move the two hinged rear support legs to form a 
‘V’ shape with the base of the appliance and 
ensure they are hooked into place to avoid 
accidental folding. 

Remember to release these 

again before attempting to fold away.  


3.


Ensure the burner controls are in the ‘OFF’ 
position. 


4.


Attach the regulator assembly to the appliance 
fittings. 

Hand tighten only. Do not cross thread 

connections.  


5.


Attach the propane/butane cylinder to the 
regulator assembly. 

The gas cylinder must sit on 

a flat surface and be fully upright at all times.  


6.


Carry out the ‘Gas Leak Test’ before use. 


PLEASE NOTE THE GAS CYLINDER, HOSE & 
REGULATOR ARE NOT SUPPLIED EITH THIS 
APPLIANCE.  


GAS LEAK TEST  


Gas leak test must be performed outdoors in a well-ventilated area prior to every use. While testing keep unit away from 
open flames, sparks or lit cigarettes. 

NEVER USE A FLAME TO CHECK FOR GAS LEAKS.  


Prepare a soapy solution (one part washing up liquid to three parts water) to enable you to check for gas leaks in 
the connections.   


Apply a generous amount of the soapy mixture to regulator assembly at the regulator, along the entire length of 
hose and at the stove fitting (located on the right side of the stove). 


With the burner control knobs in the ‘OFF’ position, check for bubbles where the gas cylinder attaches to the 
regulator assembly, along the entire length of the hose and at stove fitting.  If the soapy mixture starts bubbling, 
gas is leaking through the connections. Disconnect the gas cylinder.  Retighten the connection that is leaking gas.  
Repeat this procedure with the soapy mixture until gas no longer leaks.  

NEVER USE A FLAME TO CHECK FOR GAS 

LEAKS 


Once all gas leaks have been sealed, 

WAIT AT LEAST 5 MINUTES FOR GAS FUMES TO DISSIPATE BEFORE 

LIGHTING THE BURNERS.    


Summary of Contents for FS 430

Page 1: ...pliance other than its connection NO modifications should be made to any part of this appliance and repairs should only be carried out by qualified persons CARE MAINTENANCE Ensure the appliance is cool before cleaning Use a non abrasive detergent and cloth to clean the appliance Avoid clogging the burner ports and dry immediately If the burner ports become blocked do not use a metallic object to c...

Page 2: ...d areas All gas burning appliances consume oxygen This appliance uses oxygen from the air and may produce CO carbon Monoxide which is a colorless odorless gas that can kill you Ample ventilation must be provided to avoid endangering life Be certain that an area in which this appliance is used is properly ventilated at all times DO NOT use as a space heater DO NOT leave the stove unattended when ho...

Page 3: ...lated area prior to every use While testing keep unit away from open flames sparks or lit cigarettes NEVER USE A FLAME TO CHECK FOR GAS LEAKS Prepare a soapy solution one part washing up liquid to three parts water to enable you to check for gas leaks in the connections Apply a generous amount of the soapy mixture to regulator assembly at the regulator along the entire length of hose and at the st...

Page 4: ...knob several times until the burner lights If the burner fails to light within 5 seconds turn the burner control knob OFF immediately and wait at least 5 minutes until the gas fumes have dispersed before repeating 2 To light the second burner reduce the amount of flame on the first lit burner and repeat step 1 3 Adjust the burner flame as necessary by using the burner control knob Turn the applian...

Page 5: ...е на уреда с изключение на свръзката НЕ модифицирайте която и да било част на уреда а ремонт следва да бъде извършван само от квалифициран техник ГРИЖА И ПОДДРЪЖКА Уверете се че уреда е изстинал преди да го почистите Използвайте подходящ препарат неабразивен и кърпа за да почиствате уреда Избягвайте запушване на горивните изходи и подсушавайте незабавно Ако горивните изходи се запушат не използвай...

Page 6: ...лероден оксид газ който е безцветен и няма мирис и може да Ви убие Необходимо е да бъде предоставена достатъчна вентилация за да бъде избегната опасност за живота Уверете се че мястото в което се използва уреда се вентилира правилно през цялото време Не използвайте уреда за отопление НЕ ОСТАВЯЙТЕ уреда без наблюдение когато е горещ или когато се използва Ползвайте уреда с повишено внимание с цел д...

Page 7: ...И ОТЕЧКИ Теста за газови отечки трябва да бъде извършен на открито прастранство в добре проветрена местност преди всяка упатреба По време на теста дръжте уреда далеч от открит огън искри или запалени цигари НИКОГА НЕ ИЗПОЛЗВАЙТЕ ПЛАМЪК ЗА ДА ПРОВЕРИТЕ ЗА ГАЗОВИ ОТЕЧКИ Пригответе сапунен разтвор една част почистваща течност към три части вода за да можете да проверите за газови отечки по свръзките ...

Page 8: ... контролния ключ на котлона няколко пъти докато се запали котлона Ако котлона откаже да се запали до 5 секунди незабавно завъртете контролния ключ на позиция OFF и изчакайте поне 5 минути за да могат газовите пари да изчезнат преди да се опитате да запалите котлона отново 2 За да запалите втория котлон намалете нивото на пламъка на първия котлон и повторете стъпка 1 3 Настройте пламъка на котлона ...

Page 9: ... außer mit dem Anschluss ist Keinen Teil des Geräts modifizieren die Reparatur hat einzig durch einen Fachtechniker zu erfolgen PFLEGE UND WARTUNG Bevor Sie das Gerät reinigen müssen Sie sich vergewissern dass es kalt geworden ist Verwenden Sie zur Reinigung des Geräts ein geeignetes Reinigungsmittel nicht scheuernd und ein Tuch Vermeiden Sie Verstopfungen der Brennausgänge und trocknen Sie unverz...

Page 10: ...gen ein gas ohne Farbe und Geruch das Sie töten kann Um die Lebensgefahr zu vermeiden ist eine ausreichende Belüftung erforderlich Vergewissern Sie sich dass der Ort in dem Sie das Gerät verwenden während der ganzen Zeit richtig belüftet wird DAS GERÄT NICHT FÜR HEIZUNG VERWENDEN LASSEN SIE das Gerät nicht unbeaufsichtigt wenn es heiß ist oder benutzt wird Verwenden Sie das Gerät mit besonderer Vo...

Page 11: ... AUF GASAUSSTRÖMEN Vor jedem Gebrauch ist im Freien in einem gut belüfteten Gelände den Test auf Gasausströmen durchzuführen Während der Probe halten Sie das Gerät fern von offener Flamme Funken oder gezündeten Zigaretten NIE EINE FLAMME BENUTZEN UM AUF GASAUSSTRÖMEN ZU PRÜFEN Bereiten Sie Seifenlauge vor ein Teil Reinigungsflüssigkeit zu drei Teilen Reinwasser um auf Gasausströmen an den Anschlüs...

Page 12: ...Wird der Kocher nicht innerhalb 5 Sekunden angezündet drehen Sie unverzüglich den Steuerschalter in Position OFF und warten Sie mind 5 Minuten bis die Gasdämpfe verschwinden bevor Sie wieder versuchen den Kocher anzuzünden 2 Um den zweiten Kocher anzuzünden reduzieren Sie die Flamme des ersten Kochers und wiederholen Sie Schritt 1 3 Die Flamme des Kochers mit Hilfe des Steuerschalters auf die gewü...

Reviews: