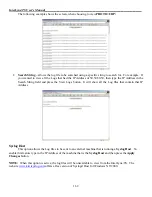
InterLynx/TS User’s Manual_________________________________________________________________
4-1
Chapter 11
_____________________________________________________Print Server Configuration
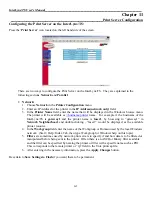
Configuring the Print Server on the InterLynx/TS:
Press the ‘
Print Server
’ icon located on the left hand side of the screen.
There are two ways to configure the Print Server on the InterLynx/TS. They are explained in the
following sections
Network
and
Parallel
.
•
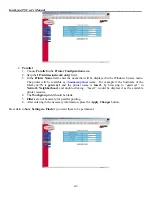
Network:
1.
Choose
Network
in the
Printer Configuration
menu.
2.
Enter an IP Address for the printer in the
IP Address(network only)
field.
3.
In the
Printer Name
field, enter the name that will be displayed in the Windows browse menu.
The printer will be available as
\\hostname\printer
name. For example if the hostname of the
InterLynx/TS is
gateway1
and the printer name is
laser1
, by browsing to “gateway1” in
Network Neighborhood
, and double-clicking , “laser1” would be displayed as the available
printer resource.
4.
In the
Workgroup
field enter the name of the Workgroup or Domain used by the local Windows
network. (Start | Help | Index Tab, then type Workgroup for Windows help on this topic)
5.
Filters
are sometimes used by network print servers to specify if and how data is to be filtered or
manipulated before being sent to the printer. Often there is an ASCII or Binary filter available
and the filter can be specified by naming the printer or filter with a specific name such as PR1.
This corresponds to the remote printer or “rp” field in the Unix printcap file.
6.
After entering in the necessary information, press the
Apply Changes
button.
Be certain to
Save Settings to Flash
if you want them to be permanent.

