background image


4


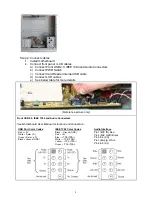
Step 2: Connect cables 

1. 

Install motherboard 

2. 

Connect front panel / LCD cables 
a)  Connect Front USB 2.0, IEEE 1394 and Audio Connectors 
b)  Connect PWR Switch 
c)  Connect Card Reader internal USB cable 
d)  Connect LCD cables 
e)  See below table for more details 


(Reference picture only) 

Front USB 2.0, IEEE 1394 and Audio Connectors 


See Motherboard User Manual for location and connection. 


USB Port Color Codes

Red = +5V 
White = Data- (-D) 
Green = Data+ (+D) 
Black = Ground (GND)


IEEE 1394 Color Codes 

Black -- Ground (GND)  
Red -- +5V  
Blue -- +TPB (TPB+)  
White -- -TPB (TPB-)  
Yellow -- +TPA (TPA+)  
Green -- -TPA (TPA-)


Audio Interface 

Pin 1 (MIC IN) Red 
Pin 2 (MIC GND) Black 
Pin 5 & 6 (SR)  
Pin 7 (Empty) White 
Pin 8 & 9 (SL)  


Summary of Contents for HTPC 180 BA

Page 1: ...eval system or translated into any language in any form by any means without the written permission of NMEDIA SYSTEM INC TECHNICAL SUPPORT If a problem arises with your system and no solution can be o...

Page 2: ...Microsoft MCE IR receive rack receiver not included Tight Cables Screws Installation Guides Other Components Micro ATX Motherboard Intel ViiV or AMD Live ready is recommended CPU Cooler nMEDIAPC ICETA...

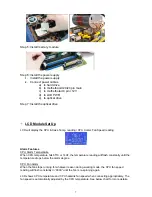
Page 3: ...the DVD drive appropriately until your case eject button can eject the tray smoothly then mark down the position and secure the DVD to the DVD rack with screws 6 If you are planning to convert the MC...

Page 4: ...e below table for more details Reference picture only Front USB 2 0 IEEE 1394 and Audio Connectors See Motherboard User Manual for location and connection USB Port Color Codes Red 5V White Data D Gree...

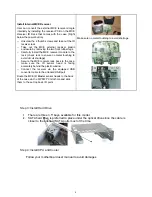
Page 5: ...ion and connection And see above referenced picture Connect LCD Cables Some of these steps follow after CPU Cooler installation 1 Use the orange tape in the accessory bag to tape the CPU heat sensor t...

Page 6: ...o Secure the MCE receiver rack back to the case make sure the IR sensor head is facing accurately behind the plastic window o Connect the receiver via the equipped USB converter cable to the onboard U...

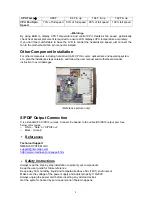
Page 7: ...d reading Alarm Features CPU Alarm Temperature When CPU temperature hits 65 C or 149F the temperature reading will flash constantly until the temperature drops below the alarm degree CPU Fan Alarm Whe...

Page 8: ...ion steps carefully and follow the user manual and motherboard manual instruction to avoid damages Reference picture only S PDIF Output Connection It is a standard PC S PDIF out jack Connect the heade...

Page 9: ...accessories and cables must be returned as they were shipped Carefully re packaging is needed to avoid shipping damages All warranties are subject to properly uses Any human power damages return may...

Reviews: