2
Installation Flowchart (Basic Procedures)
Installation Tools
Screw driver / Screws / Tight cables / Installation guides
Installation Tips:
1. Install the optical drive to the “B” position slot.
2. Use the special made hard drive noise reduction screws to install hard drive.
3. Do not perform cable management until your system is fully configured. This will make the cable
management a better smooth procedure.
4. Do not install optional upgrade video card / TV tuner card / sound card at once. Use everything on
board (video & sound) to configure system and install operation system. After then, install the
upgrades one by one and restart the system on every step to ensure component compatibility and
save times of troubleshooting when issue arises.
Step 1: Remove top cover and remove the optical drive bracket
1. Take off the 2 finger screws and move the top cover backward to take off. Put it aside on a safety
place.
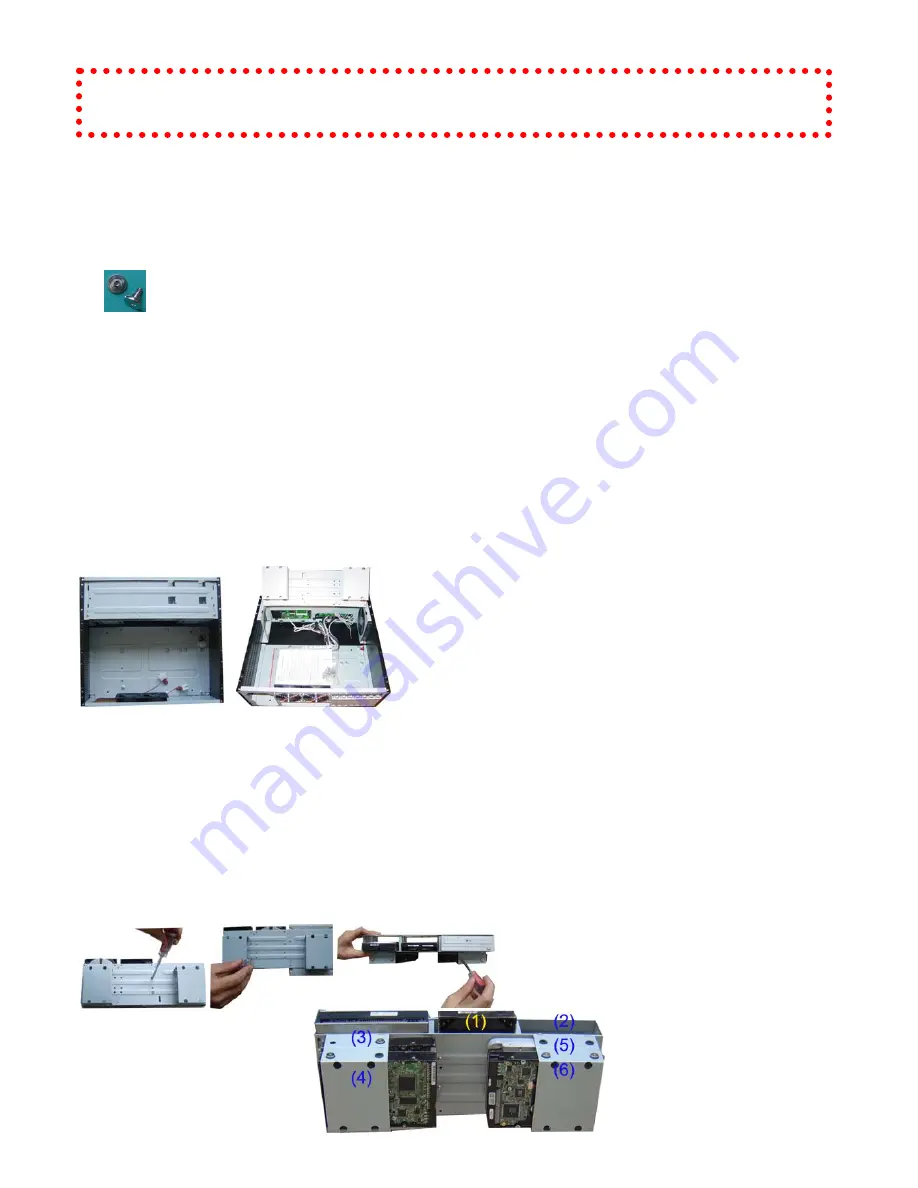
2. Take off the two screws that hold the optical/hard drive bracket. Push a little backward then raise
it up or take it off
3. Note the arrow pointing is the front “F” facing when slotting back or installing the optical drive.
Step 2: Install Motherboard and connect cables
1. Follow motherboard user manual to connect cables, CPU, memory etc…
2. Install power supply
Step 3: Install Hard Drive and Optical Drive
1. Install Optical Drive. Lock the drive to the “B” position
2. Install hard drives. You can install up to 6 hard drives in this model. But, you have to follow the
exact sequence to install them. First, take the two slots that are next to the optical drive first, then,
use the four slots that are under the bracket. If you don’t follow, the bottom drives will block the
screw holes for the upper drive slots.
Open box
Æ
Remove top cover
Æ
Read installation guides
Æ
Remove optical drive bracket
Æ
Install motherboard
Æ
Connect front interface cables
Æ
Install CPU & Cooler
Æ
Install DIMM memory module
Æ
Install hard drives &
optical drive
Æ
Install power supply
Æ
Connect power cables
Æ
Lock optical drive bracket
Æ
Replace top cover


