background image

21

07610-004-45-09-D

PREVENTATIVE MAINTENANCE

MAINTENANCE

5. 

Do not overfill racks.

6. 

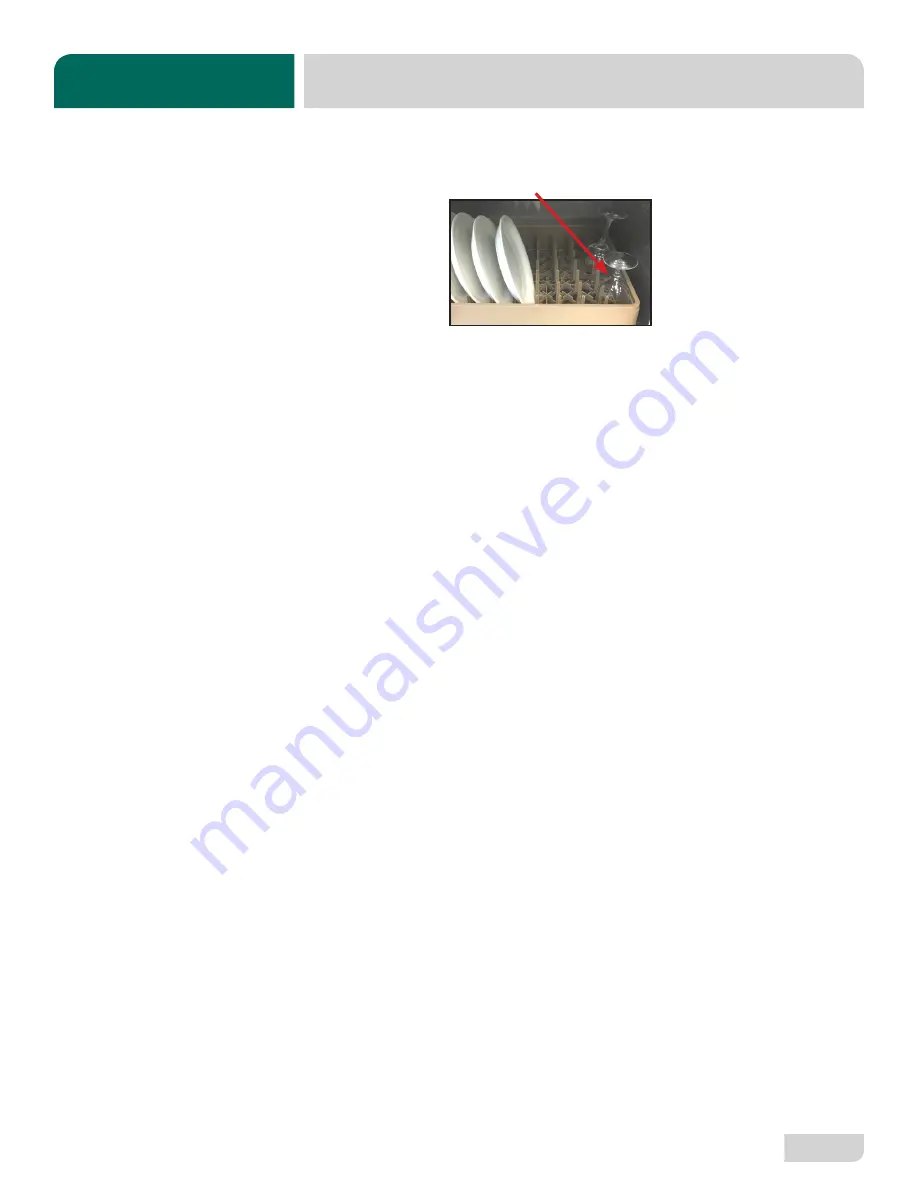
Ensure that glasses are placed upside-down in the rack.

7. 

Ensure that all chemicals being injected into machine have been verified at the 

correct concentrations.

8. 

Clean the machine at the end of every workday (see "Shutdown and Cleaning" 

section).

9. 

If hard water is present, install an SPS into the water line connecting to the 

dishmachine (see the "Plumbing" section).

10. 

Always contact a qualified service agency whenever a serious problem arises.

11. 

Follow all safety procedures, whether listed in this manual or put forth by local, 

state, or national codes/regulations.

PREVENTATIVE 

MAINTENANCE

Summary of Contents for UH30-E

Page 1: ...INSTALLATION OPERATION AND SERVICE MANUAL NOBLE UH30 E UH30 E Manual 07610 004 45 09 D NOBLE UNDERCOUNTER DISHMACHINES...

Page 2: ...e UH30 E SEER to the manual Updated the Door Assembly pages Added item 10 on pg 48 Corrected P N for item 10 on pg 52 D 2 7 19 JH 8585 8599 8619 8648 Added PRV to view on pg 3 Added note about hot wat...

Page 3: ...ion and Energy Recovery System SEER The manufacturer provides technical support for all of the dishmachines detailed in this manual We strongly recommend that you refer to this manual before making a...

Page 4: ...ulator 8 Shock Absorber 8 Connecting the Drain Line 8 Plumbing Check 8 Electrical Power Connections 9 Motor Rotation 9 Voltage Check 10 Surrounding Area 10 Temperature Setpoints 10 Leveling 10 Chemica...

Page 5: ...H30 E Electrical Panel 460 V 33 UH30 E SEER Electrical Panel 208 230 V 34 UH30 E SEER Electrical Panel 460 V 35 Chemical Feeder Pumps 36 Door 38 Miscellaneous Door Components 40 UH30 E SEER Door Inter...

Page 6: ...ID Inside Diameter kW Kilowatts NFPA National Fire Protection Association NPT National Pipe Thread OD Outside Diameter PRV Pressure Regulating Valve PSI Pounds per Square Inch V Volts CAUTION WARNING...

Page 7: ...ion B Water Inlet with 6 Hose 3 4 Male GHT connect to true 1 2 ID line 40 90 F C Drain Connection 1 ID 1 3 8 OD Connect to MIN 1 1 2 Drain with Air gap D Chemical Port All dimensions from the floor ca...

Page 8: ...al Port 17 1 2 445 mm BACK SIDE FRONT TOP 1 4 7 mm 26 7 8 692 mm 3 1 2 88 mm 24 1 4 615 mm 3 3 8 87 mm 4 3 8 110 mm 14 1 4 363 mm 7 1 2 190 mm 1 3 4 44 mm 6 152 mm 3 76 mm 43 5 8 1108 mm 16 3 4 426 mm...

Page 9: ...r reference only and is subject to change without notice Water Temperatures F Minimum Wash Temperature 155 Minimum Rinse Temperature 180 Minimum Incoming Water Temperature 110 Other Water Requirements...

Page 10: ...and is subject to change without notice Water Temperatures F Minimum Wash Temperature 155 Minimum Rinse Temperature 180 Minimum Incoming Water Temperature 40 Maximum Incoming Water Temperature 90 Othe...

Page 11: ...rated for other voltages such as 240 volts Always verify the amperage draw of the machine in operation when sizing circuit protection Amperage loads for motors and heaters are indicated on the machine...

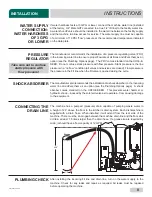
Page 12: ...rocesses can become lodged in the solenoid valves and prevent them from opening or closing Any valves that are found to be fouled or defective because of foreign matter left in the water line and any...

Page 13: ...installation of a shock absorber on the incoming water line and offers them as an option see the Plumbing Options page A shock absober comes standard on the UH30 E SEER This prevents water hammer or...

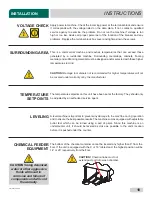
Page 14: ...e to the machine and components 1 Follow the Filling the Wash Tub section 2 Using a 7 16 nutdriver remove front kick panel and keep hardware Using a phillips screwdriver remove right dress panel and k...

Page 15: ...roblems Replace the terminal block box cover and tighten down the screws This is a commercial machine and reaches temperatures that can exceed those generated by a residential machine Surrounding coun...

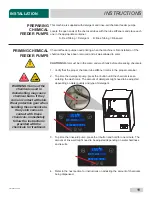
Page 16: ...n until the chemical is seen entering the wash tank The amount of detergent might need to be adjusted depending on water quality and type of detergent 3 To prime the rinse aid pump press the II button...

Page 17: ...uminate the light next to the time option time is measured in seconds In the time categories each second in use will light up To deselect the option press ENTER and the light will go off press ENTER a...

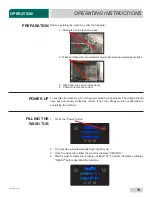
Page 18: ...e machine turn on the power at the service breaker The voltage should have been previously verified as correct If not the voltage must be verified before energizing the machine 1 Press the Power butto...

Page 19: ...ing the cycle The machine sanitizes as well as cleans To do this ware must be properly prepared before being placed in the machine 1 Follow the Filling the Wash Tub section ensuring temperature is at...

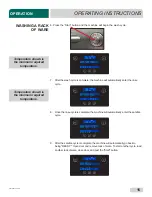
Page 20: ...e 9 After the sanitize cycle is complete the machine will automatically go back to being READY Open door and remove rack of ware To start another cycle load another rack of ware close door and pust th...

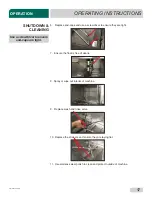
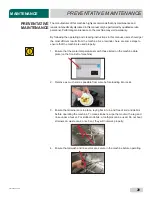
Page 21: ...re free from obstruction If clogged remove end caps clean nozzles with a brush and flush with fresh water OPERATIONAL INSPECTION SHUTDOWN CLEANING OPERATING INSTRUCTIONS OPERATION Based on use the str...

Page 22: ...free of debris 8 Spray or wipe out interior of machine 9 Replace wash and rinse arms 10 Replace the strainers and ensure they are laying flat 11 Use stainless steel polish to clean and protect outside...

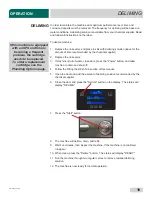
Page 23: ...4 Follow the Filling the Wash Tub section of this manual 5 Open the door and add the amount of deliming solution recommended by the chemical supplier 6 Close the door and press the Delime button on th...

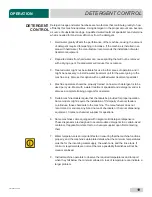
Page 24: ...le Meet with a water treatment specialist and detergent vendor to discuss a complete training program for operators 5 Certain machine models require that chemicals be provided for proper operation Som...

Page 25: ...some steps to ensure that the machine is used properly 1 Ensure that the water temperatures match those listed on the machine data plate on the front left of machine 2 Remove as much soil as possible...

Page 26: ...entrations 8 Clean the machine at the end of every workday see Shutdown and Cleaning section 9 If hard water is present install an SPS into the water line connecting to the dishmachine see the Plumbin...

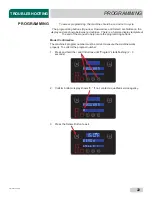
Page 27: ...at the end of the manual to help locate the programming buttons Model Confirmation The machine s program number must be correct to ensure the machine works properly To confirm the program number 1 Pr...

Page 28: ...rsion and show the firmware versions of the IO module and PCB Digital Display 3 Use the Up arrow Button to cycle through the categories will be flashing Language Wash Offset Temperature Scale Rinse Of...

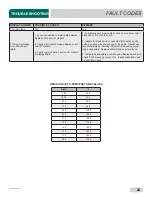
Page 29: ...resistor for T3 and verify that booster heater turns off If not replace IO module 3 Verify that the booster probe resistance is correct with respect to temperature see table on pg 24 If not replace T3...

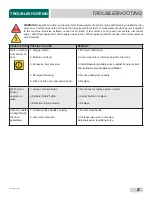
Page 30: ...to temperature see table on pg 24 If not replace T1 F8 No water in wash tank Check inlet water and door 1 Malfunction of fill solenoid or fill relay 2 Door is open which inhibits fill mode 3 Faulty d...

Page 31: ...wire or unseated terminal by gently pulling on each wire at each end of the cable Reseat any loose terminals by inserting it fully into the housing using long nosed pliers Replace cable if broken wir...

Page 32: ...t or replace wires in motor 2 Adjust button or replace 3 Replace Little or no water coming through the rinse assemblies 1 Limed up rinse heads or piping 2 Low water pressure 1 Delime rinse heads 2 Inc...

Page 33: ...k amperages Replace if necessary 4 Adjust rinse tank setpoint Machine doesn t drain when power button is pressed 1 Drain clogged 2 Defective drain valve 1 Remove obstruction 2 Replace Incorrect water...

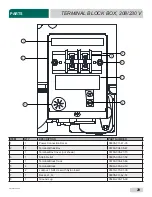
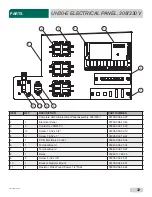
Page 34: ...6 47 1 Terminal Box Cover not shown 05700 003 27 70 3 1 Strain Relief 05975 003 37 56 4 1 Terminal Block Track 05700 000 43 60 5 2 Terminal Block 05940 500 02 19 6 2 Locknut 10 24 Hex with Nylon Inser...

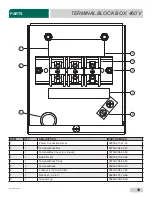
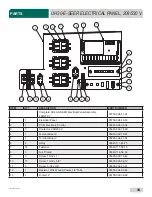
Page 35: ...004 44 79 1 Terminal Box Cover not shown 05700 004 44 80 3 1 Strain Relief 05975 210 03 00 4 1 Terminal Block Track 05700 004 44 72 5 3 Terminal Block 05940 500 02 19 6 2 Locknut 8 32 Low Profile 053...

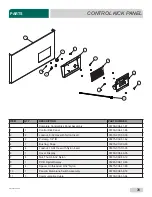
Page 36: ...sert 05310 373 03 00 3 2 P clamp 1 4 ID 05975 002 61 42 4 1 Bushing Snap 05975 210 09 00 5 4 Locknut 10 24 Hex with Nylon Insert 05310 373 01 00 6 1 Cover Display 05700 004 46 05 7 4 Nut Thumb 6 32 Ny...

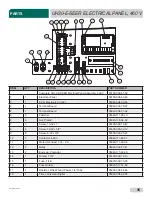
Page 37: ...actor 208 230 V 05945 002 74 20 3 13 Screw 10 32 x 5 8 05305 003 02 12 4 3 Screw 10 32 x 1 05305 002 19 42 5 1 PCB Electronic Control 05945 004 36 34 6 1 Terminal Board 05940 004 21 34 7 1 Terminal Bo...

Page 38: ...7 3 4 05700 002 79 13 5 6 Screw 10 32 x 5 8 05305 003 02 12 6 1 Motor Overload 1 35 2 A 05945 111 60 08 7 3 Screw 10 32 x 1 05305 002 19 42 8 1 PCB Electronic Control 05945 004 36 34 9 1 Terminal Boa...

Page 39: ...ic Control 05945 004 36 34 3 3 Contactor 208 230 V 05945 002 74 20 4 1 Terminal Board 05940 002 78 97 5 1 Terminal Board 05940 004 21 34 6 2 Relay 05945 111 89 75 7 18 Fastener 05340 111 58 10 8 5 Nut...

Page 40: ...Fastener 05340 111 58 10 6 6 Nut Plated 05340 118 04 00 7 3 Screw 10 32 x 1 05305 002 19 42 8 6 Screw 10 32 x 5 8 05305 003 02 12 9 6 Screw 6 32 x 3 8 05305 002 25 91 10 3 Contactor 460 V 05945 111 60...

Page 41: ...4 45 09 D 36 PARTS CHEMICAL FEEDER PUMPS 1 9 6 5 4 3 7 10 11 12 14 16 17 18 19 8 2 13 15 1 2 Complete Peri pump Panel Assembly 208 230 V 05700 004 42 08 Complete Peri pump Panel Assembly 460 V 05700 0...

Page 42: ...05700 002 96 09 1 Motor Only Peri pump 14 RPM 115 V for 460 V Machine 04320 111 35 13 9 1 Panel Outer Control 05700 004 41 89 10 2 Pump Housing 04320 111 37 09 11 1 1 Roller Black Plastic 04320 111 65...

Page 43: ...07610 004 45 09 D 38 DOOR PARTS 1 66 0 Complete Door Assembly 05700 004 36 53...

Page 44: ...2 Stop Door Hinge 05700 003 32 55 10 1 Hinge Left 05700 003 32 71 11 1 Hinge Right 05700 003 32 72 12 1 Inner Door 05700 003 33 21 13 1 Baffle Door 05700 003 33 38 14 2 Hinge Spacer 05700 003 33 42 1...

Page 45: ...00 004 36 80 4 1 Cover Right Hinge Weldment 05700 004 36 81 Hinges secured with Locknut 1 4 20 Hex with Nylon Insert 05310 374 01 00 5 2 O ring 05330 003 32 34 6 1 Latch Spring 05700 003 32 32 7 2 Lat...

Page 46: ...5999 004 47 49 05700 004 52 88 2 1 Solenoid Stop 05700 004 47 51 3 1 Bearing Dry Running Sleeve 1 4 ID 03120 004 47 52 4 1 Locknut 1 4 20 Low Profile with Nylon Insert 05310 374 02 00 5 1 Bracket Sole...

Page 47: ...07610 004 45 09 D 42 WASH MOTOR PARTS 3 4 5 5 6 5 1 2 7 5 5 10 11 12 13 13 15 15 16 16 15 17 18 19 8 9 13 13 14...

Page 48: ...otor 208 230 V 06105 004 35 22 1 Pump and Motor 460 V 06105 003 52 78 11 1 Discharge Hose 5 8 x 8 05700 004 46 28 12 1 Hose 1 1 4 x 2 3 4 05700 011 44 48 13 4 Clamp 1 1 16 to 2 04730 719 18 00 14 1 Ho...

Page 49: ...1 Pipe Clamp 05700 000 35 06 3 4 Rinse Arm End cap 04730 111 60 41 4 2 Complete Rinse Arm Assembly 05700 004 39 39 2 Rinse Arm 05700 004 38 75 5 2 Bearing Assembly Rinse Arm 05700 004 54 71 6 2 O ring...

Page 50: ...nths 04730 003 28 04 SPS System 04730 003 28 03 Replacement Test Strip Not Shown 06401 003 28 06 Must be installed vertically The provided bracket is secured to the wall Observe proper inlet outlet wa...

Page 51: ...6 5 4 3 2 7 1 Complete Inlet Plumbing Assembly 208 230 V 05700 004 09 03 Complete Inlet Plumbing Assembly 115 V for 460 V Machine 05700 004 44 40 8 Item not included in part number of complete plumbi...

Page 52: ...56 04810 003 71 55 2 1 Union 1 2 x 1 2 Brass 04730 003 62 44 3 1 Nipple 1 2 Close Brass 04730 207 15 00 4 1 Nipple 1 2 x 4 NPT Brass 04730 207 04 00 5 1 Adapter 1 2 Fitting Male 04730 011 59 53 6 1 E...

Page 53: ...nion 1 2 04730 412 05 01 6 1 Nipple 1 2 Close Brass 04730 207 15 00 7 1 Union 1 2 x 1 2 Brass 04730 003 62 44 8 1 Bracket Plumbing Support 05700 004 56 19 For water connection point see next page item...

Page 54: ...Assembly 05700 004 56 92 81 21 27720 81 21 723 7 5 2 5 7 21 ITEM QTY DESCRIPTION PART NUMBER 1 1 Plumbing Inlet Offset 05700 004 56 93 2 1 PRV 1 2 04820 004 09 37 3 1 Garden Hose Connector 04730 004...

Page 55: ...07610 004 45 09 D 50 RINSE PLUMBING PARTS 1 2 3 4 2 5 6 7 8 9 10 11 12 13 14 18 16 15 15 5 3 20 6 27 26 25 24 23 22 21 Complete Rinse Plumbing Assembly 05700 004 43 02 19 17 14 15...

Page 56: ...10 1 Adapter Male 04730 401 03 01 11 1 Copper Tube 1 2 x 15 1 2 05700 000 97 23 12 1 Union 04730 412 05 01 13 1 Adapter Male 1 2 Fitting 04730 011 59 53 14 2 Elbow 90 Degree 1 2 Brass 04730 011 42 96...

Page 57: ...07610 004 45 09 D 52 RINSE TANK PARTS 1 2 3 4 5 Front of Rinse Tank 6 7 8 Back of Rinse Tank 9...

Page 58: ...4540 004 45 12 1 Rinse Heater 5 45 kW 460 V 04540 121 65 99 4 4 Lockwasher Split 5 16 05311 275 01 00 5 4 Nut Hex 5 16 18 05310 275 01 00 6 1 Cable Temperature Probe 05700 004 33 23 7 1 Thermistor Pro...

Page 59: ...a 10i 10e 10 22 23 24 16 25 26 Complete SEER System Assembly 208 230 V 05700 004 48 96 Complete SEER System Assembly 115 V for 460 V Machine 05700 004 52 64 See Item B on UH30 E SEER Dimensions page I...

Page 60: ...otor Fan 208 230 V Motor Fan 115 V for 460 V Machine Screw 6 32 x 1 3 4 05700 004 50 83 05700 004 52 63 05310 374 01 00 03120 004 50 88 05700 004 50 94 05330 004 50 95 05999 004 50 85 05330 004 50 90...

Page 61: ...5340 108 01 03 5 1 18 Stand Assembly 05700 003 34 25 6 1 Stand 05700 002 88 82 7 4 Bullet Foot 05340 108 01 03 8 4 18 Leg 05700 002 89 47 9 4 Cross Brace 05700 003 25 90 10 4 Cross Member Bracket 0473...

Page 62: ...7 1 Thermistor Probe 4 with 18 Cable 06685 004 34 58 8 1 Probe Fitting 1 4 Brass 05310 924 02 05 9 1 Wash Heater 4 kW 208 230 V 04540 003 99 44 1 Wash Heater 4 kW 460 V 04540 004 12 29 10 1 Thermostat...

Page 63: ...Input Assignments I1 Wash I2 Cycle I3 Float I4 Rinse I5 Door Chemicals BLK DC RTN RED 24 VDC WHT BLK DC RTN VDC OUT CORRESPONDING CONNECTOR TO DISPLAY PCB PN 05945 004 36 33 B L K B L K R E D W H T B...

Page 64: ...2 N Input Assignments I1 Wash I2 Cycle I3 Float I4 Rinse I5 Door Chemicals BLK DC RTN RED 24 VDC WHT BLK DC RTN VDC OUT CORRESPONDING CONNECTOR TO DISPLAY PCB PN 05945 004 36 33 B L K B L K R E D W H...

Page 65: ......

Page 66: ...Noble Warewashing Lancaster Pennsylvania www nobleproducts biz For Service Call 1 888 800 5672 UH30 E Manual 07610 004 45 09 D NOBLE UNDERCOUNTER DISHMACHINES...

Reviews: