18
e.
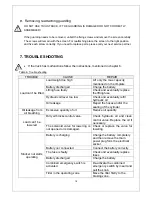
Removing, reattaching guarding
DO NOT USE THIUS TRUCK, IF THE GUARDING IS DAMAGED OR NOT CORRECTLY
ASSEMBLED!
If the guarding needs to be removed, unbolt the fixing screws and remove the screen carefully.
The screws will remain with the screen. For reattaching place the screen to the right position
and fix each screw correctly. If you need to replace parts, please call your next service partner.
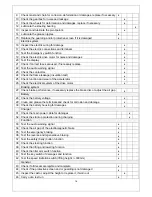
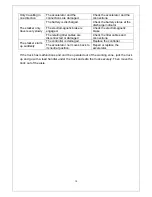
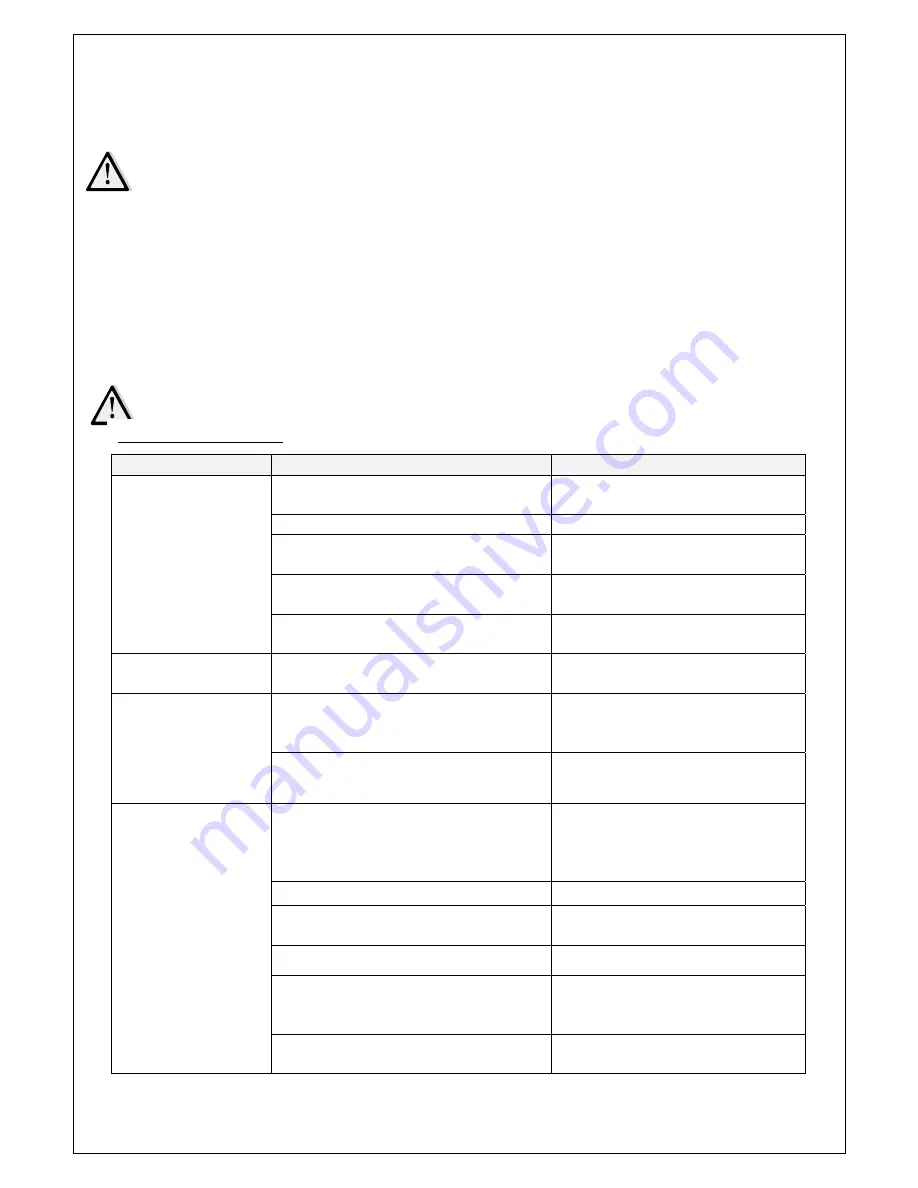
7. TROUBLE SHOOTING
If the truck has malfunctions follow the instructions, mentioned in chapter 6.
TROUBLE
CAUSE
REPAIR
Load weight too high
Lift only the max. capacity,
mentioned on the ID-plate
Battery discharged
Charge the battery
Lifting fuse faulty
Check and eventually replace
the lifting fuse
Hydraulic oil level too low
Check and eventually refill
hydraulic oil
Load can’t be lifted
Oil leakage
Repair the hoses and/or the
sealing of the cylinder
Oil leakage from
air breathing
Excessive quantity of oil. Reduce
oil
quantity.
Dirty oil blocks control valve.
Check hydraulic oil and clean
control valve. Replace the oil if
necessary.
Load can’t be
lowered
The solenoid valve for lowering is
not opened or is damaged.
Check or replace the valve for
lowering.
Battery is charging
Charge the battery completely
and then remove the main
power plug form the electrical
socket.
Battery not connected
Connect the battery correctly
The fuse is faulty
Check and eventually replace
fuses
Battery discharged
Charge the battery
Combined emergency switch is
activated
De-activate the combined
emergency switch by insert and
pull the knob.
Stacker not starts
operating
Tiller in the operating zone
Move the tiller firstly to the
braking zone.
Table 6: Trouble shooting
Summary of Contents for ECL 10
Page 28: ......
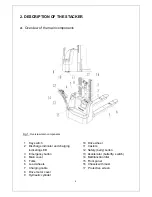
Page 31: ...3 Fig 1 Main components...
Page 36: ...8 Fig 5 Mast Assembly 5 1 Double Mast...
Page 38: ...10 Fig 6 Electronic control board assembly...
Page 41: ...13 Fig 8 Electric parts and components...
Page 53: ...25 Fig 14 Tiller arm assembly...
Page 55: ...27 Fig 15 Economic tiller head...
Page 60: ...32 Fig 18 Sticker for US...
Page 65: ...4 Fig 2 S ticker for US...
Page 67: ...6 Fig 3 Appearance...
Page 74: ...13 Fig 8 Mast assembly 8 1 Two stage mast...
Page 76: ...15 Fig 9 Electronic control board assembly...
Page 79: ...18 Fig 11 Electric parts and components...
Page 88: ...27 Fig 15 Driving system...
Page 91: ...30 Fig 17 T iller arm assembly...
Page 93: ...32 Fig 18 Economic tiller head...

