Fasteners and Torque Control (10---90)
Taper Lock
r
Bushings
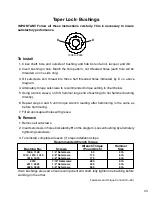
IMPORTANT: Follow all these instructions carefully. This is necessary to insure
satisfactory performance.
C
C
1008 to 3030
To Install
1. Clean shaft, bore and outside of bushing, and hub bore of all oil, lacquer, and dirt.
2. Insert bushing in hub. Match the hole pattern, not threaded holes (each hole will be
threaded on one side only).
3. Oil setscrews and thread into those half threaded holes indicated by C on above
diagram.
4. Alternately torque setscrews to recommended torque setting in chart below.
5. Using a block, sleeve, or drift, hammer large end of bushing (do not hammer bushing
directly).
6. Repeat steps 4 and 5 until torque wrench reading after hammering is the same as
before hammering.
7. Fill all unoccupied holes with grease.
To Remove
1. Remove all setscrews.
2. Insert setscrews in holes indicated by
D
on the diagram. Loosen bushing by alternately
tightening setscrews.
3. To reinstall, complete all seven (7) steps installation steps.
Recommended Wrench Torque
Bushing No.
Screws
Wrench Torque
(Pound-Inch)
Hammer
Size
1008, 1108
1210, 1215, 1310
1610, 1615
1/4” Setscrews
3/8” Setscrews
3/8” Setscrews
55
175
175
6 lb
6 lb
6 lb
2012
2517, 2525
3020, 3030
7/16” Setscrews
1/2” Setscrews
5/8” Setscrews
280
430
800
6 lb
6 lb
6 lb
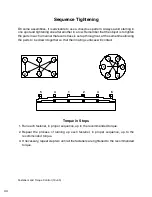
If two bushings are used on same component and shaft, fully tighten one bushing before
working on the other.
43
Summary of Contents for SpeedScrub Rider
Page 1: ... 331145 Rev 00 331145 SpeedScrub Rider Service Information and Hygenict Tanks Featuring ...
Page 4: ...ii ...
Page 7: ...1 2 3 4 5 1021038 Speed Scrub Ladder Schematic page 1 of 2 3 ...
Page 8: ...1 2 3 4 5 1021038 Speed Scrub Ladder Schematic page 2 of 2 4 ...
Page 9: ...1 Speed Scrub Wire Harness Group page 1 of 4 5 ...
Page 10: ...1 Speed Scrub Wire Harness Group page 2 of 4 6 ...
Page 11: ...1 Speed Scrub Wire Harness Group page 3 of 4 7 ...
Page 12: ...2 Speed Scrub Wire Harness Group page 4 of 4 8 ...

