background image

KAMERA WERK DRESDEN GmbH





Page 6 of 15

Attaching the Camera Strap

Thread the camera strap in the lug (

8

).

Inserting the Batteries

NOBLEX PRO cameras require 4 batteries AAA (RO3/UM4/LR) 1,5V. Please use high-quality alkaline
batteries,  of  course,  with  items  ‚Photo/Audio‘,  ‚Photo‘  or  ‚Power‘.  When  inserting  the  batteries  follow
these instructions:

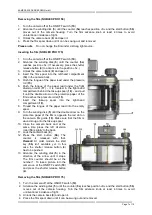
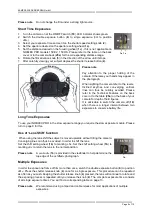
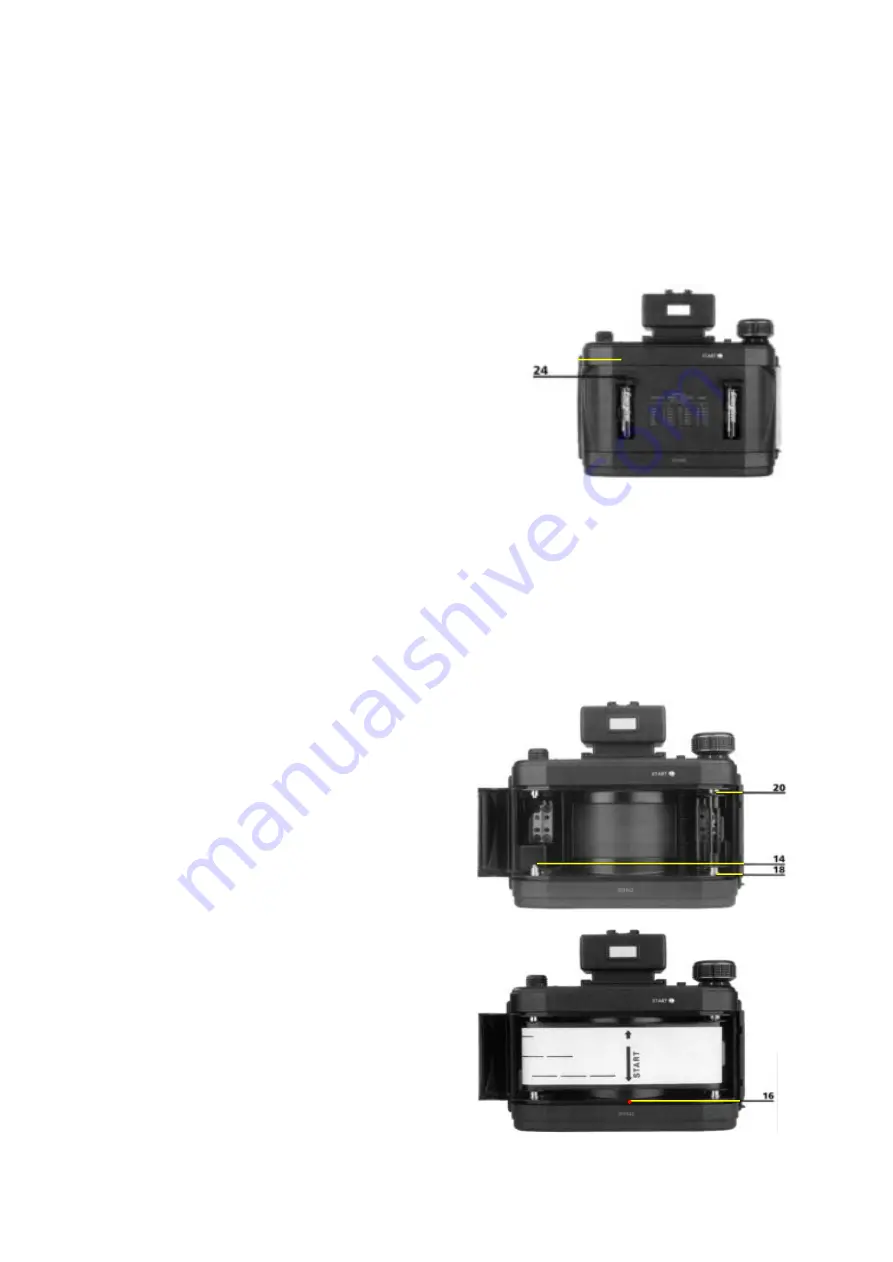
1.  Open the battery compartment cover (

24

) by pressing the

upper half of the cover slightly and push it upwards.

2.  Open up the battery compartment cover (

24

).

3.  Insert the new batteries. Pay attention to the right polarity

and  position of the strips for removing the batteries.

4.  Lift the battery compartment cover (

24

) down.

5.  Close  the  cover  by  pressing  the  lower  half  of  the  cover

slightly and push it downwards at the same time until it is
engaged.

Please note

Never  use  batteries  of  different  types  and  do  not  mix  old  batteries  with  new  ones.  Do  not  use
rechargeable batteries. If you do not use your camera for an extended time, remove the batteries for
this time.

Inserting and removing the film

NOBLEX  PRO  cameras  require  120  roll  film.  To  insert  and  change  the  film  please  follow  these
instructions:

Inserting the film (NOBLEX PRO 150)

1.  Turn the camera off at the ON/OFF switch (

10

).

2.  Advance  the  winding  disk  (

5

)  until  the  counter

(

5a

)  reaches  position  »5«.  (If  necessary,  press

the  shutter  release  button  (

4

)  to  advance  to  the

position »5«.)

3.  Unlock the camera back (

9

) and open it.

4.  Insert  the  film  spool  into  the  left-hand  spring-

loaded compartment (

14

).

5.  Insert  the  empty  film  spool  into  the  right-hand

compartment (

18

). The spool must engage in the

upper catch (

20

).

6.  Thread  the  tongue  of  the  paper  lead  into  the

take-up spool.

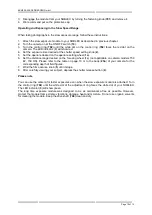
7.  Turn  the  winding  disk  (

5

)  until  the  double  arrow

on the protective paper of the film is opposite the
red  dot  on  the  camera  film  guide  (

16

).  pay

attention to insure a tight winding of the film.

8.  Close the camera back and lock it (

9

).

9.  Press  the  start  button  (

5b

).  The  counter  is

released with that. 

Remark:

  At  older models  the

start  key  (

5b

) isn't  available  yet.  In  this  case  the

shutter release button (

4

) has to be pushed.

10.  Advance  the  winding  disk  (

5

)  in  the  direction  of

the  arrow  until  it  stops.  The  film  counter  should
be  at  the  number  1.  To  take  a  picture  turn  the
camera on at the ON/OFF switch (

10

) and press

the shutter release button (

4

).

Summary of Contents for PRO 150

Page 1: ...KAMERA WERK DRESDEN GmbH Page 1 of 15 User Manual NOBLEX PRO 150 175 ...

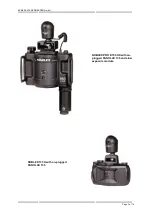
Page 2: ...KAMERA WERK DRESDEN GmbH Page 2 of 15 NOBLEX PRO 6 150 UX with on plugged PANOLUX 135 and slow exposure module NOBLEX 135 U with on plugged PANOLUX 135 ...

Page 3: ...ness 5 The photographs correspond to the natural space perception of the human eye Important Notes 1 The camera is not waterproof and therefore not suited for use in wet environments when raining or in snow A camera dropped into the water by accident should immediately send to the NOBLEX Service Centre Protect your camera tram seawater haze and tram high humidity To properly clean your camera use ...

Page 4: ... 7 Short Time Exposures_____________________________________________________________ 8 Long Time Exposures _____________________________________________________________ 8 Use of Lens Shift function ________________________________________________________ 8 Multiple Exposures _______________________________________________________________ 8 Filters and Close up Lenses_______________________________...

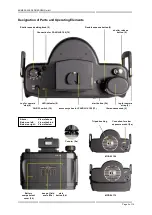
Page 5: ...tton 4 Lug for camera LED indicator 6 start button 5b lug for camera stap 8 strap 8 ON OFF switch 10 accessory shoe for PANOLUX 150 13 film advance knob 5 Battery deep of field start compartment scale 25a button 5b cover 24 Counter 5a Tripod bushing Connetion for slow exposure modul 5a MODEL 150 MODEL 175 Above View of above Below on left View of behind Below on right View of below ...

Page 6: ...O cameras require 120 roll film To insert and change the film please follow these instructions Inserting the film NOBLEX PRO 150 1 Turn the camera off at the ON OFF switch 10 2 Advance the winding disk 5 until the counter 5a reaches position 5 If necessary press the shutter release button 4 to advance to the position 5 3 Unlock the camera back 9 and open it 4 Insert the film spool into the left ha...

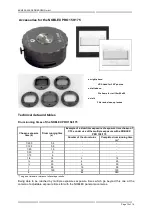
Page 7: ...tive paper of the film reaches the pressure roller 15 7 Insert the take up spool into the right hand compartment 18 8 Thread the tongue of the paper lead into the empty spool 9 Turn the winding disk 5 until the double arrow on the protective paper of the film is opposite the red dot on the camera film guide 16 Make sure that the film is wound snug onto the take up spool 10 Close the camera back an...

Page 8: ...camera for depth of field figures It is advisable to switch the camera off 10 when there is a longer interval between two exposures to conserve battery life Long Time Exposures To use your NOBLEX PRO in the slow exposure range you require the slow exposure module Please turn to page 9 for this Use of Lens Shift function When using the lens shift the subject is moved upwards without tilting the cam...

Page 9: ...ease note To step 5 If you turn the drum clockwise the film is exposed and you lose one picture Please be very careful when changing filters close up lenses in order to avoid damage to the lens caused by the tweezers The Slow Exposure Module The module for slow exposures offers you the opportunity to work comfortably with these NOBLEX PRO cameras designed for the slow exposure module in the slow s...

Page 10: ... aperture setting wheel 1a 6 Set the distance range desired on the focusing wheel 1c not applicable on camera models 150 E2 150 HS Please refer to the table on page 13 or to the back 25a of your camera for the corresponding depth of field figures 7 Wind the film advance knob 5 until it stops 8 After carefully viewing your subject depress the shutter release button 4 Please note You can use the cam...

Page 11: ... PANOLUX the lens drum moves slower or taster in the corresponding parts of the exposure and different exposure times are produced during one drum rotation Typically a slower rotation will brighten that area ConverseIy a taster rotation will darken that portion of the photograph You find broader details on this in the operation instructions for the PANOLUX 150 Care of Camera For high quality photo...

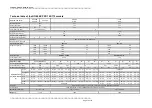
Page 12: ...nning time s Number of the drum turns Complete drum running time s 1 250 0 5 1 125 0 8 1 60 1 5 1 30 3 1 15 6 1 8 14 2 14 25 4 25 50 8 50 1 95 16 95 2 190 32 190 4 64 380 The given times are tolerance full average results Being able to be reached by multiple exposures exposure times which go beyond this one at the camera of adjustable exposure times far with the NOBLEX panorama cameras on right ab...

Page 13: ...0 5 none 0 25 0 5 Unschärfenkreis mm 0 07 0 05 0 07 0 5 0 07 0 085 0 07 Middle admission distance 10 4 2 9 1 7 17 2 6 5 2 8 3 2 2 5 1 8 1 5 27 1 21 1 5 6 3 4 3 0 1 9 k 4 5 4 6 4 3 2 2 2 1 1 4 6 9 15 4 2 4 2 2 1 4 4 2 5 3 1 2 1 2 1 1 6 1 8 1 4 is dropped k 5 6 6 5 4 1 4 9 2 0 2 2 1 3 6 1 22 3 9 4 8 2 0 4 8 2 4 3 3 2 0 2 2 1 5 1 9 1 3 8 3 6 1 12 3 6 4 8 2 7 4 0 2 4 2 2 1 7 k 8 3 2 7 2 1 8 2 6 1 2 4 ...

Page 14: ......

Page 15: ...and PANOLUX are typed in trademarks of the KAMERA WERK Dresden GmbH The KAMERA WERK Dresden GmbH reserves deviations in the illustrations and changes of the technical piece of equipment equipment for herself KAMERA WERK DRESDEN GmbH Bismarckstraße 56 01257 Dresden Tel 49 351 2 80 60 Fax 49 351 2 80 63 92 E Mail info kamera werk dresden de Web www kamera werk dresden de ...

Reviews: