Installation
11
for most users. When you have selected the desired type of installation,
click
Next
.
10
Check the installation settings. To accept them, click
Next
. To change the
settings, click
Back
, make the changes, and then click
Next
. The installation
program starts copying the files.
11
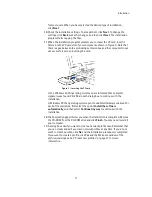
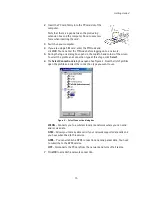
When the installation program prompts you to insert the PC card, insert it
firmly into the PC card slot of your computer as shown in Figure 3. Note that
there is a gap between the protruding extension box and the computer. Do not
use excess force when inserting the card.
In the Windows 2000 operating system you are informed that no digital
signature was found. Click
Yes
in each dialog box to continue with the
installation.
In Windows XP, the operating system opens Found New Hardware wizards. For
each of these wizards, first select the option
Install the software
automatically
, and then select
Continue Anyway
to continue with the
installation.
12
The Completion page informs you when the installation is completed. Remove
the CD-ROM from the CD-ROM drive and click
Finish
. You may need to restart
your computer.
13
A dialog box asks if you want to create a network profile now. Remember that
you can create and edit your own network profiles at any time. If you do not
want to create a profile, click
No
and the installation procedure is completed.
If you want to create a profile, click
Yes
and the Welcome window of the
profile wizard opens. See “Create new profiles” on page 21 for more
information.
Figure 3 - Inserting the PC card
Summary of Contents for D311
Page 1: ...User Guide Issue 1 ...


