background image

ENGLISH

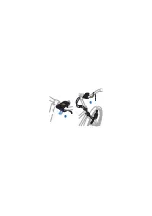
To keep the holder attached to the 
handlebar when you are not using it, 
carefully stretch the holder straps over 
the handlebar, and thread the straps 
behind the tabs on the charger (27). 
Make sure the holder stays firmly in 
place (28).

Connect the charger to the 
mobile device

Plug the charging cable of the charger 
into the 2.0 mm charger connector on 
your Nokia device.

If you connect the dynamo to 
a headlamp at the same time, your 
device will not charge properly.

Charge the battery using the dynamo

Make sure the charger is connected 
to your mobile device.

Press the lever of the dynamo so that 
the friction roller touches the tyre.

Begin pedalling your bicycle faster 
than 6 km/h (4 mph), which is 

a typical walking speed. If you pedal 
too slowly, charging may not start 
even when you increase your speed. 
In that case, stop the bicycle, and 
detach the charging cable from the 
mobile device for a few seconds.

Take care of your device

Handle your device and accessories with 
care. The following suggestions help you 
protect your warranty coverage.

• Keep the device dry. Precipitation, 

humidity, and all types of liquids or 
moisture can contain minerals that 

Summary of Contents for DC-14

Page 1: ...Nokia Bicycle Charger DC 14 9222639 1 0 11 1 2 3 10 9 6 7 8 4 5 ...

Page 2: ...12 13 ...

Page 3: ...14 15 ...

Page 4: ...16 17 ...

Page 5: ...20 18 19 ...

Page 6: ...22 21 ...

Page 7: ...23 ...

Page 8: ...24 ...

Page 9: ...26 25 ...

Page 10: ...28 27 ...

Page 11: ...ds Read this guide carefully before installing and using the product Also read the user guide for your bicycle and the Nokia device that you connect to the charger This product may contain small parts Keep them out of the reach of small children Warning The connectors of this device may contain a small amount of nickel Persons who are sensitised to nickel may have symptoms from prolonged skin cont...

Page 12: ...t interfere with or hinder the steering or braking systems of the bicycle Make sure the product is not installed where you might come in contact with it in the event of an accident or collision During extended operation or in high temperatures the charger or dynamo may be very warm Do not touch the dynamo for a few minutes after a long ride Incorrect installation may cause the dynamo to fall betwe...

Page 13: ...ket is firmly attached to the fork Mount the dynamo against the tyre To mount the dynamo against the tyre place the friction roller at the correct angle height and distance to the tyre 14 so that it properly touches the side of the tyre when you press the lever 15 Position the dynamo correctly using the adjustment bolt 16 To detach the roller from the tyre pull the dynamo away from the tyre 17 Att...

Page 14: ...aps of the holder through the slots at the charger 22 Connect the cables To connect the charger cables to the electric wire attached to the dynamo and the grounding wire attached to the mounting bracket press the ends of the corresponding cables and wires into each other 23 Attach the electric and grounding wires to the head tube with the supplied removable cable ties Make sure the charger is prop...

Page 15: ... the battery using the dynamo Make sure the charger is connected to your mobile device Press the lever of the dynamo so that the friction roller touches the tyre Begin pedalling your bicycle faster than 6 km h 4 mph which is a typical walking speed If you pedal too slowly charging may not start even when you increase your speed In that case stop the bicycle and detach the charging cable from the m...

Page 16: ...materials to dedicated collection points This way you help prevent uncontrolled waste disposal and promote the recycling of materials Check product environmental information and how to recycle your Nokia products at www nokia com werecycle or with a mobile device www nokia mobi werecycle The crossed out wheeled bin symbol on your product battery literature or packaging reminds you that all electri...

Reviews: