background image

Commissioning DNT2Mi

DN01145897

© Nokia Corporation

43 (128)

Issue 2-0 en

Nokia Proprietary and Confidential

Note

6.8

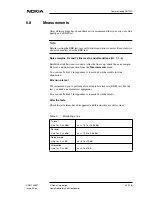
Measurements

After all the settings have been checked, we recommend that you carry out a line
quality and a BER test.

Before starting the BER test, reset all statistics and error counters. Read statistics
and error counters after the BER test.

Noise margins, Rx and Tx line levels, and attenuations (Q1: 7,1...3)

Establish a link between two units. After the line is up, check the noise margin,
Rx level, and line attenuation from the

Measurements

 menu.

You can use Table 28 in Appendix A to mark down the results for line
attenuation.

Bit error rate test

We recommend you to perform a five-minute bit error rate (BER) test. For the
test, you need an external test equipment.

You can use Table 27 in Appendix A to mark down the results.

After the tests

Check that all alarms have disappeared and the statistics are still correct.

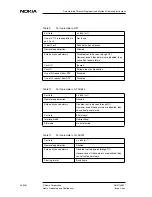
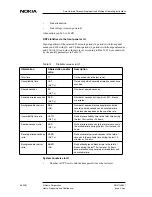
Table 3.

Monitoring a line

Tx level

Line 1 or 2: xx dBm

xx = +7.5 to +14.5 dBm

Rx level

Line 1 or 2: xx dBm

xx = +14.5 to -26 dBm

Noise margin

Line 1 or 2: xx dB

xx = 0 to +15 dB

Attenuation

Line 1 or 2: xx dB

xx = 0 to 41 dB

Summary of Contents for DNT2Mi mp

Page 1: ...DNT2Mi sp mp User Manual C33975 85 B0 DN01145897 Nokia Corporation 1 128 Issue 2 0 en Nokia Proprietary and Confidential Data Network Terminal Single port and Multiport Operating Instructions ...

Page 2: ...n the documentation are adequate and free of material errors and omissions Nokia will if necessary explain issues which may not be covered by the documentation Nokia s liability for any errors in the documentation is limited to the documentary correction of errors NOKIA WILL NOT BE RESPONSIBLE IN ANY EVENT FOR ERRORS IN THIS DOCUMENTATION OR FOR ANY DAMAGES INCIDENTAL OR CONSEQUENTIAL INCLUDING MO...

Page 3: ...ion 27 5 7 Installing DNT2Mi on a wall or into a rack 27 5 7 1 Installing DNT2Mi on a wall 27 5 7 2 Uninstalling a wall mounted DNT2Mi 30 5 7 3 Installing a modem shelf into a 19 inch rack 30 5 7 4 Installing DNT2Mi in a modem shelf 31 5 7 5 Uninstalling DNT2Mi from a modem shelf 33 5 8 Connecting power supply 34 5 8 1 Troubleshooting 37 5 8 2 Strain relief 37 5 9 Completing the installation 38 5 ...

Page 4: ...nt 72 8 4 Monitoring DNT2Mi 73 8 4 1 Monitoring a port 73 8 4 2 Monitoring a line 74 8 4 3 Monitoring alarms 75 8 4 4 Monitoring equipment information 76 8 4 5 Self testing 76 9 Using Q1 menus 77 9 1 General 77 9 2 DNT controls 5 96 9 3 DNT settings 6 96 9 3 1 Display 6 0 96 9 3 2 Service options 6 1 97 9 3 3 Timing source 6 2 98 9 3 4 Line settings 6 3 100 9 3 5 Port settings 6 4 port 105 9 3 6 T...

Page 5: ...DN01145897 Nokia Corporation 5 128 Issue 2 0 en Nokia Proprietary and Confidential Appendix A 121 A 1 Commissioning chart 121 Glossary 125 ...

Page 6: ...Data Network Terminal Single port and Multiport Operating Instructions 6 128 Nokia Corporation DN01145897 Nokia Proprietary and Confidential Issue2 0en ...

Page 7: ...ssue 2 0 en Nokia Proprietary and Confidential Summary of changes Document Date Comment DN01145897 Issue 1 0 en 19 April 2002 DN01145897 Issue 2 0 en 27 March 2003 Information on two new D2048 interface units E62628 10 and E62628 11 added ...

Page 8: ...Data Network Terminal Single port and Multiport Operating Instructions 8 128 Nokia Corporation DN01145897 Nokia Proprietary and Confidential Issue2 0en ...

Page 9: ...is document These operating instructions introduce the DNT2Mi Data Network Terminal and provide information needed for its installation and use The terminal interface units that are used in DNT products are presented separately in document DTE Interface Units for Nokia Data Network Terminals Operating Instructions ...

Page 10: ...Data Network Terminal Single port and Multiport Operating Instructions 10 128 Nokia Corporation DN01145897 Nokia Proprietary and Confidential Issue2 0en ...

Page 11: ...t below DNT2Mi terminals Nokia DNT2Mi is a single or multiport sp mp data access network terminal intended for customer premises It provides a two wire or four wire SHDSL line interface ITU T G 991 2 and up to three interchangeable DTE interface units The following interface units are available for more information refer to Table 2 V 11 V 28 V 35 X 21 G 703 64k G 703 2M ...

Page 12: ...Division Multiplexing TDM which allows dividing the transmission capacity over each DTE interface according to application needs Power supply DNT2Mi can be fed either with AC 90 to 264 V DC 20 to 75 V or remotely via ACL2i through the line Management DNT2Mi can be managed locally with the front panel keys Nokia s hand held Service Terminal or with a Microsoft Windows based Macro Service Terminal E...

Page 13: ...ange PABX connections see Figure 2 The device can be controlled configured and tested either by using the front panel keys and the LCD display or via Nokia s common network management system Figure 2 An example of DNT2Mi use DNT2Mi can also be used in point to point connections with a DNT2Mi terminal at both ends of the line see Figure 3 PABX Data Local Exchange SHDSL DNT2Mi Multiport PDH network ...

Page 14: ...ta access and enables TDM multiplexing of line rates to three n x 64k ports It also incorporates V 110 rate adaptation enabling port rates lower than 64 kbit s The line rate is n x 64 kbit s n 3 to 32 in two wire connection n 6 to 32 in four wire connection but only even numbers can be used and the Trellis Coded Pulse Amplitude Modulation TC PAM coding is used for transmission DNT2Mi multiport DNT...

Page 15: ... 0 en Nokia Proprietary and Confidential 4 Construction and interfaces This chapter introduces the mechanical construction and interfaces of DNT2Mi 4 1 Front panel The front panel of DNT2Mi includes a display LED indicators push button keys and a local management connector ...

Page 16: ...PC or with other Nokia management software If signal 108 DTR is on connecting the Service Terminal Emulator will disconnect DNT2Mi from the remote network management If signal 108 is off the entire network can be managed through this equipment Management interface cables of DNT2Mi are listed in Table 1 Electrically management interface signals comply with ITU T V 28 or V 11 The selection is made u...

Page 17: ... P1 P2 P3 1 8 Local management connector RJ 45 1 107 OUT Tx b OUT 2 108 IN 3 109 OUT Tx a OUT 4 SG SG 5 103 IN Rx b IN 6 104 OUT 7 105 IN Rx a IN 8 106 OUT V 28 V 11 Table 1 Management interface cables Code Name Connector type Length TX21750 Management cable ST ACL2i Euro c 4 3x7F D15F 1 5 m TX25741 06 Management cable PC ACL2i D9M D9F 3 m E64320 01 Management cable PC DNT2Mi RJ45 D9F 3 m ...

Page 18: ...ment interface Figure 6 Q1 management bus E62711 01 Management cable ST DNT2Mi RJ45 D15F 1 5 m DZ60639 1 Management cable PC DNT2Mi RJ45 D25F 3 m ST Service Terminal DNT2Mi Single port or multiport n x 64 kbit s stand alone Network Terminal PC PC Service Terminal Emulator ACL2i 2 Mbit s SHDSL Rack mounted Line Terminal Table 1 Management interface cables Continued Code Name Connector type Length D...

Page 19: ...ine 4 RPWR 1 b Multiport DNT2Mi Single port DNT2Mi The two upper adapters are upside down 2 1 a 3 Line 4 RPWR 1 b Remote powered DNT2Mi 1 c OUT OUT OUT AC VERSION DC VERSION REMOTE POWERED VERSION 1 a Remote power input c Remote power input cable 1 a Mains connection b Mains switch 1 a DC connection b DC switch 2 DTE interfaces 3 Line interface 2 wire or 4 wire 4 Remote power feeding output X 21 X...

Page 20: ... 4 2 1 Terminal interfaces This section briefly introduces the DTE interface unit options For more detailed information refer to document DTE Interface Units for Nokia Data Network Terminals Operating Instructions 123456 6 pin modular jack RJ 11 Line 1 2 3 Not connected 4 Not connected 5 6 Pin Line 1a Line interface Line 1b Line 2a not in use in 2 w mode Line 2b not in use in 2 w mode ...

Page 21: ...2M V 11 X 21 G 703 64k V 28 V 35 EIA 530 A G 703 2M 1 6 9 R T 432 7 8 C 5 5 1 6 9 432 7 8 1 1 1 9 8 1 G 704 2M ASYM75 SYM120 IN OUT IN OUT 19 37 20 1 9 8 15 13 25 14 15 13 25 14 SYMM 120 G 703 2M ASYMM 75 IN OUT D2048 G 703 2M BNC 1 8 1 8 G 704 2M G 704 2M IN OUT 75 75 IN OUT G 704 2M 1 8 75 IN OUT G 704 2M 1 8 75 75 D2048 RJ45 SMB D2048 RJ45 BNC 75 ...

Page 22: ...cally Connector type Product code V 11 V 11 V 10 D37F DS 62603 11 V 24 V 28 1 D25F DS 62602 11 V 35 V 35 V 28 34F DS 62604 11 X 21 V 11 D15F DS 62605 11 G 703 64k G 703 D15F DS 62609 11 G 703 2M G 703 SMBM BNC or D9F DS 62607 11 G 704 2M G 703 SMBM or D9F DS 62608 11 EIA 530 A V 11 V 10 D25F DS 62610 11 ET 10Base T RJ45 E66210 02 Router Bridge E66210 22 Bridge D2048 G 703 RJ45 E62628 01 D2048 G 70...

Page 23: ...ts are provided with adapters or unused ports provided with dummy plates The DTE cables and connectors are provided with reliable shielding The connector s connecting screws are properly fastened so that shielding integrity from the metal housing of the equipment to the cable shield over the interconnecting interface is secured A grounded 3 conductor mains cord and a grounded mains outlet for main...

Page 24: ...n in Figure 11 In a modem shelf installation slot sizing of the shelf ensures adequate horizontal clearances between the units Heat released from the unit is insignificant and does not therefore set requirements on the clearances around the equipment DNT2Mi is cooled through natural convection through air inlets and outlets located in the bottom and top of it Do not cover DNT2Mi The air inlets and...

Page 25: ...ower lines refer to Section 5 8 4 Connect DNT2Mi to your DTE and to the line 5 Switch on the power AC or DC The modem performs a self test 6 Adjust the LCD contrast if needed refer to Section 5 9 2 Then proceed to check that the main settings are correct the settings are described in Chapter 6 The settings can be checked and altered using either the front panel keys and display Chapter 8 or by usi...

Page 26: ...o insert DTE interface units 1 Make sure that the power is switched off The multiport version of DNT2Mi has three slots and the DTE interface units that go to the upper slots 2 and 3 need to be inserted upside down 2 Insert a DTE interface unit carefully into the slot 3 Tighten the two screws Figure 12 Inserting DTE interface units into DNT2Mi single port Screws ...

Page 27: ...d incidentally 2 Guide the strain relief as advised in Figure 24 3 Take care of the grounding as advised in Section 5 2 5 7 Installing DNT2Mi on a wall or into a rack This section gives instructions for the mechanical installation of DNT2Mi into a 19 inch rack or on a wall The mounting accessories used are DS 62000 1 Modem shelf for low housing single port 7 units DF 62001 1 Wall mounting bracket ...

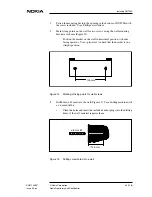
Page 28: ...nd slide the angled end of the mounting bar towards the rear panel Ensure that the pin in the other end of the mounting bar locks into the opening in the bottom of DNT2Mi Wall mounting bracket Mounting bar 6 1 2 3 4 5 Slide angled end of the mounting bar towards the rear panel Fasten to DNT2Mi with the screw included Mark fixing points on the wall using the bracket as schema Drill holes 45 mm Lift...

Page 29: ...cket as schema Figure 14 Position the bracket on the wall in horizontal position its hooks facing upwards Use a spirit level to check that the bracket is in a straight position Figure 14 Marking of fixing points for wall screws 4 Drill holes 45 mm into the wall Figure 15 Use a drilling machine with a ø 6 mm drill bit Clean the holes and insert the included anchor plugs into the drilling holes if t...

Page 30: ... the wall Slide the fixing holes of the mounting bar into the hooks of the wall mounting bracket and lay the lower end of DNT2Mi down against the wall 5 7 2 Uninstalling a wall mounted DNT2Mi To uninstall a wall mounted DNT2Mi 1 Switch off the power 2 Disconnect the cabling 3 Lift DNT2Mi from the hooks of the wall mounting bracket Figure 16 Uninstalling DNT2Mi from the wall 5 7 3 Installing a mode...

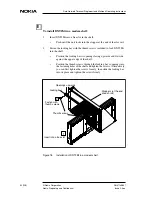
Page 31: ... the fixing holes in the rack 2 Put the rack mounting nuts 8 pcs to the rack and fix the modem shelf to the rack with eight screws 3 Tighten the screws with a 5 mm Allen key Figure 17 Installing a modem shelf into a 19 inch rack 5 7 4 Installing DNT2Mi in a modem shelf After you have installed the modem shelf into a 19 inch rack or cabinet continue by installing DNT2Mi in the modem shelf Rack nuts...

Page 32: ...d to lock DNT2Mi into the shelf Position the locking bar its openings facing upwards and flat side against the upper edge of the shelf Position the thumb screws through the locking bar s openings into the fastening holes of the shelf and tighten the screws Alternatively you can first tighten the screws loosely then slide the locking bar into its place and tighten the screws firmly Figure 18 Instal...

Page 33: ...h off the power 2 Disconnect the cabling 3 Loosen the thumb screws of the locking bar Do not remove the screws completely 4 Remove the locking bar by pushing it to left and stringing it out through the slots 5 Draw DNT2Mi out of the modem shelf Figure 19 Uninstalling DNT2Mi from a modem shelf 3 Loosen thumb screws 2 Disconnect cabling 4 Remove locking bar 5 Draw DNT2Mi out 1 Switch power off ...

Page 34: ... Using the protective ground conductor for other purpose is dangerous to life Ensure that the ground connection is established before the power outlet is connected to the power interface The power supply of DNT2Mi can operate at the following voltages 90 to 264 VAC AC powered unit 20 to 75 VDC DC powered unit 50 to 150 V remote powered via ACL2i Power interfaces are located on the rear panel of DN...

Page 35: ...Proprietary and Confidential Figure 20 Principle of a negative grounded DC power system Figure 21 Principle of a positive grounded DC power system 48V system Earthing bar bar Fuse 2 A max 10 A 1 0 mm2 1 0 mm2 E 48V system Earthing bar bar Fuse 2 A max 10 A 1 0 mm2 1 0 mm2 E ...

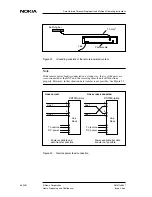
Page 36: ...s are cross connected at the DNT end the receiving remote unit still functions properly However in this situation data transfer is not possible See Figure 23 Figure 23 Remote power feed connection Earthing bar Line 1 0 mm 2 Power cable To remote DC power Line 1 Line 2 DNT2Mi rp mp To remote DC power Line 1 Line 2 DNT2Mi rp mp Line block Line block Lines correct Lines cross connected Power availabl...

Page 37: ... seen the line is too long or the power supply is broken The status LED is red Check the Status field of the top level menu display and check the Status and Alarm submenus under the Monitoring menu Location of error source Test the connection according to information in Section 7 3 The network terminal must be connected to a ground mains outlet 5 8 2 Strain relief In an AC powered unit guide the p...

Page 38: ...cted to maintain proper circulation of air 5 9 2 Adjusting the LCD display The LCD adjustment see Figure 25 may be necessary if the viewing angle differs from the normal table top viewing angle which is the case for example in a wall mounting Adjust the contrast with a small crosshead screwdriver Figure 25 Adjusting LCD contrast 5 9 3 Recommended actions after the installation After the installati...

Page 39: ...minal Emulator running on a PC using Q1 Other Nokia management products such as Nokia NMS can be used for the same purpose Menu structure for the front panel menus is shown in Chapter 8 Menu structure for Q1 management is shown in Chapter 9 The tables in Appendix A can be used to mark down information gathered during the commissioning procedure It can take up to 60 seconds to save the altered sett...

Page 40: ... 1 1 The Q1 transmission speed needs to be set to match the system management speed Q1 address information Q1 6 1 2 The equipment needs a Q1 address to be visible in the NMS systems You must give a unique address to each equipment You can also enter a name for the equipment by using the command 4 7 2 1 Q1 management path Q1 6 1 3 The routing of the management must be defined to correspond with the...

Page 41: ...6 4 Line settings You have to check the following items Line interface Q1 6 3 3 The line interface settings determine line SHDSL mode connection speed and use of wires Typically DNT2Mi is configured as STU R Rate Adaptive The Rate Adaptive mode automatically adapts the requested fixed line rate to STU C Power backoff Q1 6 3 6 Select this option to enable or disable transmit power reduction on shor...

Page 42: ...k that the Q1 alarm visibility is set correctly that is enabled or disabled If Q1 alarms are disabled port alarms are not visible in the NMS system Also the BER alarm limit and the alarm severity need to be checked 6 6 Time slot settings Q1 6 5 DNT2Mi can map a certain amount of time slots from the line connection directly to a port Check and configure the time slot allocations if necessary Pay cl...

Page 43: ...ne is up check the noise margin Rx level and line attenuation from the Measurements menu You can use Table 28 in Appendix A to mark down the results for line attenuation Bit error rate test We recommend you to perform a five minute bit error rate BER test For the test you need an external test equipment You can use Table 27 in Appendix A to mark down the results After the tests Check that all alar...

Page 44: ...olute and relative values Signal quality Last 24 hours Signal quality monitored during 1 period of 24 hours to max 4 with front panel menus or 30 with Q1 menus successive periods of 24 hours Front panel menus give you absolute values and Q1 menus both absolute and relative values Table 4 Explanation of noise margin Noise margin Bit error ratio 15 dB 1 dB Expected BER 10 7 0 dB Expected BER 10 7 Ta...

Page 45: ...wer backoff ON Bit error alarm limit 10 6 Table 7 Multiplexer parameters Use of time slots No time slots connected Table 8 Port parameters V series V 11 V 28 V 35 or EIA 530 A Port rate n x 64k n 1 Use of V 110 rate adaptation in port 2 or 3 Not in use In port 2 or 3 9600 kbit s Synchronous Remote loop detection Allowed Externally caused alarms Disabled not to be seen through Q1 However even if th...

Page 46: ...cuit C Ignored Circuit I Follows line synchronisation Use of RL request from DTE Disabled Use of LL request from DTE Disabled Table 10 Port parameters G 703 64k Port rate n x 64k n 1 Remote loop detection Allowed Externally caused alarms Disabled not to be seen through Q1 However even if these alarms are disabled they cause front panel alarms Port rate 64k always Interface mode Codirectional AIS m...

Page 47: ...red as factory settings When the factory settings are recalled the values in this section and in Section 6 9 become effective Recalling of factory settings can take up to 60 seconds G 704 TS map Equal to line Unused time slots Filled with FF National bits Sa4 to Sa8 1 BER alarm limit 1E 3 BER alarm severity B level Table 11 Port parameters G 704 2M Continued Table 12 Factory values Q1 address 2 Q1...

Page 48: ...Data Network Terminal Single port and Multiport Operating Instructions 48 128 Nokia Corporation DN01145897 Nokia Proprietary and Confidential Issue2 0en ...

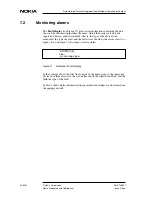
Page 49: ... information The front panel menu Monitor Info or the Identifications menu branch 4 on the Q1 main menu gives the name and type of the unit to be monitored the codes and versions of HW units and programs to be used Figure 26 Example of general information In this menu only the name of the supervised unit is changeable To change the name select Modify Q1 menu option 4 7 2 1 Note that the maximum le...

Page 50: ...evice supervision block that is the type of the device to be monitored the type of a fault and the fault status shown by the alarm class A urgent B non urgent AS urgent service alarm Figure 27 Example of Fault display In the example above the first line consists of the name given to the supervised device and alarm class AS the second line shows the supervision block and the third the type of the f...

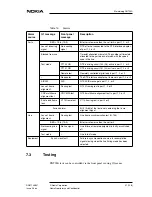
Page 51: ...in port 1 2 or 3 Remote test Remotely controlled digital loop in port 1 2 or 3 No adapter The DTE interface adapter not in place in port 1 2 or 3 AIS 2M AIS G 704 AIS message in port 1 2 or 3 Loss of frame alignment Framing lost G 704 framing lost in port 1 2 or 3 CRC multiframe alignment lost CRC MFA lost G 704 multiframe alignment lost in port 1 2 or 3 End to end frame loss V 110 frame lost V 11...

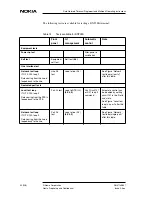
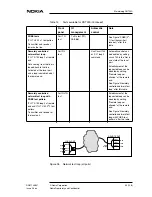
Page 52: ...X 150 loop 2 Data coming from the line is looped back to the line Line DL test Loop to line DL See Figure Network test loop all ports after this table Dedicated port tests Local test loop ITU T X 150 loop 3 Data coming from the DTE is looped back to the DTE Port LL test Loop to DTE LL 5 2 3 V xx Circuit 141 or X 21 loop 3 command Automatic control can be disabled by setting circuit 141 in the Not ...

Page 53: ...y setting circuit 140 in the Not in use state at the local port Establishment of the requested loop can be disabled by setting Remote loop not allowed at the remote end See Figure Remotely controlled network test loop after this table Remotely controlled network test loop with PRBS test pattern ITU T X 150 loop 2 at remote end and ITU T V 52 29 1 test pattern Transmitter and receiver at the local ...

Page 54: ... 29 Local test loop in a port Figure 30 Network test loop single port Figure 31 PRBS 29 1 test transmitter receiver PORT 1 DTE PORT 2 DTE PORT 3 DTE REMOTE DNT PORT 2 DTE PORT 3 DTE LOCAL DNT DTE PORT 2 DTE PORT 3 DTE LOCAL DNT DTE PORT 1 DTE PORT 2 DTE PORT 3 DTE REMOTE DNT PORT 1 DTE PORT 2 DTE PORT 3 DTE REMOTE DNT PORT 2 DTE PORT 3 DTE LOCAL DNT DTE Tx Rx ...

Page 55: ...ked through the front panel control and Q1 measurements cover various quality parameters line and error counters The parameters that can be viewed through the front panel menus or the Q1 menus Measurement main menu branch 7 and Statistics main menu branch 8 are listed below Measurements via the front panel or Q1 Noise margin Rx level Tx level DTE PORT 2 DTE PORT 3 DTE REMOTE DNT PORT 1 PORT 2 DTE ...

Page 56: ...ime during which severely errored seconds have occurred Errored seconds ES Rx Tx Number of errored seconds Severely errored seconds SES Rx Tx Number of seconds during which 30 blocks are errored Background block errors BBE Rx Number of errored blocks except blocks during severely errored seconds and unavailable time The block size depends on the used line rate Unavailability time ratio UATR Rx Tx ...

Page 57: ...menus DN01145897 Nokia Corporation 57 128 Issue 2 0 en Nokia Proprietary and Confidential 8 Using front panel menus This chapter describes the front panel menus and how to navigate between them using the front panel keys ...

Page 58: ...et Ready Line Signal Detector Clear to Send 108 107 109 105 106 LED The states of these signals are shown Test on Active data in port 1 2 or 3 Colour Green Red Red Green TEST P1 P2 P3 OFF ON State of signal DTE signal active during INTERFACE SIGNALS Display blinking DTE signal inactive during in the Port display of the Monitoring menu the last 15 minutes the last 15 minutes LED INDICATORS OK EXIT ...

Page 59: ... in the STU R 4 wire mode only and does not affect data flow DTR DSR DCD RTS CTS STATUS P1 P2 The OK key takes you one The EXIT key takes you one The arrow keys are used for scrolling the alternatives on a menu level EXIT OK TEST P3 PWR L1 1024 L2 1024 STU R OK Display Shows the status information test results configuration options and monitoring information level down in the menu It also selects ...

Page 60: ...onfiguration option on the bottom row starts to blink indicating that you are allowed to change it Note that the menu has an individual configuration parameter set for each port type OK EX OK EX OK EX OK EX Main Menu Level Monitor DNT2Mi Status OK Main Menu Level Configure Main Menu Level Test Monitor Port 1 Configure Port 1 Test Port 1 Monitor Port 2 Configure Port 2 Test Port 2 Monitor Port 3 Co...

Page 61: ...lay only when changes have been made to the edit buffer If the OK key is pressed the changes are stored and activated Pressing the EXIT key ends the configuration procedure and nothing is changed The asterisk indicates whether a parameter value is currently stored in the non volatile memory that is the parameter value is used also the next time when the modem is switched on If the port adapter is ...

Page 62: ... alarms Use of CT141 Use of CT141 In use Use of CT140 Use of CT140 Ignored Use of CT107 Use of CT107 CT103 timing CT114 CT105 CT106 use Ignored CT103 timing CT105 CT106 use Ignored CT105 CT106 use Delay 8 bits CT105 CT106 use Delay 255 bits CT105 CT106 use Simul carrier EX OK OK OK OK EX Use of CT109 Normal Use of 109 Normal Use of CT109 Simul carrier OK EX Use of CT107 Ignored CT108 CT107 OK EX U...

Page 63: ...Not in use Configure Port 3 V 110 Not in use V 110 1200 bits s V 110 56 kbits s Only if V 28 adapter and V 110 in use CT103 timing CT114 CT103 timing CT113 CT105 CT106 use Ignored CT105 CT106 use Delay 8 bits V 110 2400 bits s OK EX Port mode Port mode Port mode Async 8 bits Port mode Async 11 bits CT105 CT106 use Delay 256 bits CT105 CT106 use Simul carrier EX OK OK EX OK OK OK EX Use of CT109 No...

Page 64: ...K OK OK OK OK OK OK Circuit C Ignored Circuit I Normal DTE alarms Disabled Save OK Exit Configure Port 1 Remote loop Allowed RL from DTE Not allowed V 110 Not in use Configure Port 2 V 110 Not in use V 110 1200 bits s V 110 56 kbits s Configure Port 3 Only for port 2 and port 3 Accept Dismiss Circuit C Ignored Circuit C Simul Carrier Circuit I Normal Circuit I Simul Carrier DTE alarms Disabled DTE...

Page 65: ...ms Disabled OK EX Remote loop Allowed OK EX OK EX EX OK OK EX OK Accept Dismiss Interface mode Contradir AIS mode Octet tim disab AIS mode Octet tim enab Disabled Enabled Remote loop Allowed Remote loop Not allowed Save OK Exit Configure Port 1 Configure Port 2 Configure Port 3 OK EX Dismiss Save OK Exit Configure Port 1 OK EX EX OK OK Configure Port 2 Configure Port 3 Accept DTE alarms Disabled D...

Page 66: ... alarm limit 1E 6 BER alarm sever B level BER alarm sever AS level OK EX OK EX OK EX Not with D2048 adapter TS map Equal to line Idle Channels Code FF Sa4 Sa8 bits 11111 Save OK Exit Configure Port 1 Framing format Basic frame Configure Port 2 Configure Port 3 Accept Dismiss TS0 bit Sa5 Fixed to 1 Only with D2048 adapter Framing format Basic frame Framing format CRC multiframe Framing format CRC m...

Page 67: ...onfigure Port 3 Ports 2 and 3 in multiport version only Input level 22 0 dBm 2 w OK EX DTE if alarms Disabled OK EX Input level 22 0 dBm 2 w Input level 7 0 dBm 2 w DTE if alarms Disabled DTE if alarms Enabled 1 1 Scale 0 5 dBm resolution 22 0 dBm to 7 0 dBm 2 wire 22 0 dBm to 7 0 dBm 4 wire Remote loop Allowed OK EX Remote loop Allowed Remote loop Not alowed OK EX OK Save OK Exit EX ...

Page 68: ...Accept B level 1E 3 ON B level 1E 3 ON OFF OK EX Power backoff Power backoff Power backoff 1E 6 OK EX BER alarm limit BER alarm limit BER alarm limit OK EX BER alarm sever BER alarm sever AS level BER alarm sever psdS PSD mask Symmetric 32 Line rate the value of n x 64k For more information refer to Section 9 3 4 Line settings SHDSL mode STU R Adaptive 2 4 wire 2 wire 2 4 wire 4 wire OK EX n 3 192...

Page 69: ...last TS n 0 Add time slot to Port 1 Give 1st TS n 1 Give last TS n 1 Give last TS n 2 Give last TS n 31 Timing source Transparent EX EX OK EX Mng path Line OFF Mng path Line OFF Mng path Line ON Mng speed 4800 bits s Mng speed 9600 bits s Mng addr 0002 Mng addr 0002 Mng addr 4094 1 4094 600 1200 2400 4800 9600 EX Mng path LMI ON Mng path LMI ON Mng path LMI OFF Front panel keys In use EX Front pan...

Page 70: ...97 Nokia Proprietary and Confidential Issue2 0en 8 2 4 Default settings Figure 46 Front panel menus for default settings OK EX EX OK Common defaults Port 1 Common defaults Line Common defaults Port 2 Save OK Exit Configure Default settings Common defaults Port 3 Common defaults Factory Common defaults All ...

Page 71: ...ting a line OK EX OK EX OK EX OK EX OK EX OK EX Port TR test 1 Port LL test Port DL test Port RL test 1 Port TR test Error count 0000 Port RLTR test 1 Test Port 1 Test Port 2 Test Port 3 Port LL test ON Port Test not allowed Port DL test ON Port RL test Port RL test ON Port RLTR test Port RLTR test Error count xxxx Port RLTR test Error count 0000 or 1 The test is not possible with the D2048 adapte...

Page 72: ...28 Nokia Corporation DN01145897 Nokia Proprietary and Confidential Issue2 0en 8 3 3 Testing the equipment Figure 49 Front panel menus for testing the equipment OK EX OK EX Equipment Self test Test Equipment Equipment Self test Equipment Self test OK Equipment Self test FAIL or ...

Page 73: ...Tx ES 0000 Rx BBE 0000 Start time 1 d xx h xx m xx P1 signal qual 24 h periods Start time 0 d xx h xx m xx Monitor Port 2 Monitor Port 3 Only with V xx or X 21 or EIA or ET adapters Start time 0 d xx h xx m xx Rx UAT 0000 Tx UAT 0000 Rx SES 0000 Tx SES 0000 Rx ES 0000 Tx ES 0000 Rx UAT 0000 Tx UAT 0000 Rx SES 0000 Tx SES 0000 Rx BBE 0000 Start time 1 d xx h xx m xx G 704 2M adapter and CRC multifr...

Page 74: ...se margin dB L1 xx L2 xx Attenuation dB L1 xx L2 xx Rx level dBm L1 xx L2 xx OK EX Monitor line Measurements Monitor Line Tx level dBm L1 xx L2 xx OK EX Monitor line Statistics Signal qual L1 15 min periods Start time 0 d xx h xx m xx RX UAT xxxx OK EX Line voltage V xxx OK EX Start time 1 d xx h xx m xx RX SES xxxx RX BBE xxxx Signal qual L1 24 h periods Signal qual L2 24h periods Signal qual L2 ...

Page 75: ...rt No incoming sig Monitor Alarms Line No line signal Equipment Hardware error Port CRC MFA lost Alarms No alarms Line No frame sync Line BER 1E 6 Line BER 1E 3 Line STU R pwr OFF Port Framing lost Port AIS Port V 110 frame lost Port No adapter Port Remote test Port CT141 Port CT140 Port BER 1E 3 Port BER 1E 6 Equipment Sync clock fault Port Blocked from use Port Far end alarm OK EX ...

Page 76: ...el menus for self testing Info DNT2Mi T65680 SW S65672 01 A0 Basic HW E65671 01 A0 Port 1 V 11 DS62604 Mux HW E65633 01 A0 Port 2 D2048 E62628 01 A0 Port 3 Empty v 28 v 11 v 35 x 21 G 703 2M G 704 2M G 703 64K EIA 530 A D2048 ET VF DS62602 DS62603 DS62604 DS62605 DS62607 DS62608 DS62609 DS62610 E62628 E66210 displayed as V 35 adapter E62612 OK EX Monitor Info Monitor Self test result Self test res...

Page 77: ...wing 11 menus of which those available in DNT2Mi are typed in boldface in the list below 1 Fault display 2 Local alarm cancel 3 Reset local cancel 4 Identifications 5 Controls temporary 6 Settings permanent 7 Measurements 8 Statistics 9 Testing 10 User privileges 11 Miscellaneous The options of the DNT2Mi menus are described in more detail in the following subsections ...

Page 78: ...ations 0 Display 2 Eq name DNT controls 0 Display 1 All test loops off 2 Port test loops 3 Line test loops 4 5 DNT settings 0 Display 1 Service options 2 Timing source 3 Line settings 4 Port settings 5 Timeslot use 6 Default settings 7 Load factory settings 6 DNT measurements 0 Display all 7 DNT statistics 8 DNT privileges 1 Password 4 Setting parameters 5 Front panel rights 10 not implemented 1 E...

Page 79: ...pe DNT2Mi mp T65680 HW Main E65671 01 A Mux E65633 01 A SW S65672 01 A0 Port 1 V 11 DS62603 Port 2 No adapter Port 3 G 704 2M DS62608 Installation Date First 2003 03 16 Last 2003 03 27 Installed by K Reijonen Serial number 4H0122334455H 4 1 DNT2Mi mp 4 2 DNT2Mi 4 5 HW units Main E65671 01 A Mux E65633 01 A 4 6 SW version S65672 01 A0 4 7 Modify 2 Eq name 4 Installation info 4 7 2 Eq name 0 Display...

Page 80: ...y and Confidential Issue2 0en Figure 57 Identifications menu continued 4 7 4 Intallation info 0 Display 1 Modify 4 7 4 1 1 Give new Installation date yyyy mm dd 4 7 4 1 2 Give new Installer Max20 characters 4 7 4 0 Installation info Date First 2003 03 22 Last 2003 03 29 Installed by K Reijonen 4 7 4 1 1 Date 2 Installed by ...

Page 81: ... number 1 2 or 3 5 5 2 5 2 port 5 4 DNT controls 0 Display 1 All test loops off 2 Port test loops 3 Line test loops 4 Self test Port port test loops 0 Display 1 Port test loops off 2 Loop to line DL 3 Loop to DTE LL 4 Tx Rx test TR 5 3 Self test 0 Result of last ST 1 Start Self Test Line test loops 0 Display 1 Line test loops off 2 Loop to Line DL ...

Page 82: ... 6 1 3 6 1 4 6 2 6 3 6 4 6 5 6 6 6 7 DNT settings 0 Display 1 Service options 2 Timing source 3 Line settings 4 Port settings 5 Timeslot use 6 Default settings 7 Load factory settings Service options 1 Q1 Speed 2 Q1 Address 3 Q1 Management path 4 Test time out limit 6 6 1 Q1 speed 0 Display Set speed 600 9600 6 1 1 Q1 address 0 Display 1 Modify 6 1 2 Give new address 0 to 4094 6 1 2 1 ...

Page 83: ... 6 6 6 7 Test time out limit 0 Display 1 to 64999 min 65000 no limit 6 1 4 Q1 Management path 0 Display 1 Q1 via Line 2 LM interface 6 1 3 6 1 3 2 3 Interface type 0 Display 1 V 11 2 V 28 Q1 via Line 0 Display 1 On 2 Off 6 1 3 1 LM Interface 0 Display 1 On 2 Off 3 Interface type 6 1 3 2 Timing source 0 Display 1 Internal 2 Line 3 Port1 4 Transparent 6 2 ...

Page 84: ...severity 6 3 Line interface SHDSL mode 1 STU C fixed 2 STU R rate adaptive 6 3 3 6 4 6 5 6 6 6 7 6 3 3 1 Line if STU C 2 4 wire mode 2 Two wire 4 Four wire 6 3 3 1 2 Line if STU C 2w PSDS Give line rate n 3 32 6 3 3 1 4 Line if STU C 4w PSDS Give line rate n 6 32 even number 6 3 6 6 3 8 6 3 9 psdS Power special density mask Symmetric 32 Line rate the value of n x 64k For more information refer to ...

Page 85: ...a Proprietary and Confidential Figure 62 Settings menu structure continued 6 4 6 5 6 6 6 7 6 3 9 BER alarm severity 0 Display 1 No alarm 2 A level alarm 3 B level alarm 4 AS level alarm 6 3 8 BER alarm limit 0 Display 1 E 3 2 E 6 6 3 6 Power backoff 0 Display 1 ON 2 OFF ...

Page 86: ...structure continued 6 6 Default settings 1 Port1 2 Port2 3 Port3 4 Line 9 All 6 5 1 Give TS s e g 0 8 16 20 6 5 Timeslot use 0 Display 1 Modify 6 4 Port settings Give port number 1 2 or 3 6 4 port 6 5 1 TS Modify TS 1 Add to port1 2 Add to paort2 3 Add to port3 4 Remove 6 6 1 9 Default settings Are you sure 1 Cancel 99 Yes 6 7 Load factory settings Are you sure 1 Cancel 99 Yes ...

Page 87: ... Connection name RL control 0 Display 1 Allowed 2 Not allowed V 110 rates 0 1 2 1200 bit s 3 4 5 6 7 8 6 4 port port 2 and or port 3 only DTE if alarm 0 Display 1 Q1 alarms enabled 2 Q1 alarms disabled Connection name 0 Display 1 Modify Give new connection name 1 to 15 characters 6 4 port 4 6 4 port 2 6 4 port 5 6 4 port 6 6 4 port 6 1 6 4 port 3 Display Not in use 2400 bit s 4800 bit s 9600 bit s...

Page 88: ...ng format 0 Display 1 No frame 2 Basic frame 3 CRC multiframe 4 BF monitoring 5 CRC monitoring Only with D2048 adapter 6 4 port 3 4 TS map 0 Display 1 Set equal to line 2 Select 1st TS 3 Select 1st TS special TS Sa bits usage 0 Display 1 Fill Sa4 2 Fill Sa5 3 Fill Sa6 4 Fill Sa7 5 Fill Sa8 6 4 port 3 6 BER alarm limit 0 Display 1 E 3 2 E 6 6 4 port 3 7 BER alarm severity 0 Display 1 No alarm 2 A l...

Page 89: ...e 2 DCD use 3 DSR DTR use 4 CT140 use 5 CT141 use RTS CTS use 0 Display 1 CTS ON 2 RTS CTS delay 8 bits 3 RTS CTS delay 255 bits 4 Simulated carrier DSR DTR use 0 Display 1 DTR controls DSR 2 DSR ON CT140 use 0 Display 1 In use 2 Not in use 6 4 port 3 1 6 4 port 3 2 6 4 port 3 3 6 4 port 3 3 1 6 4 port 3 3 2 6 4 port 3 3 3 6 4 port 3 3 4 6 4 port 3 3 5 V type inteface settings V type DTE 1 Sync as...

Page 90: ... Simulated carrier Circuit I 0 Display 1 Follows line sync 2 Simulated carrier RL request 0 Display 1 In use 2 Not in use LL request 0 Display 1 In use 2 Not in use 6 4 port 3 1 6 4 port 3 2 6 4 port 3 3 6 4 port 3 4 X 21 interface settings X 21 type DTE 0 Display 1 Circuit C 2 Circuit I 3 RL request 4 LL request 6 4 port 3 VF type DTE 0 Display 1 Input level 6 4 port 3 Give input level 0 Display ...

Page 91: ...ntinued G 703 64k G 703 2M AIS mode 0 Display 1 Octet timing enabled 2 Octet timing disabled Interface mode 0 Display 1 Codirectional 2 Contradirectional 6 4 port 3 1 6 4 port 3 2 G 703 64k Interface settings G 703 2M Interface settings G 703 64k DTE 0 Display 1 AIS mode 2 Interface mode G703 2M DTE No parameters 6 4 port 3 6 4 port 3 ...

Page 92: ...T measurements 0 Display all 1 Noise margins 2 Rx levels 3 Tx levels 4 Attenuations 5 Line voltage Pair 1 2 Line voltage xxV 7 7 0 Noise margins Pair 1 xxdB Pair 2 xxdB 7 1 Rx levels Pair 1 xxdBm Pair 2 xxdBm 7 2 Tx levels Pair 1 xxdBm Pair 2 xxdBm 7 3 Attenuation Pair 1 xxdB Pair 2 xxdB 7 4 Line voltage xxV 7 5 NM dB xx xx At dB xx xx Tx dBm xx xx Rx dBm xx xx NM Noise margin At Attenuation ...

Page 93: ...rt 2 8 1 port 3 8 1 port 4 8 2 8 3 15 min 24h relative statistics PO xxd xxh xxmin xxs UATR ESR SESR BBER UATR ESR SESR 8 1 port 3 1 8 1 port 3 2 8 1 port 4 1 8 1 port 4 2 Rx Rx Rx Rx Tx Tx Tx xxxxx xxxxx xxxxx xxxxx xxxxx xxxxx xxxxx 15 min 24h absolute statistics PO xxd xxh xxmin xxs UAT ES SES BBE UAT ES SES Rx Rx Rx Rx Tx Tx Tx xx xx xx xx xx xx xx Statistics since last reset TT 2d 3h 45min 12...

Page 94: ... 15 min relative Rx statistics PO 0d 0h 4min 38s UATR ESR SESR BBER Line1 Line stat absolute 1 15 min periods 2 24h periods 3 Since last reset 8 2 4 8 2 4 1 8 2 4 2 8 2 4 3 System counters 1 CPU reset counter 2 Time since reset CPU reset counter 0 Display 1 Reset counters Time since last reset 123d 12h 34min 8 3 8 3 1 8 3 2 Line1 Rx statistics since last reset TT 0d 1h 12min 52s UAT ES SES BBE Lin...

Page 95: ...1 7 characters Setting parameters 1 Password timeout 2 Protections 3 Password Password timeout 0 Display 1 to 1000 min Protections 0 Display 1 No protection 2 Password required Give new password 1 7 characters Front panel rights 0 Display 1 Configuring 2 Test activation Configuring 0 Display 1 Allowed 2 Not allowed Test activation 0 Display 1 Allowed 2 Not allowed 10 10 1 10 4 10 4 1 10 4 2 10 4 3...

Page 96: ...lf Test submenu which shows the result of the last self test and enables the activation of a self test The activation of this test cuts off the connection between the network manager and the unit The result of the self test can be read after the unit has performed the whole test The test takes about 20 seconds The activation of a self test also cuts the data connection 9 3 DNT settings 6 9 3 1 Dis...

Page 97: ...ng to the speed used in the management network DNT settings Q1 speed 4800 Q1 address 2 Q1 via line Off LM interface On Test timeout limit 10 Timing source Line Line interface BER alarm limit 1E 3 BER alarm severity B level Port 1 V 35 rate Line rate n 32 2048k Port 2 rate 1 64 kbit s Port 3 rate 1 64 kbit s Timeslot usage TS Port TS Port 00 P1 01 P1 02 P1 03 P1 04 P1 05 P1 06 P1 07 P1 08 P1 09 P1 ...

Page 98: ... be selected by the Q1 manager Q1 management path 6 1 3 A Q1 management source is selected from this menu The source can either be Q1 via line EOC Local management interface Q1 via Port1 only with G 704 adapter 9 3 3 Timing source 6 2 This menu allows you to select a source for timing The timing alternatives are Internal Line Port1 Transparent Figure 73 illustrates the principle of each alternativ...

Page 99: ...e alternatives Line SHDSL 114 115 113 Timing DTE DNT2Mi 114 115 113 Timing DTE DNT2Mi 114 115 113 DTE DNT2Mi Timing Line SHDSL 114 115 113 Timing DTE DNT2Mi Timing Line SHDSL Timing 114 115 113 DTE DNT2Mi Port timing Line timing Internal timing Transparent timing DTE adapter DTE adapter DTE adapter DTE adapter DTE adapter ...

Page 100: ...ch allows you to perform settings to a line Line interface 6 3 3 In this menu you can select the following line settings SHDSL mode 2 wire or 4 wire mode Line rate Figure 74 Principle of the Line interface menu SHDSL mode 6 3 3 This menu allows you to select the SHDSL mode Line interface STU C Fixed 4 wire STU R Rate Adaptive SHDSL mode Line Rate n 6 32 4 wire 2 wire 2 wire Line Rate n 3 32 ...

Page 101: ...ermination Unit STU Remote It also sets the bit rate in the line as Rate adaptive If the line conditions attenuation noise allow STU R adapts to the line rate set on the STU C side Two wire 6 3 3 1 2 In the 2 wire option only Line 1 is enabled Line 2 is idle See Figure 8 for line connector pins Four wire 6 3 3 1 4 In the 4 wire option both lines Line 1 and Line 2 are enabled See Figure 8 for line ...

Page 102: ...d Multiport Operating Instructions 102 128 Nokia Corporation DN01145897 Nokia Proprietary and Confidential Issue2 0en Figure 75 Measured SHDSL symmetric PSD and mask 2 w 2M Figure 76 Measured SHDSL symmetric PSD and mask 4 w 2M or 2 w 1M ...

Page 103: ... option to enable transmit power reduction on short loops The transmit power is reduced as a function of the line power loss shown in Table 16 OFF 6 3 6 2 Select this option to disable transmit power reduction Line length The maximal performance shown in Figure 77 is measured in ideal circumstances with the VMOHBU 0 4 mm cable In a real case you should reserve 3 6 dB noise margin due to changing c...

Page 104: ...pair capacitance It also depends on impedance mismatching resulting from connecting different types of cables as well as from the reflections caused by this Cable noise level Noise in a cable is mainly caused by cross talk between wire pairs The main sources of noise are units using the same frequency band 0 1000 2000 3000 4000 5000 6000 7000 8000 9000 192 256 320 384 448 512 576 640 704 768 832 8...

Page 105: ...145 V supply voltage may be restricted due to local safety regulations BER alarm limit 6 3 8 The bit error rate BER alarm limit can be either 10 3 E 3 or 10 6 E 6 BER alarm severity 6 3 9 The severity of a line BER alarm can be viewed and changed through this menu 9 3 5 Port settings 6 4 port This menu see Figure 64 allows you to select any of the three ports and to configure its settings The sele...

Page 106: ...ible using the V 28 adapter in multiport versions in port 2 or 3 The conversion is available when bit rates 1200 2400 4800 9600 and 19200 bit s are used No other adapter can be used for this purpose This option allows you to use the asynchronous character length The bit number includes start data and stop bits 8 bits 1 start 6 data 1 stop CT103 timing 6 4 port 3 2 The timing of the data coming fro...

Page 107: ...rietary and Confidential Figure 78 CT103 timing alternatives line timing Line SHDSL 114 115 113 Timing DTE DNT2Mi CT103 timing by CT114 Line timing 104 V xx PLL PLL PLL Tx Rx 103 Line SHDSL 114 115 Timing DTE DNT2Mi 104 V xx PLL PLL Tx Rx 103 CT103 timing by CT113 Line timing ...

Page 108: ...E circuits 6 4 port 3 3 The contents of the DTE circuits menu depend on the type of the interface unit installed in the port If no interface has been connected the default is of V type Line SHDSL 114 115 113 Timing DTE DNT2Mi CT103 timing by CT114 Internal timing 104 V xx PLL PLL PLL Tx Rx 103 Line SHDSL 114 115 DTE DNT2Mi 104 V xx PLL PLL Tx Rx 103 CT103 timing by CT113 Internal timing Timing Tim...

Page 109: ...e line frame sync on DCD on set the DCD circuit to follow the simulated carrier signal V 13 DSR DTR use 6 4 port 3 3 3 The suboptions of the menu allow you to display the current use of the DSR 107 and DTR 108 circuits set the DSR circuit to follow the state of the DTR circuit set the DSR circuit to ON state the DTR circuit not being in use CT140 use 6 4 port 3 3 4 The suboptions of the menu allow...

Page 110: ... P1 P1 P1 P1 P1 P1 P1 P1 P1 P2 P2 P2 P2 P2 P2 P2 P2 P2 P3 P3 P3 P3 P3 P3 P3 P3 P3 P3 P3 P1 P1 P1 P1 P1 P1 P1 P1 P1 P2 P2 P2 P2 P2 P2 P2 P3 P3 P3 P3 P3 P3 P3 P3 P3 P3 P2 P2 TS use in line TS mapping in Port1 From the Port menu select 1st TS TS1 and special TS TS16 From the Port menu select as in line P1 P2 TS use in line 1 2 3 4 5 6 8 7 9 10 11 12 13 14 15 16 17 18 19 20 21 22 23 24 25 26 27 28 29 ...

Page 111: ...ccurred during the last 15 minutes Circuit C 6 4 port 3 1 The options of the submenu are to display the use of circuit C not to use circuit C Not in use to select circuit C to control circuit I at the remote end by using ITU T V 13 signalling Simulated carrier Circuit I 6 4 port 3 2 There are two optional alternatives to make circuit I follow the state of line synchronisation to set circuit I to f...

Page 112: ...the front panel menus or Q1 management see Figure 63 Refer to Section 6 9 for the default values The default settings can be set separately to each DNT2Mi port and line Selecting the option 9 All returns all default settings into use except for service options that is the Q1 speed and address To activate the settings you have to answer 99 Yes after receiving a request for confirmation It takes abo...

Page 113: ...e or relative values After this you can define which period you want to monitor The number of selectable periods can vary from 0 to 100 0 standing for the current period 1 for the last period and 2 for the previous one etc You can choose between 0 to 100 periods of 15 minutes or 0 to 30 periods of 24 hours to monitor a number of signal quality parameters according to G 826 For more information on ...

Page 114: ...meters The suboptions of the Setting parameters 10 4 menu allow you to change the password timeout and display the current timeout value display the current status of protection and change the status change the password It is also possible to see whether the user is allowed or disallowed to configure the device or to launch tests using the front panel keys The options of this submenu 10 5 give you...

Page 115: ...en Nokia Proprietary and Confidential 10 Technical specifications 10 1 Dimensions Table 17 DNT2Mi multiport dimensions Width 293 5 mm Height 91 4 mm Depth 236 8 mm Weight 2 6 kg Table 18 DNT2Mi single port dimensions Width 293 5 mm Height 55 mm Depth 236 8 mm Weight 2 0 kg ...

Page 116: ... power supply and 2 wire line used 15 5 W when three ET adapters AC power supply and 4 wire line used DNT2Mi single port 4 4 10 5 W 4 4 W when G 703 2M adapter remote power supply and 2 wire line used 7 3 W when V 35 adapter AC power supply and 2 wire line used 10 5 W when ET adapter AC power supply and 4 wire line used AC power supply Voltage 90 to 264 VAC Frequency 47 to 65 Hz Tolerance against ...

Page 117: ...e sticker located in the bottom corner of the unit see Figure 81 The sticker includes two codes The upper code includes the unit s manufacturing details For example the manufacturing time year and week is indicated after the two first digits 0201 in the example sticker The lower code T65670 01 0 in the example indicates the unit s product code Table 20 Line interface 192 kbit s to 2048 kbit s in a...

Page 118: ...onditions 10 5 1 Environmental and mechanical requirements The climatic and mechanical requirements of DNT2Mi comply with the following ETSI specifications Figure 82 describes in more detail the recommended conditions for the use of the device Table 21 Environmental and mechanical requirements Transportation ETSI ETS 300 019 2 2 class 2 3 Storage ETSI ETS 300 019 2 1 class 1 2 Operation ETSI ETS 3...

Page 119: ...tibility The electromagnetic compatibility EMC of DNT2Mi comply with the following specifications 0 10 20 30 40 50 60 40 30 20 10 0 10 20 30 40 50 60 100 90 80 70 50 29 0 5 1 Air temp C Relative humidity Absolute humidity g m3 1 2 1 Operating conditions Storage conditions 2 Table 22 Mean time between failure MTBF DNT2Mi multiport 73 years DNT2Mi single port 134 years ...

Page 120: ...ecifications listed below Table 23 EMC requirements EN 55022 class B 1994 EN 55024 1998 EN 300386 2 1998 Table 24 DNT2Mi safety and protection AC power supply Electrical safety EN 60950 Surge protection 4 kV common mode 2 kV differential mode according to EN 61000 4 5 DC power supply Dielectric strength 500 VRMS Surge protection 1 kV according to EN 61000 4 5 Line interface Safety EN 60950 Surge p...

Page 121: ...e refer to Chapter 6 We recommend that you take a copy of the charts in the following pages do not make any markings to the original document Table 25 General settings Setting Setting Equipment ID Q1 speed Q1 address Q1 management path Line frame format Timing source Protections Password Test timeout Power feed Table 26 Port settings Setting Port 1 Port 2 Port 3 Time slots Type Rate Timing Sync As...

Page 122: ...Issue2 0en RTS CTS DCD DSR DTR 140 RL req 141 LL req Circuit C Circuit I AIS mode Interface mode CRC 4 Unused TS fill TS 0 fill BER alarm limit BER alarm sev Table 27 BER test results Port 1 Port 2 Port 3 Table 28 Line measurements Noise margin Rx level Line attenuation Line voltage Table 26 Port settings Continued Setting Port 1 Port 2 Port 3 ...

Page 123: ...97 Nokia Corporation 123 128 Issue 2 0 en Nokia Proprietary and Confidential Table 29 Statistics CPU reset count Line Port 1 Port 2 Port 3 UAT rx SES rx ES rx BBE rx UAT tx ES tx SES tx only with G 704 adapter ...

Page 124: ...Data Network Terminal Single port and Multiport Operating Instructions 124 128 Nokia Corporation DN01145897 Nokia Proprietary and Confidential Issue2 0en ...

Page 125: ...k coaxial Connector CAS Cascade Switch CPU Central Processing Unit CRC Cyclic Redundancy Check CTS Clear To Send dB Decibel DC Direct Current DCD Line signal detector DCE Data Circuit terminating Equipment DL Digital Loop DNT Data Network Terminal DSL Digital Subscriber Line DSR Data Set Ready DTE Data Terminal Equipment DTR Data Terminal Ready EEPROM Electrically Erasable Programmable Read Only M...

Page 126: ...rganisation for Standardisation ITU T International Telecommunication Union Telecommunication Standardisation Sector former CCITT LAN Local Area Network LAN IC Local Area Network Interconnection Circuit LCD Liquid Crystal Display LED Light Emitting Diode LL Local Loop LMI Local Management Interface MFA Multiframe Alignment MSTE Macro Service Terminal Emulator NMS Network Management System ONP Open...

Page 127: ...onds Ratio SG Signal Ground SHDSL Single Pair High bit rate DSL SMB Snap on subminiature coaxial cable sp mp single port multiport STE Service Terminal Emulator TC PAM Trellis Coded Pulse Amplitude Modulation TDM Time Division Multiplexing TMC Transmission Management Computer TR Transmit receive test with 29 1 pseudo random bit sequence TS Time Slot TT Total Time Tx Transmitter TxC Transmit Clock ...

Page 128: ...e ability of a piece of equipment or a system to function satisfactorily in its electromagnetic environment without introducing intolerable electromagnetic disturbances to anything in that environment Nokia NMS Nokia s system for controlling and monitoring the resources of a telecommunications network and for recording their use and performance in order to provide telecommunications services produ...

Reviews: