Configuring a PC Card or Hard-Disk Drive for Logging
IP390
, 105i & 105s
Security Platform Installation Guide
85
To install and configure an optional disk in an
appliance:
1.
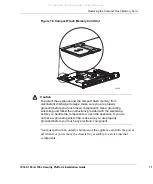
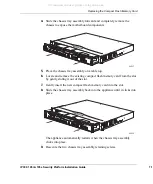
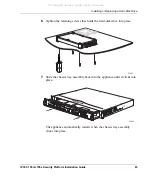
If necessary, install the optional disk in the appliance as described in
“Installing a Flash-Memory PC Card”
on page 76 and
“Installing or
Replacing a Hard-Disk Drive”
on page 78.
2.
Restart the appliance if appropriate.
3.
Start Nokia Network Voyager.
4.
Navigate to the Optional Disk configuration page.
Network Voyager displays information about the device you installed. If
you inserted a PC card and do not see this information, verify that the card
has at least one gigabyte of storage and is fully inserted into the slot.
5.
Select the device in the Choose column.
6.
Click Apply.
7.
Wait until you see a message indicating that you should reboot the
appliance.
There is a short delay (possibly a few minutes) before the message
appears. The delay is longer with devices of larger capacity.
8.
When the message appears, click Reboot, Shutdown System.
9.
Reboot the appliance.
10.
When the appliance has rebooted, log into it and start Nokia Network
Voyager.
11.
Navigate to the System Logging configuration page.
12.
Select the option Logging to Optional Disk.
The other options on this page do not apply to Check Point logging.
13.
Click Apply.
14.
Click Save.
The appliance can use only one local logging device at a time. If you add a
second optional disk, you have the option to choose between the two optional
disks.
All manuals and user guides at all-guides.com


