background image

11


472

Nokia Network Voyager for IPSO 4.0 Reference Guide

To configure the 

relaying of broadcast UDP packets

 on your system, use the following 

procedure.

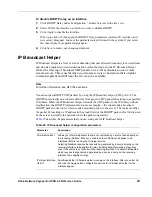
To configure IP broadcast helper 

1.

Click IP Broadcast Helper under Configuration > Router Services in the tree view.

2.

Click On for each interface to support IP Helper services. 

3.

Click Apply.

The New UDP Port field appears under that interface. 

4.

To add a new UDP Port to the helper services:

a.

Enter the new UDP port number in the New UDP Port text box. 

b.

Click Apply.

The UDP port appears in the table for that interface with On and Off radio buttons. To 
delete forwarding for a UDP service select Off and then click Apply.

5.

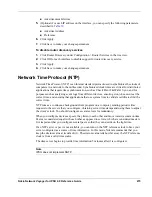
To add a new server to a UDP port:

a.

Enter the new server’s IP address in the New Address for UDP Port X text box. 

b.

Click Apply.

The server IP address appears under the UDP port. To delete forwarding for a server 
select Off and then click Apply.

6.

Verify that each interface, UDP port, or server is enabled (On) or disabled (Off) for IP helper 
support according to your requirements.

7.

Click Save to make your changes permanent.

Router Discovery

The ICMP Router Discovery protocol is an IETF standard protocol that allows hosts running an 
ICMP router discovery client to learn dynamically about the presence of a viable default router 
on a LAN. It is intended to be used instead of having hosts 

wiretap

 routing protocols such as 

RIP. It is used in place of, or in addition to, statically configured default routes in hosts.

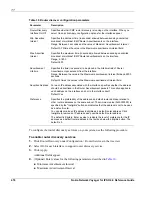
UDP Port

Specifies a new UDP service to be forwarded by an interface. Client UDP packets 
with the specified UDP port number will be forwarded to the configured server(s).

Server address

Specifies the servers defined for forwarding for the interface and UDP service.

Table 29  IP Broadcast helper configuration parameters

Parameter

Description

Summary of Contents for IPSO 4.0

Page 1: ...Nokia Network Voyager for IPSO 4 0 Reference Guide Part No N451818001 Rev A Published October 2005 ...

Page 2: ...cluding but not limited to implied warranties of merchantability and fitness for a particular purpose are disclaimed In no event shall Nokia or its affiliates subsidiaries or suppliers be liable for any direct indirect incidental special exemplary or consequential damages including but not limited to procurement of substitute goods or services loss of use data or profits or business interruption h...

Page 3: ...s nokia com Europe Middle East and Africa Nokia House Summit Avenue Southwood Farnborough Hampshire GU14 ONG UK Tel UK 44 161 601 8908 Tel France 33 170 708 166 email info ipnetworking_emea nokia com Asia Pacific 438B Alexandra Road 07 00 Alexandra Technopark Singapore 119968 Tel 65 6588 3364 email info ipnetworking_apac nokia com Web Site https support nokia com Email tac support nokia com Americ...

Page 4: ...4 Nokia Network Voyager for IPSO 4 0 Reference Guide ...

Page 5: ...work Voyager 23 Software Overview 23 Logging In to Network Voyager 24 Logging Off 24 Obtaining a Configuration Lock 25 Navigating in Network Voyager 26 Reloading Pages 26 Accessing Documentation and Help 26 Viewing Hardware and Software Information for Your System 28 2 Configuring Interfaces 29 Interface Overview 29 IP2250 Management Ports 30 Configuring Network Devices 30 Configuring IP Addresses...

Page 6: ...onfiguring PPPoE 43 Configuring MSS Clamping 46 Virtual LAN Interfaces 46 FDDI Interfaces 49 ISDN Interfaces 51 Configuring Calling Line Identification Screening 56 Dial on Demand Routing DDR Lists 58 ISDN Network Configuration Example 61 ISDN Troubleshooting 65 Token Ring Interfaces 71 Token Ring Example 73 Point to Point Link over ATM 75 ATM Example 78 IP over ATM IPoA 79 IPoA Example 82 Serial ...

Page 7: ...MRP Tunnel Example 126 ARP Table Entries 128 Configuring ARP for ATM Interfaces 130 Transparent Mode 132 Limitations 132 Transparent Mode Processing Details 133 Configuring Transparent Mode in VPN Environments 134 Example of Transparent Mode 135 Configuring Transparent Mode 136 Monitoring Transparent Mode Groups 139 Transparent Mode and Check Point NGX 139 Virtual Tunnel Interfaces FWVPN for Route...

Page 8: ...57 Sending Mail 158 Setting the System Time 158 Configuring Host Addresses 159 Configuring System Logging 160 Configuring Logging on Disk Based Systems 160 Configuring Logging on Flash Based Systems 161 Configuring Audit Logs 163 Remote Core Dump Server on Flash Based Systems 165 Changing the Hostname 166 Managing Configuration Sets 166 Scheduling Jobs 167 Backing Up and Restoring Files 168 Creati...

Page 9: ...ing VRRP 186 Selecting Configuration Parameters 187 Before you Begin 191 Configuring Monitored Circuit VRRP 192 Configuring VRRPv2 196 Configuring Check Point NGX for VRRP 197 Configuring VRRP Rules for Check Point NGX 199 Link Aggregation IP2250 Systems Only 201 Monitoring VRRP 201 Monitoring the Firewall State 203 Troubleshooting VRRP 203 General Configuration Considerations 203 Firewall Policie...

Page 10: ...de 221 Configuring the Work Assignment Method 221 Configuring an Interface 222 Configuring Firewall Monitoring 223 Supporting Non Check Point Gateways and Clients 223 Configuring Join Time Shared Features 226 Making the Cluster Active 229 Adding a Node to a Cluster 229 Recommended Procedure 230 Joining a System to a Cluster 231 Managing a Cluster 231 Using Cluster Voyager 232 Synchronizing the Tim...

Page 11: ...63 Managing SNMP Users 263 7 Configuring IPv6 267 IPv6 Overview 267 Interfaces 268 IPv6 and IPv4 Compatibility 270 Configuring IPv6 in IPv4 Tunnels 270 Configuring IPv6 to IPv4 271 Configuring IPv6 over IPv4 271 Configuring IPv4 in IPv6 Tunnels 272 Configuring an IPv6 Default or Static Route 272 Routing Configuration 273 Configuring OSPFv3 273 Configuring RIPng 273 Creating IPv6 Aggregate Routes 2...

Page 12: ...red Circuit Virtual Router for IPv6 284 Traffic Management 284 Security and Access Configuration 285 8 Managing Security and Access 287 Managing Passwords 287 Managing User Accounts 288 Adding and Deleting Users 289 Managing and Using S Key 290 Managing Groups 292 Role Based Administration 293 Managing Roles 294 Assigning Roles and Access Mechanisms to Users 295 Creating Cluster Administrator User...

Page 13: ...n AAA Authentication Server Configuration 322 Changing an AAA Configuration 323 Deleting an AAA Configuration 327 Encryption Acceleration 327 Enabling Encryption Accelerator Cards 328 Monitoring Cryptographic Acceleration 328 IPSec Tunnels IPSO Implementation 328 Using PKI 332 IPSec Implementation in IPSO 332 IPSec Parameters 334 Creating an IPSec Policy 335 Creating an IPSec Tunnel Rule 341 Trans...

Page 14: ...369 PIM 370 Configuring Virtual IP Support for VRRP 371 PIM Support for IP Clustering 371 Configuring Dense Mode PIM 373 Disabling PIM 374 Setting Advanced Options for Dense Mode PIM Optional 375 Configuring Sparse Mode PIM 376 Configuring High Availability Mode 377 Configuring this Router as a Candidate Bootstrap and Candidate Rendezvous Point 379 Configuring a PIM SM Static Rendezvous Point 380 ...

Page 15: ...rotocol Rank Example 402 BGP 403 Support for BGP 4 403 BGP Sessions Internal and External 404 BGP Path Attributes 404 BGP Multi Exit Discriminator 406 BGP Interactions with IGPs 406 Inbound BGP Route Filters 407 Redistributing Routes to BGP 407 Communities 407 Route Reflection 408 Confederations 409 EBGP Multihop Support 410 Route Dampening 411 TCP MD5 Authentication 411 BGP Support for Virtual IP...

Page 16: ...oute Redistribution 438 Redistributing Routes to BGP 439 Redistributing Routes to RIP and IGRP 440 Redistributing OSPF to BGP Example 443 Redistributing Routes with OSPF 444 Inbound Route Filters 445 BGP Route Inbound Policy Example 446 BGP AS Path Filtering Example 448 10 Configuring Traffic Management 449 Traffic Management Overview 449 Packet Filtering Description 449 Traffic Shaping Descriptio...

Page 17: ...DHCP Relay 469 Configuring BOOTP DHCP Relay 470 IP Broadcast Helper 471 Router Discovery 472 Router Discovery Overview 473 Configuring Router Discovery 473 Network Time Protocol NTP 475 Configuring NTP 476 12 Monitoring System Configuration and Hardware 479 Viewing System Utilization Statistics 479 CPU Memory Live Utilization 479 Disk and Swap Space 480 Monitoring Process Utilization 480 IPSO Proc...

Page 18: ...etwork Voyager IPSO 4 0 Reference Guide Displaying Interface Settings 487 Hardware Monitoring 487 Using the iclid Tool 488 iclid Commands 488 Preventing Full Log Buffers and Related Console Messages 494 Index 497 ...

Page 19: ...the CLI Reference Guide for Nokia IPSO This guide is intended for experienced network administrators who configure and manage Nokia IP security platforms It assumes a working knowledge of networking and TCP IP protocol principals and some experience with UNIX based systems This guide is organized into the following chapters Chapter 1 About Network Voyager describes the IPSO operating system Nokia ...

Page 20: ...sribes how to manage passwords user accounts and groups assign privileges using role based administration and how to configure network access services and Network Voyager session management It also describes how to configure AAA for a new service encryption acceleration and virtual tunnel interfaces VTI which support Check Point route based VPN Chapter 9 Configuring Routing describes the IPSO rout...

Page 21: ...ss of performance loss of data or interruption of service Note Notes provide information of special interest or recommendations Text Conventions Table 1 describes the text conventions this guide uses Table 1 Text Conventions Convention Description monospace font Indicates command syntax or represents computer or screen output for example Log error 12453 bold monospace font Indicates text you enter...

Page 22: ...ng CLI Reference Guide for Nokia IPSO which is on the IPSO CD This guide contains the commands that you can implement from the command line interface CLI for IPSO Getting Started Guide and Release Notes for IPSO which is included in the release pack This document contains a list of new features for the current IPSO release installation instructions and known limitations Menu commands Menu commands...

Page 23: ...ing capabilities and Check Point s FireWall 1 firewall functionality and to harden network security Unnecessary features have been removed to minimize the need for UNIX system administration Ipsilon Routing Daemon IPSRD IPSRD is Nokia s routing software The routing policy implemented by IPSRD resides in a database Network Voyager see below configures and maintains the routing software and database...

Page 24: ...u configured for the appliance You are prompted to enter a username and password If this is the first login enter the Admin username and the password you entered when you performed the initial configuration You can select to log in with or without an exclusive lock on configuration changes For more information see Obtaining a Configuration Lock on page 25 For information about initial configuratio...

Page 25: ...e access is limited to the features assigned by the administrator even though the configuration lock is in effect for all features To log in with exclusive configuration lock 1 At the login enter your user name 2 Enter your password 3 Check the Acquire Exclusive Configuration Lock check box This is the default 4 Click Log In Note Enabling the exclusive configuration lock in Network Voyager prevent...

Page 26: ...following procedure To clear the memory and disk cache 1 Select Network Preferences from the Options menu in Netscape 2 Select Cache in the Preferences window 3 Click the Clear Memory Cache Now button then click OK 4 Click Clear Disk Cache Now then click OK 5 Click OK or close the Preferences window Accessing Documentation and Help You can access the Nokia Network Voyager Reference Guide for IPSO ...

Page 27: ...rt another browser window to display the inline or online help text by using the following procedure To open a new window to view help 1 Right click the Doc button 2 Click Open Link in New Browser Window Displays the online help in a new window 3 Right click the Help On button 4 Click Open Link in New Browser Window Displays the inline text only help in a new window Type of Text Description italic...

Page 28: ...ance The Check Point FireWall summary lists information about the host and policy installed and the date on which the FireWall policy was installed The summary also describes which version of the FireWall is running and license information The operating system summary lists which software release and version of that release is running on the system To view the asset management summary 1 Click Asse...

Page 29: ...PSO support the following interface types Ethernet Fast Ethernet Gigabit Ethernet FDDI ATM RFC1483 PVCs only Serial V 35 and X 21 running PPP point to point Frame Relay or Cisco HDLC T1 E1 running PPP Frame Relay or Cisco HDLC HSSI running PPP point to point Frame Relay or Cisco HDLC VPN Tunneling Token Ring Unnumbered Interface ISDN Note For information on what types of interfaces your appliance ...

Page 30: ... network devices as physical interfaces A physical interface exists for each physical port on a network interface card NIC installed in the appliance Physical interface names have the form type s slot p port where type is a prefix indicating the device type slot is the number of the slot the device occupies in the appliance port is the port number of the NIC The first port on a NIC is port one For...

Page 31: ...port You also have the option of configuring an unnumbered interface for point to point interfaces Tunnels however cannot be configured as unnumbered interfaces Logical interfaces by default are named after the physical interface for which they are created If you wish you can override this default name with a more descriptive or familiar name You can also associate a comment with the logical inter...

Page 32: ...point to point interface You can add only one local destination IP address pair to a point to point logical interface To assign IP addresses to multiple VCs you must create a logical interface for each VC IP subnets are not supported on point to point interfaces Whenever an unnumbered interface generates a packet it uses the address of the interface that the user has specified as the source addres...

Page 33: ...otocols inside IP packets Use tunneling to Send network protocols over IP networks that don t support them Encapsulate and encrypt private data to send over a public IP network Create a tunnel logical interface by specifying an encapsulation type Use Network Voyager to set the encapsulation type Network Voyager supports two encapsulation types DVMRP and GRE The tunnel logical interface name has th...

Page 34: ...aps for the interface Default is On for all physical interfaces Link Speed Select 100 Mbit sec or 10 Mbit sec This setting must be the same for all hosts on the network to which the device connects Duplex Mode Select Full or Half This setting must be the same for all hosts on the network to which the device connects Autoadvertise Click on or off to enable or disable autoadvertise If turned on the ...

Page 35: ... by typing the preferred name in the Logical name text box 9 Click Apply 10 Optional Add a comment to further define the logical interfaces function in the Comments text box Click Apply 11 Click Up to go to the Interface Configuration page 12 Click On button that corresponds to the logical interface you configured Click Apply The Ethernet interface is now available for IP traffic and routing 13 To...

Page 36: ...hat have ports participating in an aggregation group If the group has ports on other NICs the traffic is distributed to those ports and the aggregation group continues to function when you remove a NIC in this manner If you reinsert the NIC the appropriate ports rejoin the aggregation group and resume forwarding traffic automatically Managing Link Aggregation Using SNMP Nokia IPSO systems use a pr...

Page 37: ...link You can configure as many as 1015 VLANs for an IPSO system If you use IOS on a Cisco switch trunking is enabled automatically If you run CatOS on a Cisco switch use the following command to configure VLAN trunking on the EtherChannel set trunk ports nonegotiate dot1q vlans Static Link Aggregation The IPSO implementation of link aggregation complies with the IEEE 802 3ad standard for static li...

Page 38: ...ns to be dropped in the event that there is a failover to a backup router Configuring the Remaining Management Ports If you are using IP clustering follow these guidelines when you configure the remaining built in Ethernet management ports Use one of the management ports exclusively for the primary cluster protocol network Use a separate management port for the following purposes if necessary mana...

Page 39: ...t match the settings for the switch ports that the interfaces are connected to When you aggregate an interface any logical configuration information is deleted Be careful not to aggregate the interface that you use for your management connection because doing so breaks your HTTP connection to the appliance Should this occur you can restore HTTP connectivity by using one of the following approaches...

Page 40: ...ation under Configuration Interface Configuration in the tree view 2 In the New Group ID field enter a numeric value that will identify the group of aggregrated interfaces 3 Click Apply An entry for the new group appears under Existing Link Aggregation Groups 4 Use the Primary Port pull down menu to select a port for the aggregation group The menu shows the physical names of the interfaces that co...

Page 41: ...ly You can simultaneously remove all the ports and delete the group by clicking all the Delete checkboxes and then clicking Apply Click Save to make the change permanent Gigabit Ethernet Interfaces You can configure the parameters listed in Table 4 for each Gigabit Ethernet interface For information on how to complete the configuration of an Gigabit Ethernet interface see To configure an Ethernet ...

Page 42: ...nter the IP address and mask length Click Apply MTU The maximum length of frames in bytes that can be transmitted over this device This value limits the MTU of any network protocols that use this device This option appears only for NICs that have the capability of transmitting jumbo frames Default is 1500 range is 1500 16 000 Note On the IP2250 the range is 1500 9600 IP Address Mask Length You can...

Page 43: ... 13 To make your changes permanent click Save Point to Point Over Ethernet Point to Point Over Ethernet PPPoE for IPSO provides you with the ability to create multiple point to point connections from your Ethernet network to your ISP Configuration is simple and your network can be connected over a bridging device such as a DSL modem Configuring PPPoE To configure PPPoE 1 Click Interfaces under Int...

Page 44: ...ser name in the Username text box and a password in the Password text box 12 Click Apply 13 Click Save to make your changes permanent To create more configuration profiles repeat these steps 14 Display the Interface Configuration page 15 Click the link for the physical PPPoE interface 16 Chose a configuration profile you created in the preceding steps from the Create a new interface with PPPoE pro...

Page 45: ...figuration in the tree view 2 Click the pppoe0 link 3 Click Delete in the Logical interfaces box associated with the PPPoE profile to delete 4 Click Apply 5 Click Save to make your changes permanent To change configuration profiles 1 Click Interfaces under Configuration Interface Configuration in the tree view 2 Click the pppoe0 link 3 Click the name of the PPPoE profile in the PPPoE Profile field...

Page 46: ...ubnets with a secure private link to Check Point FW 1 VPN 1 with the existing topology VLAN enables the multiplexing of Ethernet traffic into channels on a single cable The Nokia implementation of VLAN supports adding a logical interface with a VLAN ID to a physical interface In a VLAN packet the OSI Layer 2 header or MAC header contains four more bytes than the typical Ethernet header for a total...

Page 47: ...r each VLAN interface to create 6 To assign an IP address to the new logical VLAN interface click the link for the logical interface in the Interface field of the Logical Interfaces table Enter the IP address in the New IP address text box Enter the mask length in the New mask length text box 7 Click Apply 8 Click Save to make your changes permanent The new logical interface appears as active on t...

Page 48: ...ance running Check Point FW 1 is configured with the Virtual Router Redundancy Protocol VRRP This protocol provides dynamic failover of IP addresses from one router to another in the event of failure For more information see VRRP Description Each appliance is configured with Gigabit Ethernet and supports multiple VLANs on a single cable The appliances receive and forward VLAN tagged traffic to sub...

Page 49: ...terface page 6 Enter the IP address for the device in the New IP address text box 7 Enter the subnet mask length in the New mask length text box Click Apply Each time you click Apply the configured IP address and mask length are added to the table The entry fields remain blank to allow you to add more IP addresses To enter another IP address and IP subnet mask length repeat steps 6 through 7 8 Opt...

Page 50: ...ick Save to make your changes permanent To change the IP address of an FDDI interface Note Do not change the IP address you use in your browser to access Network Voyager If you do you can no longer access the IP security platform device with your browser 1 Click Interfaces under Configuration Interface Configuration in the tree view 2 Click the logical interface link for which to change the IP add...

Page 51: ...on information such as call direction data rate and the number to call Authentication information such as names passwords and authentication method Bandwidth allocation for Multilink PPP After configuring the physical interface then creating and configuring the logical interfaces the Nokia appliance is ready to make and accept ISDN calls Detailed information on how to create and configure ISDN int...

Page 52: ...hen the first ISDN call is placed or received The first call option is mainly used in European ISDN switch types for example ETSI PowerUp ISDN TEI negotiation should occur when the router is powered on 9 Click Apply 10 Click Save to make your changes permanent To configure an ISDN logical interface to place calls 1 Click Interfaces under Configuration Interface Configuration in the tree view 2 In ...

Page 53: ...alue for the minimum call time in the Minimum Call Time text box in the Connection Information table This entry defines the minimum number of seconds a call must be connected before it can be disconnected by an idle timeout A value of 0 indicates that the call can be disconnected immediately upon expiration of the idle timer If the service provider has a minimum charge for each call Nokia recommen...

Page 54: ...ote The Bandwidth Allocation table entries that follow allow the network administrator to manage the parameters that are used to determine when to add or remove an additional B channel only when using Multilink PPP 21 In the Bandwidth Allocation table in the Utilization Level text box enter a percentage bandwidth use level at which the additional B channel is added or removed When the measured use...

Page 55: ...erface column of the Logical Interfaces table to go to the Interface page 5 Enter the IP address for the local end of the connection in the Local address text box in the Interface Information table 6 Enter the IP address of the remote end of the connection in the Remote address text box in the Interface Information table 7 Click Incoming in the Connection Information table 8 Click Apply 9 To confi...

Page 56: ...upport Calling Line Identification CLID to filter calls by using the calling number When an incoming call is received the calling number in the received SETUP message is checked against the incoming numbers configured on each logical interface The calling number is compared with each incoming call using the right most digits algorithm A number matches if the shortest string between the received ca...

Page 57: ...rface Configuration in the tree view 2 Click the physical interface link in the Physical column Example isdn s2p1 3 Click the logical interface link in the Logical Interfaces table 4 Click the Incoming Numbers link 5 Find the incoming number to remove in the Numbers table click its corresponding Delete button and then click Apply 6 Click Save to make your changes permanent To configure an interfac...

Page 58: ... used to match a packet and an action to take when a match occurs The following are the possible actions Accept this is an interesting packet Ignore this is not an interesting packet Skip this rule is ignored When a packet matches a rule in the DDR list with an accept action that packet is regarded as interesting An interesting packet causes the ISDN interface to set up a call by using the is pass...

Page 59: ...lay in the DDR list until you create your own rule 4 Click Save to make your changes permanent To delete a DDR list 1 Click Dial on Demand Routing under Configuration Traffic Management in the tree view 2 Click the Delete check box next to the DDR list name to delete then click Apply The DDR list name disappears from the DDR List Configuration page 3 To make your changes permanent click Save To ad...

Page 60: ...al on Demand Routing under Configuration Traffic Management in the tree view 2 Locate the appropriate DDR list 3 To apply a DDR list to the interface select the appropriate interface from the Add Interfaces drop down window and click Apply The new interface appears in the Selected Interfaces section 4 To remove a DDR list from an interface click the Delete check box next to the interface under the...

Page 61: ...orm in a company s main office through ISDN by using PPP Considering the nature of the traffic being transmitted and the charging rates on an ISDN network the ISDN interface on the Nokia IP330 in this example has its minimum call timer set to four minutes and its idle timer set to one minute The Nokia IP330 is configured to send a username and password to the main office The Nokia IP650 is configu...

Page 62: ...ll Time text box in the Connection Information table 11 Enter the number 384020 in the Remote Number text box in the Connection Information table 12 Enter User in the Name text box under the To Remote Host heading in the Authentication table 13 Enter Password in the Password text box under the To Remote Host heading in the Authentication table 14 Click Apply 15 Click Save To configure the IP650 to...

Page 63: ...Authentication table 13 Click Apply 14 Click the Incoming Numbers link 15 Enter 384000 in the Number text box under the Add Incoming Call Information section 16 Click Apply 17 Click Save Sample Call Traces Sample traces for call setup between the Nokia IP Security platform follow The traces were produced by issuing the following command on each device tcpdump i interface Traffic was generated by d...

Page 64: ...conf_ack addr 06 23 49 102200 O B1 206 226 15 2 206 226 15 1 icmp echo request 06 23 49 102224 O B1 206 226 15 2 206 226 15 1 icmp echo request 06 23 49 102241 O B1 206 226 15 2 206 226 15 1 icmp echo request 06 23 49 102257 O B1 206 226 15 2 206 226 15 1 icmp echo request 06 23 49 128295 I B1 206 226 15 1 206 226 15 2 icmp echo reply 06 23 49 139918 I B1 206 226 15 1 206 226 15 2 icmp echo reply ...

Page 65: ... condition Informational a normal event of note Setting a logging to a particular level means all messages of this severity and higher are sent to the message log For example if you set logging to Error all error messages are sent to the message log ISDN logs messages for the following informational events ISDN Layer 1 protocol activated or deactivated Expiration of Layer 1 Layer 2 and Layer 3 tim...

Page 66: ... Q 921 messages are also decoded and displayed If the v option is used Q 931 messages are displayed Also the fields in all PPP messages and their values are displayed in an extended format To trace ISDN traffic using tcpdump 1 Create a telnet session and log in to the firewall 2 Enter tcpdump i isdn interface Troubleshooting Cause Codes Use the following debug commands to display the ISDN cause co...

Page 67: ... 6 Cause Values Cause Cause Description Diagnostics 1 Unallocated unassigned number Note 12 2 No route to specified transit network Transit network identity Note 11 3 No route to destination Note 12 6 Channel unacceptable 7 Call awarded and being delivered in an established channel 16 Normal call clearing Note 12 17 User busy 18 No user responding 19 No answer from user user alerted 21 Call reject...

Page 68: ...d Facility identification Note 1 57 Bearer capability not authorized Note 3 58 Bearer capability not presently available Note 3 63 Service or option not available or specified Note 3 65 Bearer capability not implemented Note 3 66 Channel type not implemented Channel Type Note 7 69 Requested facility not implemented Facility Identification Note 1 70 Only restricted digital information bearer is ava...

Page 69: ...it network selection might also be included 86 Call having the requested call identity has been cleared Clearing cause 88 Incompatible destination Incompatible parameter Note 2 91 Invalid transit network selection 95 Invalid message unspecified 96 Mandatory information element is missing Information element identifiers Information element identifiers is missing 97 Message type non existent or not ...

Page 70: ...t implemented Note 9 The timer number is coded in IA5 characters The following coding is used in each octet Bit 8 Spare 0 Bits 7 through 1 IA5 character Note 10 Examples of the cause values to be used for various busy or congested conditions appear in Annex J of the ITU T Q 931 specification Note 11 The diagnostic field contains the entire transit network selection or network specific facilities i...

Page 71: ...en the option is on it maps a multicast address to an all ring broadcast address ff ff ff ff ff ff When the option is off it maps a multicast IP address to an IEEE assigned IP multicast group address noncanonical form c0 00 00 04 00 00 7 Click the logical interface name in the Interface column of the Logical interfaces table to go to the Interface page 8 In the Active column of the Logical interfa...

Page 72: ...a logical interface proceed to Step 6 The Physical Interface Setup page appears 3 Perform the following procedures to make the desired changes If no change is desired skip this step a In the Ring Speed column of the Physical configuration table select the desired value 16 Mbit sec or 4 Mbit sec There is no default value b In the MTU field enter the desired value The minimum for both ring speeds is...

Page 73: ... a single interface 8 Click Apply 9 Click Save Token Ring Example This section describes how you might use Network Voyager to configure the interfaces of your IP security platform in an example network In a company s main office IP650 A terminates a serial line to an Internet service provider running PPP with a keepalive value of 10 IP650 A also provides Internet access for an FDDI ring and a remo...

Page 74: ...U value 5 In the Allow Source routes Multi Ring field select On or Off 6 In the Select Use Broadcast instead of Multicast select On or Off 7 Under the Active column of the Logical interfaces table select On or Off 8 Click Apply Click Up to return to the interface configuration page 9 Click the logical interface link to configure in the Logical column Nokia Platform A Nokia Platform B tok s2p1c0 19...

Page 75: ...SDH as the framing format in the Physical Configuration table Note SONET and SDH settings are available only if the ATM interface card supports them The setting should match the type of transmission network to which the interface is connected 4 Select Freerun or Loop Timing as the transmit clock choice in the Physical Configuration table Note The Transmit Clock settings are available only if the A...

Page 76: ...ge the interfaces logical name to a more meaningful name by typing the preferred name in the Logical Name text box 13 Click Apply 14 Optional Add a comment to further define the logical interfaces function in the Comments text box 15 Click Apply 16 Click Save to make your changes permanent To change the VPI VCI of an ATM interface Note To move an IP address from one PVC to another you must first d...

Page 77: ... Apply 16 Click Save to make your changes permanent To change the IP Address of an ATM interface Note Do not change the IP address you use in your browser to access Network Voyager If you do you can no longer access the IP security platform unit with your browser 1 Click Interfaces under Configuration Interface Configuration in the tree view 2 Click the logical interface link for which to change t...

Page 78: ...a company s main office Nokia Platform A terminates a serial line to an Internet service provider running PPP with a keepalive value of 10 Nokia Platform A also provides Internet access for an FDDI ring and a remote branch office connected through ATM PVC 93 The branch office contains Nokia Platform B which routes traffic between a local fast Ethernet network and ATM PVC 52 It provides access to t...

Page 79: ...8 3 1 in the Remote Address text box 8 Click Apply 9 Enter 9180 in the IP MTU text box 10 Click Apply 11 Click Save Note The steps for configuring the ATM interface on Nokia Platform B are the same except that you should set the to 52 when you create the logical interface and reverse the IP addresses should be reversed IP over ATM IPoA To configure an ATM logical IP subnet LIS interface 1 Click In...

Page 80: ...erface in the IP Address text box 10 Enter the IP subnet mask length in the Mask Length text box 11 Enter a number in the IP MTU text box to configure the device s maximum length in bytes of IP packets transmitted in this interface The default value and range depend on the hardware configuration The standard value is 9180 Click Apply Note All hosts in the same LIS must use the same IP MTU in their...

Page 81: ...ch to change the IP address in the Logical column Example atm s2p1c8 The Logical Interface page appears 3 Enter the IP address for the interface in the IP Address text box 4 Enter the IP subnet mask length in the Mask Length text box 5 Click Apply 6 Click Save to make your changes permanent To change the IP MTU of an ATM interface 1 Click Interfaces under Configuration Interface Configuration in t...

Page 82: ...interfaces have already configured To configure the ATM interface on Nokia Platform A 1 Click Interfaces under Configuration Interface Configuration in the tree view 2 Click the physical interface link to configure in the Physical column Example atm s2p1 The Physical Interface page appears 3 Create a logical interface in the Create a new LLC SNokia Platform RFC1483 interface section by selecting L...

Page 83: ... system that does not provide a clock source Otherwise set the internal clock to Off 4 Click Apply 5 If you turned the internal clock on enter a value in the Internal clock speed text box If the device can generate only certain line rates and the configured line rate is not one of these values the device selects the next highest available line rate 6 Click Full Duplex or Loopback in the Channel Mo...

Page 84: ...on table Internal Clock field to set the internal clock on the serial device Click Apply Set the internal clock to On when you are connecting to a device or system that does not provide a clock source Otherwise set the internal clock to Off 4 If you turned the internal clock on enter a value in the Internal clock speed text box If the device can generate only certain line rates and the configured ...

Page 85: ... Enter the IP address of the remote end of the link in the Remote address text box Click Apply 20 Optional Change the interfaces logical name to a more meaningful name by typing the preferred name in the Logical name text box Click Apply 21 Optional Add a comment to further define the logical interfaces function in the Comments text box Click Apply 22 To make your changes permanent click Save To c...

Page 86: ...the connection active status in the LMI status message 13 Optional Click the Advanced Frame Relay Options link to go to the Frame Relay Advanced Options page The Frame Relay Advanced Options page allows you to configure frame relay protocol and LMI parameters for this device Note The values you enter depend on the settings of the frame relay switch to which you are connected or to the subscription...

Page 87: ... Serial Interface Example This section describes how you might configure the interfaces of your IP security platform in an example network using Network Voyager The following figure shows the network configuration for this example In a company s main office Nokia Platform A terminates a serial line to an Internet service provider running PPP with a keepalive value of 10 Nokia Platform A also provi...

Page 88: ... name to a more meaningful name by typing the preferred name in the Logical name text box 12 Click Apply 13 Optional Add a comment to further define the logical interfaces function in the Comments text box 14 Click Apply 15 Click the Up button to go to the Interfaces page 16 Click the On radio button for ser s1p1c0 17 Click Apply 18 Click Save T1 with Built In CSU DSU Interfaces To configure a T1 ...

Page 89: ...r can be set to not use the least significant bit of each DS0 channel This setting allows data to be sent over these trunk lines without corruption but at a reduced throughput This mode is called the 56 Kbps mode because each DS0 channel now has an effective throughput of 56 Kbps instead of 64 Kbps All T1 functions still work in the 56 Kbps mode including all framing modes and fractional T1 config...

Page 90: ... define the logical interfaces function in the Comments text box 22 Click Apply 23 Click Save to make your changes permanent To configure a T1 Interface for PPP 1 Click Interfaces under Configuration Interface Configuration in the tree view 2 Click the interface link to configure in the Physical column Example ser s2p1 3 Optional Click On or Off in the Internal Clock field to set the internal cloc...

Page 91: ...ck the PPP in the Encapsulation field 13 Click Apply A logical interface appears in the Logical Interfaces table 14 Enter a number in the Keepalive text box to configure the PPP keepalive interval This value sets the interval in seconds between keepalive protocol message transmissions These messages are used periodically to test for an active remote system Note This value must be identical to the ...

Page 92: ...l interfaces function in the Comments text box 31 Click Apply 32 Click Save to make your changes permanent To configure a T1 interface for frame relay 1 Click Interfaces under Configuration Interface Configuration in the tree view 2 Click the physical interface link to configure in the Physical column Example ser s2p1 3 Optional Click On or Off in the Internal Clock field to set the internal clock...

Page 93: ...ame relay in the Encapsulation field 12 Click Apply 13 Enter a number in the Keepalive text box to configure the frame relay keepalive interval This value sets the interval in seconds between keepalive protocol message transmissions These messages are used periodically to test for an active remote system Note This value must be identical to the keepalive value configured on the system at the other...

Page 94: ... 25 Click Apply Each time you click Apply after entering a DLCI a new logical interface appears in the Interface column The DLCI entry field remains blank to allow you to add more frame relay logical interfaces 26 Click the logical interface name in the Interface column of the Logical Interfaces table to go to the Interface page 27 Enter the IP address for the local end of the PVC in the Local add...

Page 95: ...thernet network and ATM PVC 52 It provides access to the main office and the Internet To configure the serial interface on Nokia Platform A 1 Click Interfaces under Configuration Interface Configuration in the tree view 2 Click the link 3 Select ser s1p1 in the Physical column of the table 4 Click B8ZS in the T1 Encoding field 5 Click Extended SF in the T1 Framing field 6 Click 64 Kbps in the T1 C...

Page 96: ...nder Configuration Interface Configuration in the tree view 2 Click the physical interface link to configure in the Physical column Example ser s2p1 3 Optional Click On or Off in the Internal Clock field to set the internal clock on the E1 device Click Apply If you are connecting to a device or system that does not provide a clock source set Internal Clock to On otherwise set it to Off Internal cl...

Page 97: ... page 9 Click Cisco HDLC in the Encapsulation field Click Apply A logical interface appears in the Logical Interfaces table 10 Enter a number in the Keepalive text box to configure the Cisco HDLC keepalive interval Click Apply This value sets the interval in seconds between keepalive protocol message transmissions These messages are used periodically to test for an active remote system The range i...

Page 98: ...e view 2 Click the physical interface link to configure in the Physical column Example ser s2p1 3 Optional Click On or Off in the Internal Clock field to set the internal clock on the E1 device Click Apply If you re connecting to a device or system that does not provide a clock source set Internal Clock to On otherwise set it to Off Internal clocking for E1 is fixed at 2 048 Mbits sec To configure...

Page 99: ...ical Interfaces table 10 Enter a number in the Keepalive text box to configure the PPP keepalive interval Click Apply This value sets the interval in seconds between keepalive protocol message transmissions These messages are used periodically to test for an active remote system The range is 0 255 The default is 5 Note This value must be identical to the keepalive value configured on the system at...

Page 100: ...s text box Click Apply 23 Optional Change the interface s logical name to a more meaningful one by typing the preferred name in the Logical name text box Click Apply 24 Optional Add a comment to further define the logical interfaces function in the Comments text box Click Apply 25 Click Save to make your changes permanent Note Try to ping the remote system from the command prompt If the remote sys...

Page 101: ...t is used This setting must match the setting of the CSU DSU at the other end of the link 8 Click On or Off for the E1 timeslot 16 Framing Click Apply Note This option appears only if you set the E1 Framing field to E1 channel 0 framing This value controls whether timeslot 16 is used in channel associated signaling CAS Setting this value to On means that timeslot 16 cannot be used as a data channe...

Page 102: ...e relay switch to which you are connected or to the subscription that your service provider provides 16 From the Frame Relay Advanced Options page click Up to return to the Physical Interface page 17 Enter the DLCI number in the Create a New Interface DLCI text box Click Apply A new logical interface appears in the Interface column The DLCI number appears as the channel number in the logical inter...

Page 103: ...ting to a device or system that does not provide a clock source Otherwise set the internal clock to Off 4 If you turned the internal clock on enter a value in the Internal clock speed text box If the device can generate only certain line rates and the configured line rate is not one of these values the device selects the next highest available line rate 5 Click Full Duplex or Loopback in the Chann...

Page 104: ...column Example ser s2p1 3 Optional Click On or Off in the Physical configuration table Internal Clock field to set the internal clock on the HSSI device Click Apply Set the internal clock to On when you are connecting to a device or system that does not provide a clock source Otherwise set the internal clock to Off 4 If you turned the internal clock on enter a value in the Internal clock speed tex...

Page 105: ...iate an MRU with a peer Click Apply 12 Click Up to return to the Physical Interface page 13 Click the logical interface name in the Interface column of the Logical Interfaces table to go to the Interface page 14 Enter the IP address for the local end of the link in the Local address text box 15 Enter the IP address of the remote end of the link in the Remote address text box Click Apply 16 Optiona...

Page 106: ... system at the other end of a point to point link or the link state fluctuates 8 Click DTE or DCE in the Interface Type field DTE is the usual operating mode when the device is connected to a Frame Relay switch 9 Click On or Off in the Active Status Monitor field Sets the monitoring of the connection active status in the LMI status message 10 Optional Click the Advanced Frame Relay Options link to...

Page 107: ...or router has its own IP address This situation can cause inefficient use of the scarce IP address space because every point to point link must be allocated an IP network prefix To solve this problem a number of people have proposed and implemented the concept of unnumbered point to point lines An unnumbered point to point line does not have any network prefix associated with it As a consequence t...

Page 108: ...rom the Proxy Interface drop down window The Proxy Interface drop down window shows only those interfaces that have been assigned addresses 6 Click Apply Note You must choose a proxy interface for the unnumbered interface to function Note You cannot delete the only IP address of the proxy interface First select another proxy interface and then delete the IP address of the original proxy interface ...

Page 109: ...IP address of the destination network in the New Static Route text box 3 Enter the mask length in bits in the Mask Length text box 4 Select the type of next hop the static route will take from the Next Hop Type drop down window Your options are Normal Reject and Black Hole The default is Normal 5 Select Gateway Logical to specify the next hop gateway type from the Gateway Type drop down window Not...

Page 110: ...erfaces whenever you change this proxy interface OSPF adjacencies are re established Note Whenever you change the underlying encapsulation of the unnumbered serial interfaces for example from Cisco HDLC to PPP or from PPP to Frame Relay OSPF adjacencies are re established OSPF over Unnumbered Interfaces Using Virtual Links The following graphic below shows a network configuration that uses both vi...

Page 111: ... OSPF must have an IP address configured on both ends The virtual link between Nokia Platform B and Nokia Platform C functions because each Nokia Platform is configured with an IP address Cisco HDLC Protocol To change the keepalive interval for Cisco HDLC 1 Click Interfaces under Configuration Interface Configuration in the tree view 2 Click the physical interface link to configure in the Physical...

Page 112: ...o change the IP address in the Logical column Example ser s2p1c0 3 Delete the address from the Local address text box and from the Remote address text box Click Apply This removes the old IP address pair 4 Enter the IP address of the local end of the connection in the Local address text box and the IP address of the remote end of the connection in the Remote address text box Click Apply This adds ...

Page 113: ...age within the keepalive interval before this IP security platform considers the link down 4 Click Save to make your changes permanent To change the IP address in PPP Note Do not change the IP address you use in your browser to access Network Voyager If you do you can no longer access the IP security platform with your browser 1 Click Interfaces under Configuration Interface Configuration in the t...

Page 114: ...VC to another you must first delete the logical interface for the old PVC then create a new logical interface for the new PVC 1 Click Interfaces under Configuration Interface Configuration in the tree view 2 Click the physical interface link to configure in the Physical column Example ser s2p1 3 Locate the logical interface to delete in the Logical interfaces table for this device 4 Click the corr...

Page 115: ...ge allows you to configure frame relay protocol and LMI parameters for this device Note The values you enter are dependent on the settings of the frame relay switch to which you are connected or to the subscription provided by your service provider 4 From the Frame Relay Advanced Options page click Up to return to the Physical Interface page 5 Click Save to make your changes permanent To change th...

Page 116: ...iguration Interface Configuration in the tree view 2 Click the logical interface link for which to change the IP address in the Logical column Example ser s2p1c17 3 Delete the address from the Local address text box and from the Remote address text box Click Apply This deletes the old IP address pair 4 Enter the IP address of the local end of the connection in the Local address text box and the IP...

Page 117: ...ical interface created and enabled 1 Click Interfaces under Configuration Interface Configuration in the tree view 2 Click the loopback logical interface link in the Logical column loop0c0 3 To add an IP address enter the IP address for the device in the New IP address text box Click Apply Each time you click Apply the configured IP address appears in the table The entry fields remain blank to all...

Page 118: ...es table 5 Click the logical interface name in the Interface column of the Logical interfaces table to go to the Interface page for the specified tunnel Example tun0c1 6 Enter the IP address of the local end of the GRE tunnel in the Local address text box The local address cannot be one of the system s interface addresses and must be the remote address configured for the GRE tunnel at the remote r...

Page 119: ...ortant packets By default the TOS bits are copied from the inner IP header to the encapsulating IP header If the desired TOS value is not displayed in the drop down window select Custom Value from the menu Click Apply An entry field appears 12 Optional If you selected a custom value from the TOS value drop down window enter a value in the range of 0 255 Click Apply 13 Optional Change the interface...

Page 120: ...router Click Apply 7 Click Save to make your changes permanent To change IP TOS value of a GRE tunnel 1 Click Interfaces under Configuration Interface Configuration in the tree view 2 In the Logical column click the Logical Interface link of the item for which to change the TOS Example tun0c1 3 Select a value from the TOS value drop down window Click Apply On GRE tunnels it is desirable to copy or...

Page 121: ...ext box 8 Enter 192 68 26 65 in the Local endpoint text box 9 Enter 192 68 26 74 in the Remote endpoint text box 10 Optional Select a value from the TOS value drop down window Click Apply On GRE tunnels it is desirable to copy or specify the TOS bits when the router encapsulates the packet After you select the TOS feature intermediate routers between the tunnel endpoints may take advantage of the ...

Page 122: ... Add a comment to further define the logical interfaces function in the Comments text box Click Apply 15 Click Save High Availability GRE Tunnels High Availability GRE Tunnels provide redundant encrypted communication among multiple hosts They are created by performing the procedures associated with the configuration of GRE tunnels OSPF VRRP and Check Point firewall HA GRE Tunnel Example In our ex...

Page 123: ...s example shows you how to create an HA GRE tunnel we need to create multiple tunnels and in two directions This example requires repeating steps 7 through 10 of the GRE Tunnel example four times as follows a Configuring from IP Unit 1 to IP Unit 2 Enter 10 0 0 1 in the Local address text box Enter 10 0 0 2 in the Remote address text box Remote PCs Site A Remote PCs Site B VPN Tunnel VPN Tunnel 11...

Page 124: ...OSPF and Configuring OSPF Example sections For this example enable OSPF by using the following interface values IP Unit 1 10 0 0 1 and 192 168 0 1 IP Unit 2 10 0 0 2 and 192 168 1 1 IP Unit 3 11 0 0 1 and 192 168 0 2 IP Unit 4 11 0 0 2 and 192 168 1 2 Use iclid to show all OSPF neighbors Each firewall should show two neighbors and also show that the best route to the destination network is through...

Page 125: ... Physical column 3 From the pulldown menu in the Create a new tunnel interface with encapsulation select DVMRP 4 Click Apply Each time you select a tunnel encapsulation and click Apply a new tunnel appears in the table 5 Click the logical interface name in the Interface column of the Logical interfaces table this takes you to the interface page for the specified tunnel Example tun0c1 6 Enter the I...

Page 126: ...gured on the DVMRP tunnel on the remote router 4 Optional Enter the IP address of the remote end of the DVMRP tunnel in the Remote Address text box The remote address must be the IP address of the multicast router at the remote end of the DVMRP tunnel It cannot be one of the systems interface addresses 5 Click Apply 6 Click Save to make your changes permanent Note When the tunnel interface has bee...

Page 127: ...n the Physical column 3 From the pulldown menu in the Create a new tunnel interface with encapsulation select DVMRP 4 Click Apply Each time you select a tunnel encapsulation and click Apply a new tunnel appears in the table 5 Click the logical interface name in the Interface column of the Logical interfaces table this takes you to the interface page for the specified tunnel Example tun0c1 6 Enter ...

Page 128: ...s example the ISP has already done this for us 18 Ensure that DVMRP is running on all interfaces Ethernet ATM FDDI on which the multicast is to be received See Configuring DVMRP ARP Table Entries ARP allows a host to find the physical address of a target host on the same physical network using only the target s IP address ARP is a low level protocol that hides the underlying network physical addre...

Page 129: ... IP address in the IP Address field in the Add a New Static ARP Entry section 3 In the same table enter the MAC address corresponding to the IP address in the MAC Address text box 4 Click Apply 5 Click Save to make your changes permanent To add a proxy ARP entry A proxy ARP entry makes this system respond to ARP requests for a given IP address received through any interface This system does not us...

Page 130: ...next to the ARP entry to delete Click Apply To flush all dynamic ARP entries 1 Click ARP under Configuration Interface Configuration in the tree view 2 Click Flush Configuring ARP for ATM Interfaces To change InATMARP global parameters The InATMARP protocol is used for finding a mapping from IP addresses to ATM PVCs in a logical IP subnet LIS on top of an ATM network 1 Click ARP under Configuratio...

Page 131: ...sponding PVC in the VPI VCI field The IP address must belong to the subnet of the logical ATM interface and the VCI must be one of those configured for the interface Note Whenever static ATM ARP entries are applied dynamic entries are no longer updated therefore new neighbors cannot be seen through a dynamic InATMARP mechanism 5 Click Apply The newly created static ATM ARP entry appears in the Sta...

Page 132: ... mode you configure Ethernet interfaces on the firewall router to behave like ports on a bridge The interfaces then forward traffic using layer 2 addressing You can configure some interfaces to use transparent mode while other interfaces on the same platform are configured normally Traffic between transparent mode interfaces is inspected at layer 2 while traffic between normal interfaces or betwee...

Page 133: ...ace whenever a packet is received with an unknown source MAC address This association is called a neighbor control block The neighbor control block is deleted from the address table after a period of inactivity age time out The age time out is reset to this initial value for the neighbor control block on receiving any packet from that neighbor Packet processing for a firewall consists of ingress a...

Page 134: ...de Network B with access to certain addresses behind the Nokia Platform with Firewall which is in transparent mode To do this the network administrator would do the following in the firewall software 1 Create a group of addresses on Firewall A In this case the network administrator groups together addresses x y and z into group M 2 Create an object for the remote Firewall B 3 Create a rule for exa...

Page 135: ...rk administrator wants to protect the LAN with a firewall Installing a conventional firewall requires the network administrator to obtain another IP address from the ISP IP 1 5 4 0 24 Nokia s transparent mode solution provides firewall protection for the LAN without having to obtain new IP addresses or reconfigure addresses on the LAN Packet traffic continues to run at Layer 2 rather than at Layer...

Page 136: ...se connectivity to those interfaces Note An interface can be in at most one group Once you have associated an interface to a group you will not have the option to associate it with another group 5 In the Add Interface drop down box select the logical interfaces associated with IP address 1 5 3 4 24 and click Apply 6 Click Up 7 Select Yes in the Enable column associated with XMG 100 and click Apply...

Page 137: ...the interfaces in that group See Enabling or Disabling a Transparent Mode Group To create a transparent mode group 1 Click Transparent Mode under Configuration Interface Configuration in the tree view 2 Enter any positive integer an integer greater than 0 in the edit box 3 Click Apply 4 Click Save to make your changes permanent If you make delete a transport mode group or add or remove interfaces ...

Page 138: ... select the Remove radio button associated with the interface you want to delete and click Apply 5 Optional Repeat to add or remove other interfaces to or from the transparent mode group 6 Click Save to make your changes permanent Enabling or Disabling a Transparent Mode Group By default a transparent mode group is disabled unless explicitly enabled In the disabled mode the transparent mode group ...

Page 139: ...Transparent Mode under Monitor in the tree view 2 Click a transparent mode group under XMODE Group Id Transparent Mode and Check Point NGX This section explains some details about configuring a firewall to work with transparent mode Configuring Antispoofing The proper configuration for antispoofing depends on how the interfaces in the transparent mode group are configured All Interfaces Are Intern...

Page 140: ...any other type of interface and the traffic will be encrypted For more information about route based VPN see the Check Point Virtual Private Networks guide Unnumbered VTIs Nokia IPSO supports only unnumbered VTIs Local and remote IP addresses are not configured instead the interface is associated with a proxy interface from which it inherits an IP address Traffic that is initiated by the gateway a...

Page 141: ...Nokia Network Voyager as unnumbered interfaces and are given logical names in the form tun0cn You configure static or dynamic routes on VTIs the same way you configure them on other unnumbered interfaces The dynamic routing protocols supported on VTIs are BGP4 and OSPFv2 ...

Page 142: ...o be reestablished there will be a temporary loss of routes Creating Virtual Tunnel Interfaces To create a virtual tunnel interface 1 Create a VPN community the contains the two gateways using the SmartDashboard The VPN community defines the virtual tunnel properties such as the type of encryption used Because encryption is determined by routing packets through the tunnel no VPN domain is required...

Page 143: ...gured then domain based VPN takes priority Configuring a VTI does not override the domain based VPN The only way to configure no VPN domain is to create an empty VPN domain group 3 Create a VPN community and add both gateways to that community 4 Create a security policy rule and install the policy on both gateways ...

Page 144: ...sed as the source IP address for the outbound traffic you would normally choose an external interface for the proxy interface You can also use a loopback interface 4 Click Apply and then Save The new tunnel is added to the list of tunnels If the status field shows a status other than OK you can click on the tunnel interface name to display details about the VTI The Description field contains infor...

Page 145: ...namic and fixed IP address allocation from the DHCP server Automatic Domain Name System DNS server updates from the DHCP server The ability to specify various client parameters including which servers are available for services such as DNS NTP TFTP and SMTP You can also configure NetBIOS over TCP IP which includes identifying WINS and Datagram Distribution servers available to clients Support for ...

Page 146: ...econds in the Retry text box If you do not enter a value the configuration defaults to 300 seconds 6 Enter a value in seconds in the Lease text box for the length of time the IP address will be leased to the interface 7 Enter a value in seconds in the Reboot text box for the client to reacquire an expired lease address before it attempts to discover a new address 8 Click Apply 9 Click Save to make...

Page 147: ...ptional Enter the lease length in seconds for client IP addresses in the Default Lease text box This would be applied only if clients do not request a specific lease time If you do not enter a value the configuration will default to 43 200 seconds 8 Optional Enter the maximum lease length in seconds for client IP addresses in the Maximum Lease text box This would be the longest lease the server wo...

Page 148: ...resolve domain names in the DNS Servers text box 19 Enter the Network Time Protocol NTP servers clients will use in the NTP Servers text box Enter the servers you want clients to use in the order of preference separated by commas 20 Enter the Simple Mail Transfer Protocol SMTP servers available to clients separated by commas in the SMTP Servers text box 21 If you configure NetBIOS enter the Window...

Page 149: ...ver Process box 3 Click Apply 4 Click Save to make your changes permanent Changing DHCP Service To change the DHCP service 1 Click DHCP under Configuration System Configuration in the tree view 2 Click the Change DHCP Service link 3 Click the service for which you would like to configure your appliance in the DHCP Service Selection box 4 Click Apply 5 Click Save to make your changes permanent Addi...

Page 150: ...ermanent Assigning a Fixed IP Address to a Client To assign a fixed IP address to a client 1 Click DHCP under Configuration System Configuration in the tree view 2 Click the Add a new Fixed IP Entry link in the Fixed IP Address Client Configuration 3 Optional Enter a host name that will be assigned to the client in the Host Name text box If you do not enter a host name the server will assign the I...

Page 151: ...ver clients will use to resolve domain names in the DNS Servers text box 15 Enter the Network Time Protocol NTP servers clients will use in the NTP Servers text box Enter the servers you want clients to use in the order of preference separated by commas 16 Enter the Simple Mail Transfer Protocol SMTP servers separated by commas available to clients in the SMTP Servers text box 17 If you configure ...

Page 152: ...ain text box 8 Optional Enter the time offset for clients in the Time Offset text box 9 Optional Enter the IP address or the name of the swap server diskless clients will use in the Swap Server text box 10 Enter the Domain Name Servers DNS clients will use to resolve domain names in the DNS Servers text box 11 Enter the Network Time Protocol NTP servers clients will use in the NTP Servers text box...

Page 153: ... add more keys complete steps 6 through 9 for each new key Configuring Dynamic Domain Name System Zones This procedure describes how to configure Dynamic Domain Name System DDNS zones Note Before you can configure DDNS zones you must have created DDNS keys See Configuring Dynamic Domain Name System Service 1 Click DHCP under Configuration System Configuration in the tree view 2 Click the DDNS Conf...

Page 154: ...n the event of a hard disk drive failure in your appliance for platforms that support the feature You must have a second hard disk drive installed on your appliance Disk mirroring gives you the ability to configure a mirror set composed of a source hard disk drive and a mirror hard disk drive that uses Network Voyager The hard disk drive in which you installed IPSO is your source hard disk drive W...

Page 155: ...isk No mirror set is created if the synchronization operation is not successful To delete a mirror set 1 Click Disk Mirroring under Configuration System Configuration in the tree view 2 Select the Delete check box in the Mirror Sets table 3 Click Apply Note You can only delete a mirror set that is 100 percent synchronized Using an Optional Disk Flash Based Systems Only You can add flash memory PC ...

Page 156: ...em Configuration 2 Next to Logging to Optional Disk click On 3 Click Apply If you want to stop using PC card flash memory follow these steps To remove an optional disk 1 Click Optional Disk under Configuration System Configuration 2 Click Optional Disk 3 Deactivate the card by clicking in the Unselect column 4 Wait until you see a message indicating that you should reboot the system There is a sho...

Page 157: ...tree view 2 Click On next to Enable Failure Notification 3 Click Apply 4 Enter the email address of the people you want to notify in the event of a system failure and then click Apply Examples of a system failure include crashing daemons snmpd ipsrd ifm xpand and a system reboot that results from a fatal error In a system failure notification the following information appears System information Im...

Page 158: ...udit logs the time stamps on different network devices should be accurate to within about a second of each other to correlate events across multiple devices You can view the current system time at the top of any Network Voyager page You can set the system time using any of the following methods Set the date and time manually Access a time server once Configure Network Time Protocol to access time ...

Page 159: ...box Note If NTP is enabled this option does not appear 4 Click Apply 5 Click Save Configuring Host Addresses Click Host Address under Configuration System Configuration to perform any of the following tasks View the entries in the hosts table Add an entry to the list of hosts Modify the IP address of a host Delete a host entry You should add host addresses for systems that will communicate frequen...

Page 160: ...ny system log message to be repeated indefinitely on both devices Accepting Log Messages You can also enable your system to accept unfiltered system log messages from remote devices If you enable logging from remote systems network system log packets are tagged with the hostname of the sending device and logged as if the messages were generated locally If logging from remote systems is disabled ne...

Page 161: ...ecify more than one severity level all messages that are least as severe as the lowest severity level you select are sent to the remote host Note You must select at least one severity level for this option to function The system will not send syslog messages to the remote host if you do not configure at least one severity level 5 Click Apply The name of each severity level appears in Log at or abo...

Page 162: ... use remote systems you must configure them to store the log files To configure your flash based system to send syslog messages to remote log servers use the following procedure To configure a flash based system to use a remote log server 1 Click System Logging under Configuration System Configuration in the tree view 2 Next to Network Logging click On 3 Enter the IP address of the primary remote ...

Page 163: ...aved on the card are not affected If you have configured the system to send messages to remote log server it continues to do so Note If you use SNMP the system sends SNMP traps when the flash memory file system is full 90 percent and 95 percent full to alert you of the impending issue To delete log files stored in PC card flash memory so that new messages can be stored you can use the rm command t...

Page 164: ...each time a user applies a configuration change to the running system Transient changes are those that apply only to the currently running system Transient changes are equivalent to clicking the Apply button only in Network Voyager Logging of transient and permanent changes The system writes messages to the system log each time a user applies a configuration change to the running system or changes...

Page 165: ...ime If necessary older core files are deleted to make room for newer files If a kernel core file is created this is indicated in the log file the next time the system boots To configure your flash based system to transfer application core files to a remote server use the following procedure You must also configure the remote system FTP or TFTP server appropriately To configure a flash based system...

Page 166: ...ing to a new configuration database file You can also create a new configuration database file using factory defaults that is known to work correctly To save the active configuration as a new configuration set use the following procedure The active configuration might be different from that of the current configuration file if you have applied changes but not saved them To save the current configu...

Page 167: ...onfiguration in the tree view 2 Select from the available configuration database files in the list 3 Click Apply 4 To make your changes permanent click Save To delete unwanted configuration database files 1 Click Configuration Sets under Configuration System Configuration in the tree view 2 Click the Delete Configuration Databases link 3 Select Delete for each database file you want to delete 4 Cl...

Page 168: ...lete scheduled jobs 1 Click Job Scheduler under Configuration System Configuration in the tree view 2 In the Scheduled Jobs table select Delete next to the name of each job you want to delete 3 Click Apply 4 Click Save to make your changes permanent Backing Up and Restoring Files You can perform manual backups of files or you can configure your system to run regularly scheduled backups as describe...

Page 169: ... in the tree view 2 Enter a file name for your backup file in the Backup File Name text box If you do not enter a name the backup file is not created 3 Select any additional directories to include in the backup file a To include the home directories of all active users in the backup file check the Backup Home Directories check box b To include log files in the backup file check the Backup Log File...

Page 170: ...ed 5 Select any additional directories to include in the backup file a To include the home directories of all active users in the backup file check the Backup Home Directories check box b To include your log files in the backup file check the Backup Log Files check box c To include package files in your backup file select the check box next to the name of each package to include in the backup file...

Page 171: ...ocol indicate where the core files should be stored on the remote server by entering the appropriate path and directory 5 Click Apply 6 Click Save to make your changes permanent Transferring Backup Files Manually To transfer a archive file containing backup files manually to an FTP server using the following procedure To manually transfer archive files to a remote server 1 Click Backup and Restore...

Page 172: ...d data files which might or might not be immediately detectable 2 Click Backup and Restore under Configuration System Configuration in the tree view 3 If the file you are restoring from is stored on the local appliance go to the Restore from Local section a Select the name of the backup file from either the Manual Backup File or the Scheduled Backup File drop down lists depending on the type of fi...

Page 173: ...ding to a previous version of IPSO see Downgrading Nokia IPSO Images on page 176 Changing Current Image When the system boots it reads the kernel file in the directory indicated by the current pointer To identify the current image you can either look on the Home page or choose Configuration System Configuration Images click Manage Images and look in the State column To change the current image use...

Page 174: ...livered with your appliance and available on the Nokia customer support site at https support nokia com Upgrade the IPSO image on your platform using Network Voyager using the following procedure 1 Click Upgrade Images under Configuration System Configuration Images in the tree view 2 Enter following information in the appropriate text boxes a URL or IP address of the FTP HTTP or file server on wh...

Page 175: ...your packages run etc newpkg after REBOOT 8 If you made configuration changes click Save 9 You can either set your new image to be the current image for your platform see To select a new current image on page 173 or test the new image before you set it as the current image see To test an image before activating it on page 175 Testing a New Image You can test an IPSO image before you permanently ac...

Page 176: ...ster on page 231 in the section on configuring traffic management Rebooting a Cluster When you click Reboot Shut Down System on the main configuration page in Cluster Voyager you see the Cluster Traffic Safe Reboot link If you click this link the cluster nodes are rebooted in a staggered manner The process is managed so that at least one node is always operational For example if you reboot a two n...

Page 177: ... install a new image for a previous version that was never on your appliance the following message is displayed WARNING Configuration set for target release does not exist Will attempt to create a new configuration set with connectivity only information All other configuration changes will be lost You are also instructed to perform a test boot just as you would with any other fresh install Note If...

Page 178: ...rm runs Check Point NGX the only supported Check Point packages are Table 7 Monitor Report Parameters Parameter Description Collection Interval Specifies in seconds how often the data is collected Range 60 2100000 Default 60 On Off You can enable or disable each data collection event By default all events are enabled For the rate shaping bandwidth report you can enable packets delayed and bytes de...

Page 179: ...nal User account and password to use when connecting to the FTP site If you leave these fields empty the anonymous account is used Note If you specify a user account and password you must re enter the password whenever you change the FTP site FTP directory or FTP user on future requests 4 Click Apply A list of files ending with extensions tgz Z and gz in the specified FTP directory appears in the ...

Page 180: ...er most circumstances you should not change any of the default settings Tuning the TCP IP Stack When a TCP connection is established both ends of the connection announce their TCP maximum segment size MSS The MSS setting is the value that your system advertises and you can change the value to tune TCP performance by allowing your system to receive the largest possible segments without their being ...

Page 181: ...allows for a 20 byte TCP header and a 20 byte IP header which are included in the MTU To set the TCP MSS 1 Click Advanced System Tuning under Configuration System Configuration in the tree view 2 Click the Advanced System Tuning link in the System Configuration section 3 Enter the value you will use for your MSS The range for this value is 512 through 1500 and the default value is 1024 If you ente...

Page 182: ...3 182 Nokia Network Voyager for IPSO 4 0 Reference Guide ...

Page 183: ...th static routes normally the failure of the master router results in a catastrophic event isolating all hosts that are unable to detect available alternate paths to their gateway You can implement VRRP to provide a higher availability default path to the gateway without needing to configure dynamic routing or router discovery protocols on every end host How VRRP Works VRRP uses a virtual router t...

Page 184: ... priority for each platform when you establish the VRID or add a platform to it If two platforms have equivalent priorities the platform that comes online and starts broadcasting VRRP advertisements first becomes the master Figure 1 shows a simple VRRP configuration with a master Platform A and one backup Platform B Figure 1 Simple VRRP Configuration A VRRP router a router that is running VRRP mig...

Page 185: ... B is the master for VRID 7 and serves as the default gateway for Host H3 and Host H4 Simultaneously both Platform A and B are configured to back up each other If one platform fails the other takes over its VRID and IP addresses and provides uninterrupted service to both default IP addresses This configuration provides both load balancing and full redundancy Internet 00497 VRID 2 Master Backup 200...

Page 186: ...red circuit VRRP monitors all of the VRRP configured interfaces on the platform If an interface fails the master releases its priority over all of the VRRP configured interfaces This allows the backup platform to take over all of the interfaces and become master for both the internal and external VRID To release the priority IPSO subtracts the priority delta a Nokia specific parameter that you con...

Page 187: ...valent priorities the platform that comes online and starts broadcasting VRRP advertisements first becomes the master If there is a tie the platform with the higher IP address is selected To prevent the unlikely event that the tie breaking algorithm selects one platform as the master for the external network and another as the master router for the internal network you should make all interfaces o...

Page 188: ...ets which results in both platforms going to the master state The hello interval also determines the failover interval that is how long it takes a backup router to take over from a failed master If the master misses three hello advertisements it is considered to be down Because the minimum hello interval is 1 second therefore the minimum failover time is 3 seconds 3 Hello_interval Authentication Y...

Page 189: ...always display an error message Verify that the backup address subnet is configured on your system You must also select backup addresses that do not match the real IP address of any device on the interface network nor the IP address of any of the interfaces on either VRRP node Before you modify backup addresses or delete an IP address from an interface consider the following points These points ap...

Page 190: ...ke care to choose the correct proxy ARP setting for Network Address Translation Interface mode can be useful with certain switches that have problems with packets on multiple ports with the same MAC address In these cases you can use Interface mode to ensure that the VMAC from the master and backup are not the same Static mode Select this mode if you want to set the VMAC address manually then ente...

Page 191: ...cation allowing accept and respond to IP packets destined to an adopted VRRP IP address Default Disabled Monitor Firewall State This option allows VRRP to monitor Firewall State This replaces cold start delay of previous releases Nokia recommends that you do not disable the Monitor Firewall State option when running a firewall on a security platform If you change the setting for Monitor Firewall S...

Page 192: ...commends you use this method The simplified method automatically includes all VRRP configured interfaces on the platform in the VRRP Priority Delta Choose a value that will ensure that when an interface fails the priority delta subtracted from the priority results in an effective priority that is lower than that of all of the backup routers Nokia recommends you use a standard priority delta such a...

Page 193: ...al interface you must delete the corresponding backup addresses configured in the monitored circuit VRRP for the specified virtual router The configuration for the virtual router might become corrupted if you delete the IP address before you delete the backup addresses This issue does not apply either to the full method configuration of monitored circuit VRRP or to VRRPv2 To add a virtual router 1...

Page 194: ...riority priority delta hello interval authentication method password for simple authentication and backup address for an existing virtual router For information on these parameters see Selecting Configuration Parameters Note If you change the hello interval authentication method password or backup address you must change it on all other platforms which participate in the VRID 3 Click Apply 4 Click...

Page 195: ...lover of all mcVRRP interfaces on a platform when one interface goes down It triggers failover by subtracting the priority delta from the priority for each mcVRRP interface causing the interface to fail over to a node with a higher priority If you disable preempt mode interfaces will no longer failover in this way they will only failover if their effective priority is 0 Therefore if you disable pr...

Page 196: ... see the CLI Reference Guide for the version of IPSO you are using To delete a virtual router 1 Click VRRP under Configuration High Availability in the tree view 2 Click VRRP Legacy Configuration 3 Under the section showing the interface for which the VRID is configured select the Off radio button for the virtual Router Alternatively you can select the Off radio button in the Mode section for the ...

Page 197: ...backup router enter values in the Router with VRID section for each VRID you are using the interface to backup 8 Click Apply 9 Click Save to make your changes permanent Note To disable a virtual router first remove the VRRP configuration for that virtual router from all backup routers If you delete the virtual router on the master first it stops sending VRRP advertisements and the backup router as...

Page 198: ...nfigure interfaces for each member of the VRRP cluster Click the Topology tab for each VRRP cluster member and click Get Configure interfaces for the VRRP cluster Click the Topology tab for the gateway cluster object and click Get Enable state synchronization and configure interfaces for it Note The firewall synchronization network should have bandwidth of 100 mbps or greater The interfaces that y...

Page 199: ...uration System Configuration in the tree view Note This option is available only when SecureXL is enabled 2 On the Advanced System Tuning page click the button to enable sequence validation 3 Enable sequence validation in the Check Point management application 4 Push the new policy to the IPSO appliance Configuring VRRP Rules for Check Point NGX When you are using Check Point NGX FP1 and FP2 or la...

Page 200: ...0 0 18 is a Node Host object with the IP address 224 0 0 18 Configuring Rules if You Are Using OSPF or DVMRP All of the solutions in Configuration Rule for Check Point NGX FP1 and Configuration Rules for Check Point NGX FP2 and Later are applicable for any multicast destination If your appliances are running routing protocols such as OSPF and DVMRP create new rules for each multicast destination I...

Page 201: ...out link aggregation Monitoring VRRP You can use the following CLI commands to view and monitor VRRP information To view VRRP information using Network Voyager click Monitor on the Home Page VRRP Service Statistics under System Health The VRRP service status table appears The VRRP service status table contains per interface and per virtual router VRRP send and receive packet statistics It is updat...

Page 202: ...ress Primary address of the current virtual router master Address 0 0 0 0 indicates unknown Stats The stats section of the VRRP service status table displays VRRP send and receive packet statistics The Stats options are Advertisement Transmitted Number of VRRP Advertisement packets sent Advertisement Received Number of VRRP Advertisement packets received Bad Address List Received Number of VRRP pa...

Page 203: ...nformation about contacting Nokia Customer Support go to https support nokia com You can log information about errors and events to troubleshoot VRRP by enabling traces for VRRP To enable traces for VRRP 1 Click Config on the home page 2 Click the Routing Options link in the Routing Configuration section 3 Scroll down the Trace Options section to VRRP and choose an option from the Add Option drop ...

Page 204: ...interface is invalid or reserved SNMP Get on Interfaces might list the wrong IP addresses resulting in incorrect Policy An SNMP Get for the Firewall object Interfaces in the GUI Security Policy editor fetches the lowest IP address for each interface If the interfaces are created when the node is the VRRP master the wrong IP address might be included in the object To solve this problem edit the int...

Page 205: ...seen with switches using the spanning tree protocol This protocol was created to prevent Layer 2 loops across multiple bridges If spanning tree is enabled on the ports connected to both sides of a VRRP pair and it sees multicast hello packets coming for the same MAC address from two different ports then in most cases this would indicate a loop and the switch blocks traffic from one port or the oth...

Page 206: ...4 206 Nokia Network Voyager for IPSO 4 0 Reference Guide ...
Page 207: ...o the networks connected to it A cluster continues to function if a node fails or is taken out of service for maintenance purposes The connections being handled by the failed node are transferred to one of the remaining nodes IPSO clusters are also scalable with regard to VPN performance as you add nodes to a cluster the VPN throughput improves IPSO clusters support a variety of Check Point NGX fe...

Page 208: ...traffic between the nodes If an internal or external interface on one of the nodes fails or if a node itself fails the existing connections handled by the failed node are not dropped the other node processes them The other node continues to function and handle all of the traffic for the cluster Routers connected to an IPSO cluster must have appropriate static routes to pass traffic to the cluster ...

Page 209: ...er protocol network for production traffic If a secondary cluster protocol network fails but the primary remains functional the cluster remains active but traffic to non cluster devices on the secondary network might fail IPSO s cluster management features allow you to configure firewall A and B as a single virtual device and IPSO also lets you easily set up automatic configuration of cluster node...

Page 210: ...ssword and that password is the password for the cadmin user When you log in as a cluster administrator one of the following occurs If you are using a browser the system displays Cluster Voyager If you are using the command shell and enter clish the system starts the CCLI Cluster ID A user specified number that uniquely identifies the cluster within the broadcast domain Every node shares this ID n...

Page 211: ...ystem that is part of a cluster regardless of whether it is a member or the master Cluster protocol networks interfaces The cluster protocol networks are used for cluster synchronization and cluster management traffic You create these networks by connecting cluster protocol interfaces You must create a primary cluster protocol network and Nokia recommends that you also create a secondary cluster p...

Page 212: ...u should not use a secondary cluster protocol network for production traffic If a secondary cluster protocol network fails but the primary remains functional the cluster remains active but traffic to non cluster devices on the secondary network might fail Cluster Voyager A feature that lets you centrally manage all the nodes in a cluster as a single virtual system using one browser session Joining...

Page 213: ...at is sent to the cluster If the switches perform IGMP snooping elicit or listen for IGMP messages you can prevent this from happening by using multicast mode with IGMP When you use this mode each cluster interface joins an IP multicast group and IPSO bases the cluster multicast MAC addresses on the IP multicast group addresses The cluster MAC addresses are in the form 01 00 5E xx xx xx in which t...

Page 214: ... of a cluster should use an internal cluster IP address as the gateway address Nokia strongly recommends that you not configure a routing protocol on the primary or secondary cluster protocol interfaces You cannot use OSPFv3 in a cluster If you use OSPF only the master exchanges OSPF messages with the external routers A cluster cannot use OSPF or BGP to forward traffic over VPN tunnels If you use ...

Page 215: ... you might want to temporarily replace switches with hubs to simplify your configuration You can create multiple clusters in the same LAN or VLAN broadcast domain The clusters are distinguished by their cluster IDs Other Considerations If a cluster will be in service as soon as it is activated you should configure and enable NGX on each node before they become part of the cluster Add nodes to the ...

Page 216: ...itch or a hub can result in incomplete synchronization If you use aggregated ports for firewall synchronization traffic and delete a port from the aggregation group but do not delete the group itself be sure to delete the corresponding port on the other IP2250 system If you delete a port on one system only and that port remains physically and logically enabled the other system will continue to sen...

Page 217: ...mode with IGMP and connecting the networks with switches that use IGMP snooping You usually need to enable IGMP for specific switch ports or VLANS See Clustering Modes for more information about multicast mode with IGMP IPSO sends out IGMP membership reports for the cluster protocol multicast group A switch using IGMP snooping will then forward cluster protocol messages only to group nodes that is...

Page 218: ...cess because IPSO 3 6 does not have cluster management functionality If you want to upgrade cluster nodes from IPSO 3 6 to IPSO 3 8 Nokia recommends that you first upgrade all the nodes to IPSO 3 7 and then upgrade to 3 8 Following this process allows the cluster to remain in service throughout the upgrade The upgraded nodes retain any cluster configuration information that was created with the ea...

Page 219: ...mpletes the process of restarting it joins the new cluster Enabling Cluster Management After you complete the upgrade process the cluster is active but you cannot use Cluster Voyager or the CCLI until you create a password for a cluster administrator user on each of the cluster nodes After you upgrade IPSO on the cluster nodes you can perform the following procedure to create a password for the ca...

Page 220: ...er if the firewall fails on the node 5 Deselect any features that should not be cluster sharable 6 Change the cluster state to up 7 Save the cluster configuration to disk 8 If you disabled firewall monitoring in step 4 re enable it 9 Create cluster configurations on the other nodes 10 Join the other nodes to the cluster The failure interval and performance rating are set by default on each node an...

Page 221: ...dwidth of the production networks Note You must use one of the multicast modes if you use PIM in the cluster If the routers or switches adjacent to the cluster do not support multicast MAC addresses you must use forwarding mode Caution Do not use forwarding mode if you use PIM in the cluster Configuring the Work Assignment Method A cluster initially balances its work load by automatically distribu...

Page 222: ...interface Remember that the primary and secondary cluster protocol networks should not carry any production traffic The Interfaces Configuration table lists all the Ethernet interfaces on the system that are configured with IP addresses The table displays the status and IP address of each interface To add Ethernet interfaces to this list or to activate inactive interfaces go to the Interface Confi...

Page 223: ...the node from the cluster if the firewall stops functioning To enable firewall monitoring click enable next to Enable VPN 1 NG FW 1 monitoring in the firewall table If NGX is not running at the time you change the cluster state to up click Disable next to Enable VPN 1 NG FW 1 monitoring If NGX is not running and you do not disable firewall monitoring you cannot initialize the cluster protocol Note...

Page 224: ...address of the non Check Point gateway 4 Click Apply The VPN Tunnel Information table appears and displays the information you configured 5 If there is more than one network behind the non Check Point gateway repeat these steps for each network In each case enter the external address of the non Check Point gateway as the tunnel end point If one of the networks behind a non Check Point gateway is n...

Page 225: ...Only Check Point Gateways Are Involved If the other end of the tunnel is not a Check Point gateway you must follow the instructions in Using IP Pools When Only Check Point Gateways Are Involved and also configure the IP pools in IPSO as explained in Configuring IP pools in Cluster Voyager Using IP Pools When Only Check Point Gateways Are Involved To set up the configuration shown in the previous d...

Page 226: ...the Mask field enter the appropriate subnet mask If you were configuring firewall A in the cluster shown in the previous diagram you would enter 24 3 In the Member Address field enter the real IP address of the primary cluster protocol interface If you were configuring firewall A in the cluster shown in the previous diagram you would enter 192 168 3 1 Configuring Join Time Shared Features You may ...

Page 227: ...cess are added to the list of static routes Note Beginning with IPSO 4 0 Monitor Report Configuration and System Logging are no longer sharable features What if Settings Conflict If there is a conflict between configuration settings on the existing node and the joining system the settings on the joining system are changed to those of the master node For example assume that you have a cluster with ...

Page 228: ...aring Follow these steps to ensure that the appropriate configuration settings are identical on each cluster node 1 After you create a cluster configuration on the first node make sure all the relevant settings are correct on the Clustering Setup Configuration page 2 Scroll to the bottom of the Clustering Setup Configuration page and click No next to any features that should not share settings acr...

Page 229: ...er After the cluster is active change this setting to enable When this is set to ENABLE the cluster monitors the firewall If the firewall fails on a node that node drops out of the cluster and stops forwarding traffic Before you activate the cluster click Save to store all the cluster configuration settings in the configuration database on the hard disk To make the cluster active click Up in the C...

Page 230: ...join method under these conditions it will not join because NGX is not running on it In this situation you could manually add the system to the cluster by disabling its firewall monitoring Caution For security reasons you should never add a system that is not running NGX to a cluster that is in service This should only be done in a test environment Recommended Procedure Nokia recommends that you f...

Page 231: ...hould use an address of an interface on the cluster node that you configured first Note Using an interface on the first system that you configured for clustering each time you join another system will make sure that all nodes are configured appropriately The interface must be one of the cluster interfaces You should use the real address of the interface not its cluster IP address If the cluster is...

Page 232: ...ead to confusing or inconsistent configurations See Cluster Administrator Users for more information about how different users can manage clusters Using Cluster Voyager You can perform the tasks explained in this section using Cluster Voyager or Voyager Nokia recommends that you use Cluster Voyager whenever possible Doing so facilitates configuration tasks and helps ensure that your cluster is con...

Page 233: ...nistrator Users You can create users and make them cluster administrators by assigning them a cluster role using Role Based Administration Be aware of the following constraints You must log in as a system user to use Role Based Administration this feature is not accessible if you log in as a user with a cluster role This is also true if you log in as cadmin If you do not assign the default cluster...

Page 234: ...o repeatedly leave and rejoin the cluster though the cluster protocol attempts to prevent this situation by sending data at shorter intervals if it detects delays To change the number of milliseconds the node waits before assuming cluster breakup enter a number in the Failure Interval field then click Apply and Save Configuring the Performance Rating The performance rating is a measure of a cluste...

Page 235: ... a system user user with the role type System or a cluster administrator but the results are different When you log in as a cluster administrator and use Cluster Voyager or the CCLI and change a setting of a shared feature the change is made on all the nodes For example if static routes are shared and you add a static route while logged in as a cluster administrator the route is added to all the c...

Page 236: ... change When you change the time on a node a message similar to the following appears in the log May 24 12 05 09 baston2 LOG_NOTICE xpand 803 date set May 24 12 07 27 baston2 LOG_WARNING kernel IP Cluster last keepalive scheduled 530 ms ago This message is expected and does not indicate that there is any problem Note Some settings of cluster shareable features cannot be configured as a cluster adm...

Page 237: ...boots see Rebooting a Cluster If you manually reboot each node by clicking the Reboot buttons associated with the individual nodes there might be a period in which all the nodes are out of service 5 On the Cluster Safe Reboot page click Apply The upgraded nodes retain any cluster configuration information that was created with the previous version of IPSO Rebooting a Cluster When you click Reboot ...

Page 238: ...er Note Your Cluster Voyager session stays active throughout the process of rebooting the cluster You can monitor the process by clicking Cluster Safe Reboot Status Caution Do not log out of Cluster Voyager end your browser session or otherwise break your connection with the cluster while a cluster safe reboot is in progress Doing so causes the nodes that you are not logged into to leave the clust...

Page 239: ...e cluster IP address for an interface enter a new IP address in the Cluster IP Address field for that interface then click Apply and Save Deleting a Cluster Configuration If you want to delete all the cluster configuration information and remove a node from a cluster you must log into the node as a system user On the Clustering Setup Configuration page click Delete Synchronizing the Time on Cluste...

Page 240: ...is to use Cluster Voyager or the CCLI because you need to perform the configuration steps only one time instead of performing them on each node individually The instructions provided in the following sections assume that you are using Cluster Voyager Note Nokia recommends that you keep NTP as a cluster sharable feature the default setting so that if a node leaves and rejoins the cluster it will au...

Page 241: ...ords each node must have exactly the same set of packages as all the other nodes When you use Check Point s cpconfig program at the command line or through the Voyager interface to this program follow these guidelines You must install NGX as an enforcement module only on each node Do not install it as a management server and enforcement module After you choose to install NGX as an enforcement modu...

Page 242: ...ended or a dedicated network avoid using a production network for firewall synchronization If you use a cluster protocol network for firewall synchronization Nokia recommends that you use the secondary cluster protocol network for this purpose Note The firewall synchronization network should have bandwidth of 100 mbps or greater Connection synchronization is CPU intensive and Nokia recommends that...

Page 243: ...illustrates the example configuration This example cluster has three firewall nodes A B and C To the devices on either side of the cluster A B and C appear as a single firewall The following sections explain the steps you would perform to configure this cluster 192 168 1 0 192 168 2 0 Secondary Cluster Protocol Network 192 168 4 0 Cluster IP 192 168 4 10 Cluster ID 10 External Router Primary Clust...

Page 244: ...interfaces a Click Yes in the Select column of the Interfaces Configuration table for each appropriate interface b Enter each cluster IP address in the appropriate field For eth s1p1 enter 192 168 1 10 For eth s2p1 enter 192 168 2 10 For eth s3p1 enter 192 168 3 10 For eth s4p1 enter 192 168 4 10 Note The cluster IP address must be in the same subnet as the real IP address of the interface 11 In t...

Page 245: ...nfiguring the Internal and External Routers You would also need to perform the following tasks on the routers facing the cluster 1 Because the cluster is using multicast mode with IGMP configure the internal and external routers to accept multicast ARP replies for unicast IP addresses This is not necessary if you use forwarding mode 2 Configure static routes to the cluster On the internal router c...

Page 246: ...the tunnel 1 Follow the steps under Configuring the Cluster in Voyager 2 Log into the cluster using Cluster Voyager 3 Click the option for enabling non Check Point gateway and client support on the Clustering Setup Configuration page 192 168 1 0 192 168 2 0 Secondary Cluster Protocol Network 192 168 4 0 Cluster IP 192 168 4 10 Cluster ID 10 Primary Cluster Protocol Network 192 168 3 0 Cluster IP 1...

Page 247: ...el section enter 10 1 1 0 in the Network Address field 5 In the Mask field enter 24 6 In the Tunnel End Point field enter 10 1 2 5 7 Click Apply 8 Click Save 9 Configure the same tunnel in NGX For more information see Configuring NGX for Clustering and the Check Point documentation ...

Page 248: ...5 248 Nokia Network Voyager for IPSO 4 0 Reference Guide ...

Page 249: ...ase version of SNMP Changes have been made to the base version to address security and other fixes For more information on Net SNMP go to http www net snmp org Caution If you use SNMP Nokia strongly recommends that you change the community strings for security purposes If you do not use SNMP you should disable the community strings SNMP as implemented on Nokia platforms supports the following GetR...

Page 250: ...ystem such as hardware software processes CPU utilization disk utilization and so on IANAifType MIB IANA Defines the IANAifType textual convention including the values of the ifType object defined in the MIB II ifTable IF MIB RFC 2233 Describes generic objects for network interface sublayers IP MIB RFC 2011 Provides management information for IP and ICMP implementations IP Forwarding MIB RFC 2096 ...

Page 251: ...istics and version information on any firewalls currently installed 1213 MIB RFC 1213 Contains the original definition of MIB II Nokia provides this MIB with the system to ensure backwards compatibility with SNMP v1 IPSO LBCluster MIB proprietary Provides information about IPSO load balancing systems HWM MIB proprietary Contains hardware management information Note IPSO does not send the traps tha...

Page 252: ...on Create SNMP users Modify SNMP user accounts Add or delete trap receivers Enable or disable the various traps Enter the location and contact strings for the device SNMP Proxy Support for Check Point MIB IPSO supports the use of a proxy for SNMP GetRequest and SNMP GetNextRequest for Check Point objects The following are guidelines and limitations you should be aware of Nokia Enhanced SNMP Soluti...

Page 253: ...0 CP SNMPd must continue to accept SNMPv1 and have a read community set to public CP SNMPd must continue to be accessible through localhost on the Nokia IPSO device The SNMP Proxy is not a trap proxy and only proxies SNMP Get and SNMP GetNext requests When simultaneous SNMP queries arrive the SNMP Proxy returns valid values to only one request Because Nokia IPSO uses a proxy to support the Check P...

Page 254: ... supports v3 select to use only v3 on your IPSO system SNMPv3 limits community access only requests from users with enabled SNMPv3 access are allowed and all other requests are rejected To enable or disable SNMP 1 Choose SNMP under Configuration in the tree view 2 Select Yes or No for Enable SNMP Daemon 3 If you are enabling SNMP click Apply The SNMP configuration options appear Caution To run the...

Page 255: ...age 256 Setting an Agent Address An agent address is a specific IP address at which the SNMP agent listens and responds to requests The default behavior is for the SNMP agent to listen to and respond to requests on all interfaces If you specify one or more agent addresses the system SNMP agent listens and responds only on those interfaces You can use the agent address as another way to limit SNMP ...

Page 256: ...aps are associated with the ipsoConfigGroup objects These objects include ipsoConfigIndex ipsoConfigFilePath ipsoConfigFileDateAndTime ipsoConfigLogSize ipsoConfigLogIndex and ipsoConfigLogDescr The systemTrapDiskMirrorSetCreate systemTrapDiskMirrorSetDelete systemTrapDiskMirrorSyncFailure and systemTrapDiskMirrorSyncSuccess traps are associated with the ipsoDiskMirrorGroup objects These objects i...

Page 257: ...ation when a permanent change to the system configuration occurs systemTrapLowDiskSpace Supplies notification when space on the system disk is low This trap is sent if the disk space utilization has reached 80 percent or more of its capacity If this situation persists a subsequent trap is sent after 15 minutes systemTrapNoDiskSpace Supplies notification when the system disk is full This trap is se...

Page 258: ...de joins the cluster clusterMemberLeft Supplies notification when a member node leaves the cluster clusterNewMaster Supplies notification when a cluster is formed and a new master is elected clusterProtocolInterfaceChange Supplies notification when a failover occurs from the primary cluster network to the secondary cluster network systemPowerSupplyFailure Supplies notification when a power supply ...

Page 259: ... trap message to the management station when it receives a packet with an incorrect community string To enable or disable traps 1 Choose SNMP under Configuration in the tree view 2 To enable any type of trap click On next to the name of the trap and click Apply 3 To disable any type of trap click Off next to the name of the trap and click Apply 4 To make your changes permanent click Save Setting t...

Page 260: ...device 4 Click Apply 5 Click Save to make your changes permanent Interpreting Error Messages This section lists and explains certain common error status values that can appear in SNMP messages Within the PDU the third field can include an error status integer that refers to a specific problem The integer zero 0 means that no errors were detected When the error field is anything other than 0 the ne...

Page 261: ...ibes each element GetRequest The following table lists possible value field sets in the response PDU or error status messages when performing a GetRequest 9 wrongEncoding Error status code Meaning Error status code Meaning Variable bindings element Description value Value associated with each object instance specified in a PDU request unSpecified A NULL value is used in retrieval requests noSuchOb...

Page 262: ... Instead the responding entity returns a response PDU with an error status of genErr and a value in the error index field that is the index of the problem object in the variable bindings field Configuring SNMPv3 IPSO supports the user based security model USM component of SNMPv3 to provide message level security With USM described in RFC 3414 access to the SNMP service is controlled on the basis o...

Page 263: ...SNMP users are maintained separately from system users You can create SNMP user accounts with the same names as existing user accounts or different You can create SNMP user accounts that have no corresponding system account When you delete a system user account you must separately delete the SNMP user account Table 13 Security Related Options Used in Request Messages Option Description u name Spec...

Page 264: ...authNoPriv you must supply a privacy pass phrase To add an SNMP user 1 Click SNMP under Configuration in the tree view 2 Click Manage USM Users 3 Enter the following information for the new user User Name The range is 1 to 31 alphanumeric characters with no spaces backslash or colon characters This can be the same as a user s name for system access though the SNMP user account is handled as a sepa...

Page 265: ...To delete a USM user 1 Click SNMP under Configuration in the tree view 2 Click Manage USM Users at the bottom of the page The Manage SNMP Users page appears 3 Select the appropriate Delete check box 4 Click Apply 5 Click Save to make your changes permanent ...

Page 266: ...6 266 Nokia Network Voyager for IPSO 4 0 Reference Guide ...

Page 267: ... implementation includes basic features specified in IPv6 RFCs and features that support IPv6 capable hosts in a network IPv6 includes a transition mechanism that allows users to adopt and deploy IPv6 in a diffuse way and provides direct interoperability between IPv4 and IPv6 hosts IPSO supports the following features as specified in the corresponding RFCs IPv6 Specification RFC 2460 ICMP v6 RFC 2...

Page 268: ...rver Utilities ping netstat tcpdump ndp Interfaces To configure IPv6 logical interfaces 1 Click IPv6 Interfaces under Configuration System Configuration IPv6 Configuration in the tree view 2 Click the logical interface link to configure in the Logical column Example eth s1p1c0 3 Enter the IP address prefix in the New IP Address text box and the mask length in bits in the New Mask Length text box T...

Page 269: ...bled on a virtual router when the router is in a backup state 3 Click Apply The list of addresses in the IPv6 address field for the specified logical interface disappear 4 Click Save to make your changes permanent To configure neighbor discovery 1 Click Neighbor Discovery under Configuration System Configuration IPv6 Configuration in the tree view 2 In the Global Neighbor Discovery Settings field ...

Page 270: ...ual link by configuring a tunnel To configure IPv6 in IPv4 tunnels 1 Click IPv6 in IPv4 Tunnels under Configuration System Configuration IPv6 Configuration in the tree view 2 Enter the IPv4 address of the local tunnel endpoint in the Local IPv4 Address text box 3 Enter the IPv4 address of the remote tunnel endpoint in the Remote IPv4 Address text box Note The local address must be the address of a...

Page 271: ...other interface configured for the router 5 Optional Enter a valuefor the Time to Live TTL packets sent 6 Click Apply 7 Click Save to make your changes permanent Configuring IPv6 over IPv4 This feature allows you to transmit IPv6 traffic through IPv4 domains without configuring a tunnel To configure IPv6 over IPv4 1 Click IPv6 over IPv4 Tunnels under Configuration System Configuration IPv6 Configu...

Page 272: ... packets sent on the tunnel can take to reach their destination 5 Click Apply 6 Click Save to make your changes permanent Configuring an IPv6 Default or Static Route To configure an IPv6 default or static route 1 Click IPv6 Static Routes under Configuration System Configuration IPv6 Configuration Routing Configuration in the tree view 2 To enable a default route a Select On in the Default field b ...

Page 273: ...me configuration parameters as OSPFv2 except that you enter them from the Network Voyager page that you access by clicking Routing Configuration under Configuration System Configuration IPv6 Configuration in the tree view For more information see OSPF on page 353 Configuring RIPng 1 Click RIPng under Configuration System Configuration IPv6 Configuration Routing Configuration in the tree view 2 To ...

Page 274: ...IPng click the On button in the Redistribute All Statics in the RIPng field 4 Enter a value in the Metric text box for the metric cost that the created RIPng routes will have 5 Click Apply 6 Click Save to make your changes permanent 7 To redistribute a specific static route or routes into RIPng click On next to the IPv6 interface for the static route to redistribute to RIPng 8 Enter a value in the...

Page 275: ...te to redistribute into RIPng 8 Enter a value in the Metric text box for the metric cost that the created RIPng routes will have 9 Click Apply 10 Click Save to make your changes permanent Router Discovery Configuring ICMPv6 Router Discovery The ICMPv6 Router Discovery Protocol allows hosts running an ICMPv6 router discovery client to locate neighboring routers dynamically as well as to learn prefi...

Page 276: ...nt on the interface 8 Optional Enter a value in seconds in the Max Adv Interval text box for the maximum time between which unsolicited multicast ICMPv6 router advertisements are sent on the interface in the Max Adv Interval text box Whenever an unsolicited advertisement is sent the timer is set to a value between the maximum advertisement interval and the minimum advertisement interval 9 Optional...

Page 277: ... not support authentication and the advertisement interval in the VRRP packet is 12 bits rather than eight bits Also for both VRRP version 3 and Monitored Circuit for IPv6 interfaces the hello interval is measured in centiseconds rather than seconds In version 3 the first address in the packet must be an IPv6 link local address For general information about VRRP see Virtual Router Redundancy Proto...

Page 278: ...o configure VRRP for its own addresses 5 From the Address drop down list select an IP address to specify a virtual IPv6 address for the virtual router Click Apply You must configure at least one virtual address and at least one virtual IPv6 address must be the link local address for the interface To remove a virtual IP address click off next to the entry for the IPv6 address 6 Optional In the Hell...

Page 279: ...h this virtual router configured The default is 100 centiseconds that is 1 second 7 Optional Click Disabled next to Preempt Mode if you do not want a virtual router with a higher priority to preempt the current master router and become the new master The default value is Enabled which means that a virtual router with a higher priority than the current master preempts the master and becomes the new...

Page 280: ...mically calculates three bytes of the interface hardware MAC address to extend its range of uniqueness To set the virtual MAC address 1 Click VRRP for IPv6 under Configuration System Configuration IPv6 Configuration Router Services in the tree view 2 You can set the VMAC option for an interface on which you enable VRRP or Monitored Circuit a To enable VRRP click the VRRPv3 button next to the inter...

Page 281: ...ing the IP Address List of a Virtual Router in VRRPv3 You must configure at least one virtual address for a virtual router Addresses already configured are displayed in the List of IPv6 addresses field Addresses that belong to the interface but not selected for the virtual router are displayed in the Addresses drop down list 1 Click VRRP for IPv6 under Configuration System Configuration IPv6 Confi...

Page 282: ... The monitored circuit feature makes the election of the virtual master router dependent on the current state of the access link You can select which interfaces on which to associate dependency and configure a priority delta for each interface you select The up and down status of each interface is monitored and the election of the VRRP master dynamically adapts to the current state of each interfa...

Page 283: ... router to zero 0 The default is Disabled which sets the lowest value for the effective priority of the virtual router to one 1 A VRRP virtual router with an effective priority of 0 does not become the master even if there are not other VRRP routers with a higher priority for this virtual router Click Apply 10 Optional To configure a virtual MAC VMAC address for the virtual router see Setting a Vi...

Page 284: ...n a Monitored Circuit Virtual Router for IPv6 1 Click VRRP for IPv6 under Configuration System Configuration IPv6 Configuration Router Services in the tree view 2 Locate the virtual router and the interface with the IP address to change You can locate the virtual router information by using the Virtual Router ID value displayed in the Virtual Router field 3 To remove an IP address from the list cl...

Page 285: ...P or Telnet access 1 Click Network Access Services under Configuration System Configuration IPv6 Configuration Security and Access Configuration in the tree view 2 Select Yes next to the types of access you want to allow for IPv6 FTP Telnet and TFTP 3 Click Apply 4 Click Save to make your changes permanent ...

Page 286: ...7 286 Nokia Network Voyager for IPSO 4 0 Reference Guide ...

Page 287: ...a link to the feature in the tree If they have read only access to a feature they will see a link and be able to access the page but all the controls will be disabled Managing Passwords You can change your own password Any user with privileges to the Users feature can reset the passwords of any user including the admin and monitor users without providing the current password Caution Because a user...

Page 288: ... Users in the tree view You can also view the user name that you used to log in by clicking Home under Configuration in the tree view The following users are created by default and cannot be deleted admin Has full read write capabilities to all features accessible through Network Voyager and the CLI This user has a User ID of 0 and thus has all of the privileges of a root user monitor Has read onl...

Page 289: ... to identify the user Range 1 32 characters User ID Unique ID number for the user account The system will not allow you to create a user with a duplicate User ID Range 0 65535 0 102 and 65534 are reserved for system use For example the admin user is UID 0 the monitor user is UID 102 and the cluster administrator cadmin is UID 101 Group ID Primary group for the user The user can be assigned to othe...

Page 290: ...n the tree view 2 In the Add new user field click Off 3 Click Apply 4 Click Save to make your changes permanent Note When you remove a user that user can no longer log in although the user s home directory remains on the system To remove the user s directory use the Unix shell Also since the user accounts for SNMP are maintained separately you may need to delete the SNMP account for the user if th...

Page 291: ...in in the S Key Secret Password verify text box 7 Click Apply The sequence number and the seed appear The sequence number begins at 99 and goes backward after every subsequent S Key password is generated The seed is associated with the S Key secret password 8 Click Save to make your changes permanent Using S Key You must have an S Key calculator on your platform to generate the S Key one time pass...

Page 292: ...ased systems This capability is retained under IPSO for advanced applications and for retaining compatibility with UNIX To view a list of all existing groups click Manage Groups under Configuration Security and Access Groups in the tree view Two groups are created by default and cannot be deleted Other group All users are assigned by default to the Other group If you edit a user s primary group ID...

Page 293: ...ministration When you add a new user the user is given read only privileges to the Nokia Network Voyager home page and CLI prompt but cannot access other Network Voyager pages or execute commands from the CLI prompt You must assign roles to the user to provide additional access privileges Role based administration RBA allows IPSO administrators to create and use separate roles With RBA an administ...

Page 294: ...pages for that feature but not to the monitor pages for that feature To provide access to the monitor pages you must include the monitor privilege for that feature in the role definition To add or edit a role 1 Select one of the following To add a role click Add Role under Configuration Security and Access Role Based Administration in the tree view To edit a role click Manage Roles under Configura...

Page 295: ... changes permanent Note You cannot delete the adminRole clusterAdminRole or monitorRole default roles Assigning Roles and Access Mechanisms to Users To give a user permissions for various features assign the role or roles that contain the feature permissions to the user You can also specify whether a user can use Nokia Network Voyager and the CLI by assigning access mechanisms to the user from the...

Page 296: ...terAdminRole to the users you create be sure to assign them a role of type Cluster The implications of this choice are explained below Users with the role clusterAdminRole automatically log into Cluster Voyager or the CCLI and have full access to all clustering features Users with the role type Cluster automatically log into Cluster Voyager or the CCLI and have access to the features that you assi...

Page 297: ...ble Telnet access to this appliance Telnet access is enabled by default Once you have enabled SSH and have tested your SSH access you should disable telnet access to avoid security vulnerabilities If you enable telnet access you usually should require S Key passwords for the admin and monitor users as described in Managing and Using S Key on page 290 Admin Network Login Allow or restrict admin log...

Page 298: ...cription Table 17 Modem Configuration Parameters Parameter Description Modem On Off Select the appropriate radio button to turn modem on or off Modem Status Shows whether the system detects a modem on the port and whether it is online Options Modem Detected No Modem Detected Inactivity Timeout minutes The length of time in minutes that a connected call on the modem can remain inactive that is no t...

Page 299: ...t you selected appears b Enter a country code Codes are listed in the tables below You can also view them by clicking Help from the Network Voyager page c Click Apply d Click Save to make your changes permanent Note When you dial into a Nokia appliance that has an Ositech Five of Clubs III modem installed be sure to set the connection rate to 9600 BPS If you do not the text you receive from the ap...

Page 300: ...18 Country Codes for Ositech Five of Clubs Card Code Country Code Country Code Country 1 Australia 17 Greece 12 Portugal 2 Belgium 99 Iceland 13 Spain 20 Canada 7 Ireland 14 Sweden 3 Denmark 8 Italy 25 Switzerland 4 Finland 9 Luxembourg 16 United Kingdom 5 France 10 Netherlands 22 United States 6 Germany 11 Norway Table 19 Country Codes for Ositech Five of Clubs Card II and III Code Country Code C...

Page 301: ...ect Yes for the Enable Session Management field 4 Enter the time interval for which a Network Voyager user is allowed to be logged in without activity in the Session Timeout in Minutes text box The default value is 20 minutes If the user closes the browser without logging out the exclusive configuration lock remains in effect until the session time out interval expires 5 Enter the number of the po...

Page 302: ...e a certificate and its associated private key 1 Click Generate Certificate for SSL under Configuration Security and Access Voyager in the tree view 2 Choose the Private Key Size that is appropriate for your security needs The larger the bit size the more secure the private key The default and recommended choice is 1024 bits 3 Optional Enter a passphrase in the Enter Passphrase and the Re enter Pa...

Page 303: ...FICATE REQUEST and END CERTIFICATE REQUEST b Store the new private key that your certification authority securely sends Install the private key and the certificate See Installing a Certificate later in this section 8 If you generated a self signed certificate a screen appears that contains a certificate New X 509 Certificate and its associated private key You must perform a cut and paste operation...

Page 304: ...ssages can help you troubleshoot further and might contain important information for Customer Support should you contact them Secure Shell SSH IPSO uses the Secure Shell SSH program to provide secure connections for the CLI SSH allows you to securely log in to another computer over a network execute commands on a remote platform and move files from one platform to another platform SSH provides a c...

Page 305: ...le to use public key authentication as well To permit public key authentication you must first authorize the users client identity keys for this system as described in Configuring Secure Shell Authorized Keys on page 308 To configure SSH 1 Click SSH Configuration under under Configuration Security and Access Secure Shell SSH in the tree view 2 Select Yes in the Enable Disable SSH Service field Not...

Page 306: ...w DSA Host Key drop down list The recommend value is 1024 bits 14 Click Apply 15 Click Save to make your changes permanent Note When you generate new keys you might need to change the configurations of each client or the clients might return errors For more information see your SSH client documentation Configuring Advanced Options for SSH The advanced SSH Server Configuration page allows you to co...

Page 307: ...te You can authenticate SSH connections by using public keys for RSA and DSA SSHv2 standard user and password information rhosts files RSA keys for SSHv1 or any combination of these methods In all cases the default is Yes except for rhost and rhost with RSA authentication The rhost utility is insecure and Nokia does not recommend using it 9 Click Apply 10 Optional In the Configure User Login Envir...

Page 308: ... can access accounts on your system without using a password To configure an authorized key you need to have information about the clients keys For SSHv1 implementation you need to enter the RSA key and such information as key size exponent and modulus One commonly used file name on your SSH client that is used for storing this information is identity pub For SSHv2 implementations you need to ente...

Page 309: ... client and optional comment in the RSA for protocol version 2 table To add a DSA authorized key to use in SSHv2 enter the DSA key in either OpenSSH format or SSHv2 format depending on your client and optional comment in the Add a New Authorized Key DSA for protocol version 2 table 4 Click Apply 5 Click Save to make your changes permanent Changing Secure Shell Key Pairs The following procedure des...

Page 310: ...To manage user identities 1 Click SSH Key Pairs under Configuration Security and Access Secure Shell SSH in the tree view 2 Click the View Create Identity Keys for User user name link for the appropriate user 3 Optional To create an RSA identity to use with SSHv1 select the key length in the Generate key of size field in the Generate New RSA v1 Identity for user name 4 Enter the passphrase in the ...

Page 311: ... 8000 The destination host should be 127 0 0 1 and the destination port should be 80 For security reasons check the allow local connections only box e Click OK twice to return to the connection dialog box f Press OK to connect to the remote host Note To redirect a port permanently choose Save As in the File menu and save the configuration to a file This allows you to redirect the same ports every ...

Page 312: ...gured to accept cookies to enable session management To enable or disable session management 1 Click Voyager Options under Configuration Security and Access Voyager in the tree view 2 Select Yes for Enable Cookie Based Session Management to enable session management select No to disable session management 3 Click Apply A new login window opens See Obtaining a Configuration Lock on page 25 4 Close ...

Page 313: ...uration 1 Click AAA under Configuration Security and Access in the tree view 2 Create an AAA Configuration entry using one or more of the following elements a Creating a Service Module Entry b Creating a Service Profile c Creating an Authentication Profile d Creating an Accounting Profile e Creating a Session Profile Which element to create depends on the needs of the service that uses AAA at a mi...

Page 314: ...irements do not match any of the existing authentication profiles Leave the Auth Profile text box blank if the service requirements do not include authentication services 3 In the Acct Profile text box under the Service Profile table enter either an existing item from the Acct Profile table if the service requirements match one of the existing accounting profiles or a unique accounting profile nam...

Page 315: ...base to authenticate the user using a special algorithm specifically for the Apache Web server When the user requests a Network Voyager page this module is called to authenticate the user which in turn verifies the user name and password supplied during the Network Voyager login against the information in etc master passwd Then the module performs Lawful Interception Gateway processing to determin...

Page 316: ...ss phrase which is used to authenticate the user by using the password database SNMPD pam_snmpd_auth so 1 0 Authenticates the SNMP packets from a user Management Station When an SNMP user is added in the system through Network Voyager a corresponding authentication and privacy key is created and kept in the usmUser database var ucd snmp snmpd conf When an SNMP packet is received the user name in t...

Page 317: ...atches the service requirements Values other than required are effective only when the service requires more than one Session Profile For a description of the effect on result disposition and subsequent algorithm invocation that the list items represent see Profile Controls Session Profile Types The following table describes the session management algorithms that the values represent in the Type d...

Page 318: ...rements for authentication accounting and session management as follows Control Description required The result is retained and the next algorithm is invoked requisite A result of failure is reported immediately and no further algorithms are invoked sufficient If no previous algorithm reported failure a result of success is reported immediately and no further algorithms are invoked a result of fai...

Page 319: ... multiple remote access servers A host contacts a RADIUS server which determines who has access to that service Beginning with IPSO 3 5 Nokia provides RADIUS client support only To configure RADIUS servers for a single authentication profile 1 Click AAA under Configuration Security and Access in the tree view 2 In the Auth Profile section enter a name for the RADIUS service in the New Auth Profile...

Page 320: ...t Address text box RADIUS supports only IPv4 addresses 9 Enter the port number of the UDP port to contact on the server host in the Port text box The default is 1812 which is specified by the RADIUS standard The range is 1 to 65535 Caution Firewall software often blocks traffic on port 1812 To ensure that RADIUS packets are not dropped make sure that any firewalls between the RADIUS server and IPS...

Page 321: ... and not for accounting Challenge response authentication such as S Key over TACACS is not supported by IPSO at this time You can configure TACACS support separately for various services The Network Voyager service is one of those for which TACACS is supported and is configured as the httpd service When TACACS is configured for use with a service IPSO contacts the TACACS server each time it needs ...

Page 322: ...TACACS standard The range is 1 to 65535 10 Enter the shared secret used to authenticate the authorization profile between the TACACS server and the local client in the Secret text box You must also configure this same value on your TACACS server Enter a text string without a backslash 11 Optional Enter the number of seconds to wait for a response after contacting the server in the Timeout text box...

Page 323: ...Profile Configuration Changing a Session Profile Configuration Deleting an Item in a Service Profile Entry The steps for changing each of these elements is described in the following subsections 3 Click Apply 4 Click Save to make your changes permanent Changing the Service Profile You can add one or more authentication accounting or session profiles to a service profile Note that the authenticatio...

Page 324: ...ice Profile Entry and add them in the desired order using this procedure Creating a Stacked Service Module When you create a service the requirement for multiple authentication algorithms is as follows The following graphic screens below show an example of how to create a service which has the requirement for multiple authentication algorithms Only the portion of the page that has changes is shown...

Page 325: ...rvice Profile text box the name is shown in the Profile Name column of the Service Profile table 2 Enter an item from the Name column of the Session Profile table into the Session Profile text box of the Service Profile table If the requirements for the service do not match any of the entries in the Session Profile table create a new Session Profile and enter the new name in the Session Profile te...

Page 326: ...ng algorithms that the list items represent see Accounting Profile Types Select a different item in the Control list that matches the new service requirements Values other than required are effective only when the service requires more than one Acct Profile For a description of the effect on result disposition and subsequent algorithm invocation that the list items represent see Profile Controls N...

Page 327: ... the Profile column of one of the rows in the Service Module Configuration table 3 Click Apply 4 Click Save to make your changes permanent You cannot delete the following services httpd snmpd login sshd other Encryption Acceleration The Nokia encryption accelerator cards provide high speed cryptographic processing that enhance the performance of virtual private network VPN tunnels By taking over c...

Page 328: ...Click Apply to enable the card Monitoring Cryptographic Acceleration You can also monitor encryption accelerator card interfaces with Network Voyager To monitor the encryption accelerator cards click Cryptographic Accelerator Statistics under Monitor Hardware Monitoring in the tree view IPSec Tunnels IPSO Implementation Developed by the Internet Engineering Task Force IETF IPSec is the industry st...

Page 329: ...atures for authenticating the data s source IPSec operates in two modes Transport mode Tunnel mode In transport mode the original IP header remains the outer header The security header is placed between the IP header and the IP payload This mode offers some light bandwidth savings at the expense of exposing the original IP header to third party elements in the packet path It is generally used by h...

Page 330: ...e address of a gateway to the packet Tunneling allows you to pass nonrouteable and private RFC 1918 IP addresses through a public network that otherwise would not be accepted Tunneling with ESP using encryption also has the advantage of hiding the original source and destination addresses from the users on the public network reducing the chances of traffic analysis attacks Tunneling with ESP can c...

Page 331: ...protocol defines two phases Phase 1 In order to safely set an IPSec SA the two peers first establish a secure channel which is an encrypted and authenticated connection The two peers agree on authentication and encryption methods exchange keys and verify each other s identities The secure channel is called ISAKMP Security Association Unlike IPSec SAs ISAKMP SAs are bi directional and the same keys...

Page 332: ...nization organization unit city state country and contact email address 3 Forward the certificate request to the CA or corresponding RA Registration Authority using the Web interface or another file transfer mechanism CA or RA verifies the identity of the IPSec system and generates the approved certificate A certificate is valid only for a certain period of time 4 Download and install the approved...

Page 333: ...d of security applied to a defined traffic is specified by a list of proposals ordered by priority This list is offered to the other peer beginning with the lowest priority value proposal Proposals and filters can be reused in different policies Other elements defined in a policy are authentications methods Preshared Keys or X 509 Certificates and lifetime attributes Miscellaneous Tunnel Requireme...

Page 334: ... Hard Phase 1 lifetime seconds 5 Hard Phase 2 lifetime seconds The soft limit value is approximately 80 90 percent of the hard limit value depending on whether the device is working as a session initiator or responder If you create tunnels between an IPSO platform and non IPSO systems configure the non IPSO system so that the Phase 1 lifetime is five times the Phase 2 lifetime Set the encryption t...

Page 335: ...y Choosing IPv4 or IPv6 General Configuration Page To chose IPv4 or IPv6 general configuration pages 1 Click IPSec under Security and Access in the tree view 2 Access the appropriate IPSec General Configuration page To display the IPv4 IPSec General Configuration page click on the IPSec link To display the IPv6 IPSec General Configuration page first click on the IPv6 Configuration link this takes ...

Page 336: ...overlap 5 Click Apply The new filter information is added to the Filters list If needed you can then define a protocol or a port Defaults are assumed Repeat this operation for as many networks you need Note Each Network Voyager page displays a maximum of 10 proposals or 10 filters If you create more than 10 they are continued on new pages Access these pages by clicking the link directly below the ...

Page 337: ...icate click Apply This action should print a Success message Click on the link titled IPSec General Configuration page to return to the main IPSec configuration page 7 If you are asked to enter URL information of the certificate enter the URL to the certificate Examples are http test acme com dev1 cert ftp test acme com dev1 cert file tmp dev1 cert 1dap test acme com cn dev1 acme com pem_x509 sub ...

Page 338: ... paste the PEM certificate request into the CA RA certificate enrollment page Note Some CAs do not expect the header BEGIN CERTIFICATE REQUEST and the footer END CERTIFICATE REQUEST lines in the text Alternatively you can copy the text in a file and send the file to the CA RA by FTP or some other file transfer mechanism that is supported Contact the CA for details 7 If you could successfully make ...

Page 339: ...em Also includes error messages Debug besides the informational messages gives full details of the negotiations that the subsystem performs Note In any of the log level options confidential information such as secrets or session keys are not shown Allowing tunnels without logical interfaces This option allows for the creation of IPSec tunnels that are not associated with a logical tunnel interface...

Page 340: ...ly one method can be active at a time 5 If you chose Pre Shared Secret enter the shared secret in the Enter Shared Secret text box Enter the secret again in the Shared Secret Verify text box for verification 6 Click Apply If the secret has been entered correctly the red light of the Secret Status field turns green after you click Apply 7 If you chose X 509 Certificates select the certificate name ...

Page 341: ...ss of the remote interface to which the IPSec tunnel is bound in the Remote Address text box The remote endpoint cannot be one of the system interface addresses and must be the local endpoint configured for the IPSec tunnel at the remote gateway 7 Click Apply An Apply Successful message appears and an entry for the new tunnel appears in the IPSec Tunnel Rules table Note IPSO can support up to 1500...

Page 342: ...umn select a filter name that corresponds to the source of the traffic that this policy will protect then click Apply Repeat this operation to add as many filters as necessary Click Apply after each selection Note If there are 40 or more source or destination filters they do not appear as a list on the Network Voyager page To view a filter that is not displayed type the name of the filter in the a...

Page 343: ...ly after each selection Note Select as source filters only filters that present a single host but no subnet Note If you have 40 or more source or destination filters they are not displayed as a list on the Network Voyager page To view a filter that is not displayed type the name of the filter in the appropriate field 7 From the drop down list in the Destination Filters column select a filter name ...

Page 344: ...on Alg drop down list Click Apply 5 In the Filters table enter site_A as a new filter name in the New Filter text box Enter 192 68 22 0 in the Address text box and 24 in the Mask Length text box Click Apply The new entry appears in the Filters table 6 In the Filters table enter site_B as a new filter name in the New Filter text box Enter 192 68 23 0 in the Address text box and 24 in the Mask Lengt...

Page 345: ...to return to the IPSec General Configuration page Under the IPSec Tunnel Rules table enter IPSec_tunn in the New Tunnel field 16 If Create a logical interface appears select Yes 17 Enter 192 68 26 65 in the Local Address text box 18 Enter 192 68 26 74 in the Remote Address text box Click Apply 19 Click on the name in Tunnel Rules table The IPSec Tunnel IPSec_tunn page appears 20 Optional Click On ...

Page 346: ...To configure Nokia Platform 1 IPSO 1 Click IPSec under Configuration Security and Access in the tree view of the network application platform 1 Nokia Platform 1 IPSO 2 Under the Proposals table enter ah md5 as a name for a new proposal in the New Proposal text box 3 In the Type field click AH 4 Select MD5 from the Authentication Alg drop down list and None from the Encryption Alg drop down list Cl...

Page 347: ... a Proposal drop down list Enter 1 in the Priority text box 13 If no default is selected select Pre Shared Secret in the Authentication Method field 14 Enter secreted in the Enter Shared Secret text box and Shared Secret Verify text box Click Apply 15 Click Up to return to the IPSec General Configuration page 16 Select IPSec Transport Rules Configuration link The IPSec Transport Rules page appears...

Page 348: ...d must be the same as the remote address configured for the IPSec tunnel at the remote router 5 Optional Enter the IP address of the remote end of the IPSec tunnel in the Remote Address text box The remote address cannot be one of the system s interfaces and must be the same as the local address configured for the IPSec tunnel at the remote router 6 Click Apply 7 To make your changes permanent cli...

Page 349: ...ou must change the default configuration if you want your Nokia platform to accept packets that have both the SYN and FIN bits set Complete the following procedure to configure your platform to accept packets that have both SYN and FIN bits set To set TCP flag combinations 1 Click Miscellaneous Security Settings under Configuration Security and Access in the tree view 2 Select On next to Allow TCP...

Page 350: ...8 350 Nokia Network Voyager for IPSO 4 0 Reference Guide ...

Page 351: ...oring tool is ICLID which provides interactive text based monitoring of the routing subsystem Routing Protocols Routing protocols compute the best route to each destination Routing protocols also exchange information with adjacent firewalls The best route is determined by the cost or metric values Routing protocols can be broken up into two major categories exterior gateway protocols EGPs and inte...

Page 352: ... OSPF Open Shortest Path First is a modern link state routing protocol It is described in RFC 2328 It fully supports non classful networks OSPF has a single 24 bit metric for each destination You can configure this metric to any desired value OSPF allows the AS to be broken up into areas Areas allow you to increase overall network stability and scalability At area boundaries routes can be aggregat...

Page 353: ...ng RIP BGP RIPng OSPFv2 and OSPFv3 BGP 4 policy can only be specified using route maps For the other protocols you can use either route maps or the Route Redistribution and Inbound Route Filters features that you configure using Network Voyager Route map for import policy corresponds to Inbound Route Filters route map for export policy corresponds to Route Redistribution Note Route maps offer more...

Page 354: ... NSSA Not So Stubby Area Allows the import of external routes in a limited fashion using Type 7 LSAs NSSA border routers translate selected Type 7 LSAs into Type 5 LSAs which can then be flooded to all Type 5 capable areas Configure an area as an NSSA if you want to reduce the size of the routing table but still want to allow routes that are redistributed to OSPF It is generally recommended that y...

Page 355: ... types of routes Intra area Have destinations within the same area Interarea Have destinations in other OSPF areas Autonomous system external ASE Have destinations external to the autonomous system AS These are the routes calculated from Type 5 LSAs NSSA ASE Router Have destinations external to AS These are the routes calculated from Type 7 LSAs All routers on a link must agree on the configuratio...

Page 356: ...autonomous system By default the system selects a non loopback address assigned to the loopback interface if one is available or an address from the list of active addresses Nokia recommends that you configure the router ID rather than accepting the system default value This prevents the router ID from changing if the interface used for the router ID goes down In a cluster environment you must sel...

Page 357: ...fic prefix from being advertised into the backbone by selecting On in the Restrict field next to the entry for that prefix Add New Stub Network OSPF can advertise reachability to prefixes that are not running OSPF using a stub network The advertised prefix appears as an OSPF internal route and can be filtered at area borders with the OSPF area ranges The prefix must be directly reachable on the ro...

Page 358: ...associated with the default route to the NSSA Default Route Type Specifies the route type associated with the Type 7 default route for an NSSA when routes from other protocols are redistributed into OSPF as ASEs If a redistributed route already has a route type this type is maintained If summary routes are imported into an NSSA only then a Type 7 default route is generated otherwise a Type 3 defau...

Page 359: ... next to the entry for that prefix 6 Configure virtual links for any area that does not connect directly to the backbone area as described in Configuring Virtual Links on page 359 7 Configure the OSPF interfaces as described in To configure an OSPF interface on page 363 Configuring Virtual Links You must configure a virtual link for any area that does not connect directly to the backbone area You ...

Page 360: ...link must agree on the authentication configuration to form neighbor adjacencies This feature guarantees that routing information is accepted only from trusted routers Options None Simple MD5 Default None 5 If you selected MD5 for the auth type you must also configure the following parameters Add MD5 Key If the Auth type selected is MD5 the Key ID and MD5 Secret fields appear Specify the Key ID an...

Page 361: ... recalculations of the OSPF routing table Default is 5 Range is 1 60 Default ASE Route Cost Specifies a cost for routes redistributed into OSPF as ASEs Any cost previously assigned to a redistributed routed overrides this value Default ASE Route Type Specifies a route type for routes redistributed into OSPF as ASEs unless these routes already have a type assigned There are two types Type 1 externa...

Page 362: ...he default hello interval is 10 seconds For point to point interfaces the default hello interval is 30 seconds Dead interval Specifies the number of seconds after the router stops receiving hello packets that it declares the neighbor is down Typically this value should be four times the hello interval For a given link this value must be the same on all routers or adjacencies do not form The value ...

Page 363: ... the cost is ignored Options are On or Off Default is Off Virtual address Makes OSPF run only on the VRRP Virtual IP address associated with this interface If this router is not a VRRP master then OSPF will not run if this option is On It will only run on the VRRP master You must also configure VRRP to accept connections to VRRP IPs For more information see Configuring Monitored Circuit VRRP on pa...

Page 364: ...tform D are gateways Nokia Platform C is an area border router with Interface e1 on the backbone area Area 0 and Interface e2 on Area 1 Nokia Platform A and Nokia Platform B are on the backbone area Nokia Platform D is on Area 1 The routes in Area 0 are learned by Nokia Platform D when the ABR Nokia Platform C injects summary link state advertisements LSAs into Area 1 1 Configure the interfaces as...

Page 365: ...ve network traffic if there are a large number of routes and that it has a slow convergence time and is less secure than other IGPs such as OSPF Routers using RIP broadcast their routing tables on a periodic basis to other routers whether or not the tables have changed Each update contains paired values consisting of an IP network address and a distance to that network The distance is expressed as...

Page 366: ...eived networks and hosts from the network mask of the interface from which the packet was received If a received network or host is on the same natural network as the interface over which it was received and that network is subnetted the specified mask is more specific than the natural network mask then the subnet mask is applied to the destination If bits outside the mask are set it is assumed to...

Page 367: ...Network Voyager Option Description Version You an use either RIP 1 or RIP 2 RIP interfaces You can specify the interfaces on which to run RIP Metric You can adjust the metric to a given interface to something other than the number of hops You can use this adjustment to trick the router into taking a better path for example one that has a faster link speed even though it may have more hops Accept u...

Page 368: ...hen click Apply The password must be from 1 to 16 characters long For MD5 authentication select MD5 from the AuthType drop down list Enter the password in the MD5 key text box then click Apply 10 Optional If you selected MD5 as your authentication type and want to ensure interoperability with Cisco routers running RIP MD5 authentication click YES in the Cisco Interoperability field The default is ...

Page 369: ...IP 1 Note Auto summarization applies only to RIP 1 1 Click RIP under Configuration Routing Configuration in the tree view 2 To enable auto summarization click on in the Auto Summarization field then click Apply 3 To disable auto summarization click off in the Auto Summarization field then click Apply 4 To make your changes permanent click Save Note By default auto summarization is enabled RIP Exam...

Page 370: ...oint traffic distribution patterns dense and sparse Dense mode is most useful when Senders and receivers are in close proximity There are few senders and many receivers The volume of multicast traffic is high The stream of multicast traffic is constant Dense mode PIM resembles Distance Vector Multicast Routing Protocol DVMRP Like DVMRP dense mode PIM uses Reverse Path Forwarding and the flood and ...

Page 371: ... Nokia supports PIM both Dense Mode and Sparse Mode in a cluster Nokia also supports IGMP in a cluster IPSO clusters have three modes of operation To use PIM either Dense Mode or Sparse Mode in an IP cluster you must use either multicast mode or multicast mode with IGMP as the cluster mode Do not use forwarding mode For more information about IP clustering see IP Clustering Description on page 207...

Page 372: ...ail to forward multicast traffic all cluster nodes send periodic PIM hello messages All messages from each cluster member have the same source IP address generation ID holdtime and designated router priority Therefore all neighboring routers view the cluster as a single neighbor even though they receive hello messages from all members of the cluster Note The generation ID included in all PIM hello...

Page 373: ...at the check box next to Forward Cluster Members IP addresses is not checked If it is checked click on the check box to remove the check Make sure that all the other available check boxes are checked Note All available check boxes should be checked if you are not enabling PIM SM or PIM DM in an IP cluster d Click Ok to save your changes PIM and Check Point SecureXL To make sure that your PIM conne...

Page 374: ...7 Optional For each interface that is running PIM enter a new designated router priority in the DR Election Priority text box The router with the highest priority and the highest IP address is elected as the designated router The default is 1 and the range is 0 to 4294967295 2 32 1 Note Although you can configure this option PIM DM does not use DR Election Priority On a LAN with more than one rout...

Page 375: ...fix that all neighboring PIM routers share 5 Optional For each interface that is running PIM enter a new designated router priority in the DR Election Priority text box The router with the highest priority and the highest IP address is elected as the designated router The default is 1 and the range is 0 to 4294967295 2 32 1 6 Click Apply and then click Save to make your changes permanent 7 Click t...

Page 376: ... between receiving a join prune message with a higher hold time and allowing duplicate join prune messages to be sent again Note The join prune suppression interval should be set at 1 25 times the join prune interval 14 In the Assert Ranks section in the appropriate text box enter a value for the routing protocol s you are using Assert Rank values are used to compare protocols and determine which ...

Page 377: ...ter priority in the DR Election Priority text box The router with the highest priority and the highest IP address is elected as the designated router To break a tie the designated router with the highest IP address is chosen If even one router does not advertise a DR election priority value in its hello messages DR election is based on the IP addresses The default is 1 and the range is 0 to 429496...

Page 378: ...ace to run PIM Note The number of interfaces on which you can run PIM is unlimited 7 Click Apply 8 Optional For each interface that is running PIM enter the specified local address in the Local Address edit box PIM uses this address to send advertisements on the interface This option is useful only when multiple addresses are configured on the interface Note If neighboring routers choose advertise...

Page 379: ...y 6 In the Sparse Mode Rendezvous Point RP Configuration section to enable this router as a candidate bootstrap router a Click On in the Bootstrap Router field b Optional Enter the address of the bootstrap router in the Local Address text box Configure an address for the candidate bootstrap router to help specify the local address used as the identifier in the bootstrap messages By default the rou...

Page 380: ...alue the higher the priority The default priority value is 0 8 Optional To configure a multicast address for which this router is designated as the rendezvous point in the Local RPSET field enter an IP address in the Multicast address group text box and the address mask length in the Mask length text box Note If you do not configure a multicast address for the router it advertises as able to funct...

Page 381: ...Mode field click On for sparse 3 Click Apply 4 In the Interfaces section click On each interface on which to run PIM Note The number of interfaces on which you can run PIM is unlimited 5 Click Apply 6 Click the Advanced PIM Options link In the Sparse Mode Timers section enter a value for the register suppression interval in seconds in the Register Suppression Interval text box This value represent...

Page 382: ... is received and when the assert is timed out 14 Optional In the General Timers section enter a value for the assert rate limit in the Assert Rate Limit text box The value represents the number of times per second at which the designated router sends assert messages The upper limit is 10 000 assert messages per second 15 Optional In the General Timers section enter a value in seconds for the inter...

Page 383: ...ke your changes permanent click Save Debugging PIM The following iclid commands can assist you in debugging PIM The following iclid commands can assist you in debugging sparse mode PIM PIM SM Command Shows show pim interface Which interfaces are running PIM their status and the mode they are running This command also displays the interface and its DR priority and the number of PIM neighbors on the...

Page 384: ...M trap messages All Traces all PIM events and packets The following trace options apply to sparse mode implementations only Bootstrap Traces bootstrap messages CRP Traces candidate RP advertisements RP Traces RP specific events including both RP set specific and bootstrap specific events Register Traces register and register stop packets The following trace option applies to dense mode implementat...

Page 385: ...e An update message includes the following information Configured autonomous system number Current edition number of the routing table Checksum of the update message Count of the number of routes included List of route entries An IGRP update packet contains three types of routine entries Interior System Exterior Each entry includes three bytes of an IP address The fourth byte is determined by the ...

Page 386: ...new route is adopted In general routing updates are issued every 90 seconds If a router is not heard from for 270 seconds all routes from that router are deleted from the routing database If holddowns are enabled and a route is deleted the route remains in the holddown for 280 seconds If a router is not heard from for 630 seconds all routes from that router are no longer announced that is after th...

Page 387: ...p are omitted from the response Poison Reverse uses simple split horizon that is poison reverse is not performed Other implementations use a form of poison reverse in which at least a single update advertises an expired route as being unreachable on the interface from which the route was learned Forwarding to Unreachable Routes when a route expires or is marked as unreachable from the originator t...

Page 388: ...GRP are ignored In sum any route redistributed into IGRP that is marked as a system or exterior route has the natural class mask applied to the route to determine what route should be advertised in an update Configuring IGRP Note IGRP configuration of an interface is available only if you are licensed for IGRP on your IP router See the Licenses link on the Configuration page 1 Complete Ethernet In...

Page 389: ...ter the new hold interval metric in the Hold interval text box then click Apply 14 Optional In the Protocol section enter the new flush interval metric in the Flush interval text box then click Apply 15 Optional In the Protocol section click Yes in the No Check Zero field then click Apply Leave this field set to No to interoperate with Cisco equipment 16 To make your changes permanent click Save I...

Page 390: ...Path Multicast RPM allows the leaf routers to prune the distribution tree to the minimum multicast distribution tree RPM minimizes packet transmissions by not forwarding datagrams along branches that do not lead to any group members Multicast capabilities are not always present in current Internet based networks Multicast packets must sometimes pass through a router that does not support IP multic...

Page 391: ...ers Nokia recommends that if you have a core multicast network you configure the timer values so that they are uniform throughout a network Otherwise you can rely on the default timer values You can configure two neighbor specific timers three routing specific timers and a cache specific timer 1 Click DVMRP under Configuration Routing Configuration in the tree view 2 Click the Advanced DVMRP optio...

Page 392: ...h an IP protocol number of 2 Protocol operation requires that a designated querier router be elected on each subnet and that it periodically multicast a host membership query to the all hosts group Hosts respond to a query by generating host membership reports for each multicast group to which they belong These reports are sent to the group being reported which allows other active members on the s...

Page 393: ...uster The support for IGMP in an IP cluster ensures synchronization of IGMP state from master to members when a new node running PIM joins the cluster For more information about PIM and IP Clustering see PIM on page 370 and IP Clustering Description on page 207 Configuring IGMP 1 Complete Ethernet Interfaces for the interface 2 Configure a multicast routing protocol such as PIM or DVMRP The IGMP f...

Page 394: ...al in the Last member query interval text box then click Apply This value specifies the maximum response time in seconds inserted into IGMP group specific queries A lower value results in less time to detect the loss of the last member of a multicast group This value must be lower than that of the query interval The default is 1 and the range is 1 to 25 10 Optional Click On in the Disable router a...

Page 395: ...he static route will take from the Next Hop Type drop down list 5 Select the gateway type of the next hop router from the Gateway Type drop down list Gateway Address specifies the IP address of the gateway to which forwarding packets for each static route are sent This must be the address of a router that is directly connected to the system you are configuring Note Gateway Logical Name is valid on...

Page 396: ...static route you want to add Use the following format IP address mask length next hop IP address The IP addresses must be specified in a dotted quad format 0 to 255 0 to 255 0 to 255 0 to 255 The range for the mask length is 1 to 32 For example to add a static route to 205 226 10 0 with a mask length of 24 and next hops of 10 1 1 1 and 10 1 1 2 enter 205 226 10 0 24 10 1 1 1 10 1 1 2 4 Press Enter...

Page 397: ...1 Use Network Voyager to connect to Nokia Platform A 2 Click Static Routes under Configuration Routing Configuration in the tree view 3 Click on in the Default field then click Apply 4 In the gateway text box enter 192 168 22 1 then click Apply You should now have one static default route in your routing tables on Nokia Platform A For the rest of the network to know about this route you must redis...

Page 398: ... a directly attached interface is down all the gateways that belong to the interface are deleted from the list of next hop selections Backup static routes are useful for default routes but you cannot use them for any static route To create a backup static route 1 Click Static Routes under Configuration Routing Configuration in the tree view Note This example assumes that a static route has already...

Page 399: ...f the component routes that led to the generation of an aggregate route responds with an ICMP network unreachable message This message prevents packets for unknown component routes from following a default route into another network where they would be continually forwarded back to the border router until their TTL expires To create aggregate routes 1 Click Route Aggregation under Configuration Ro...

Page 400: ...e Prefix for New Aggregate text box and enter 24 in the Mask Length edit box then click Apply 4 Click OSPF2 in the New Contributing Protocol drop down list then click Apply 5 Click on in the Contribute all matching routes from OSPF2 field then click Apply 6 Click direct in the New Contributing Protocol drop down list then click Apply 7 Click on in the Contribute All Matching Routes from direct fie...

Page 401: ...ing database Each route has only one rank associated with it even though rank can be set at many places in the configuration The route derives its rank from the most specific route match among all configurations The active route is the route installed into the kernel forwarding table by the routing subsystem In the case where the same route is contributed by more than one protocol the one with the...

Page 402: ...In the preceding figure the top part of the network is running OSPF and the bottom part of the network is running RIP Nokia Platform D learns network 192 168 22 0 from two routing protocols RIP from the bottom of the network and OSPF from the top of the network When other hosts want to go to 192 168 22 0 through Nokia Platform D Nokia Platform D can select one protocol route such as an OSPF route ...

Page 403: ... represent the results of aggregating dissimilar routes These update messages are sent over TCP transport mechanism to ensure reliable delivery BGP contrasts with IGPs which build their own reliability on top of a datagram service As a path vector routing protocol BGP limits the distribution of router reachability information to its peer or neighbor routers Support for BGP 4 IPSO implements BGP 4 ...

Page 404: ...tween routes with equal preference from the same neighbor AS Internal BGP sessions carry at least one metric in the path attributes that BGP calls the local preference The size of the metric is identical to the MED Use of these metrics is dependent on the type of internal protocol processing BGP implementations expect external peers to be directly attached to a shared subnet and expect those peers...

Page 405: ...s set to the local AS On internal connections the AS path length is set to zero Routing information shared between peers in BGP has two formats announcements and withdrawals A route announcement indicates that a router either learned of a new network Path Attribute Definition AS_PATH Identifies the autonomous systems through which routing information carried in an UPDATE message passed Components ...

Page 406: ...on the mechanism used to propagate BGP information within a given AS take special care to ensure consistency between BGP and the IGP since changes in state are likely to propagate at different rates across the AS A time window might occur between the moment when some border gateway A receives new BGP routing information which was originated from another border gateway B within the same AS and the ...

Page 407: ...sirable If the metric is specified as IGP any existing metric on the route is sent as the MED For example this allows OSPF costs to be redistributed as BGP MEDs If this capability is used any change in the metric causes the route to be redistributed with the new MED or to flap so use it with care The BGP local preference is significant only when used with internal BGP It is a 32 bit unsigned quant...

Page 408: ...n are supported By default all routes received by the route reflector that originate from a client are sent to all internal peers including the client group but not the client If the no client reflect option is enabled routes received from a route reflection client are sent only to internal peers that are not members of the client group In this case the client group must be fully meshed In either ...

Page 409: ...one large AS Each distinct sub AS within a confederation is referred to as a routing domain RD Routing domains are identified by using a routing domain identifier RDI The RDI has the same syntax as an AS number but as it is not visible outside of the confederation it does not need to be globally unique although it does need to be unique within the confederation Many confederations find it convenie...

Page 410: ...ters are multiple hops away from each other or if multiple links are between them you can override this restriction by enabling the EBGP multihop feature TCP connections between EBGP peers are tied to the addresses of the outgoing interfaces Therefore a single interface failure severs the session even if a viable path exists between the peers EBGP multihop support can provide redundancy so that an...

Page 411: ...unavailable When a set threshold is reached that route is no longer considered valid and is no longer propagated for a given period of time usually about 30 minutes If a route continues to flap even after the threshold is reached the time out period for that route grows in proportion to each additional flap Once the threshold is reached the route is dampened or suppressed Suppressed routes are add...

Page 412: ...protocol Do not use VRRPv2 when configuring virtual IP support for BGP Note BGP support for advertising the virtual IP address of the VRRP virtual router is only available for IPv4 BGP sessions not for IPv6 In a VRRPv2 pair if you select the Virtual Address option on the Advanced BGP page it affect only IPv4 BGP peers In a VRRPv3 pair this option is not available for IPv6 BGP peers Perform the fol...

Page 413: ...nd establishes its peering relationship on a new master You must configure a cluster IP address as a local address when you run BGP in clustered mode For more information on IP Clustering see IP Clustering Description on page 207 Note Nokia recommends that you configure BGP in an IP cluster so that peer traffic does not run on the primary and secondary cluster protocol interfaces Note BGP support ...

Page 414: ...uting tables from these two ISPs Each routing table contains 50 000 routes The customer is only advertising its local routes 2 000 to each ISP With these figures you can compute the total memory requirements The base IPSRD memory is 2 MB Add this value to the following values to calculate the total memory requirements 1 To calculate the inbound memory requirements multiply the number of peers two ...

Page 415: ...onfigure the interface as in Ethernet Interfaces on page 34 2 Configure an internal routing protocol such as OSPF or configure a static route to connect the platforms within AS100 to each other For more information see Configuring OSPF on page 356 or To configure a default or static route on page 395 3 Click BGP under Configuration Routing Configuration in the tree view 4 Enter a router ID in the ...

Page 416: ...70 20 1 1 in the Add remote peer IP address text box then click Apply 9 Configure an inbound route filter for AS100 according to BGP Route Inbound Policy Example To configure IBGP on Nokia Platform C 1 Configure the interface as in Configuring an Ethernet Interface 2 Configure an internal routing protocol such as OSPF or configure a static route to connect the platforms in AS100 to each other For ...

Page 417: ...route filter according to BGP Route Inbound Policy Example To configure EBGP on Nokia Platform C 1 Click BGP under Configuration Routing Configuration in the tree view of Platform C 2 Enter 300 in the AS number text box 3 Click External in the Peer group type drop down list then click Apply 4 Enter 172 17 10 2 in the Add remote peer IP address text box then click Apply 5 Configure route redistribu...

Page 418: ... IP address edit box then click Apply 7 Configure route inbound policy according the BGP Route Inbound Policy Example on page 446 8 Configure route redistribution policy according to Redistributing Routes to BGP on page 407 9 Configure an inbound route filter according to BGP Route Inbound Policy Example on page 446 Verification To verify that you configured BGP neighbors correctly run the followi...

Page 419: ... being propagated with BGP updates This diagram shows four different configurations To configure Default MED for Nokia Platform D To configure MED Values for all peers of AS200 To configure MED Values for each external BGP peer for Nokia Platform D To configure MED Values and a route redistribution policy on Nokia Platform D To configure Default MED for Nokia Platform D 1 Click BGP under Configura...

Page 420: ...MED sent out text box 5 Click on in the Accept MED from external peer field then click Apply 6 Click the link for the peer IP address for Nokia Platform B under AS100 7 Enter 200 in the MED sent out text box 8 Click on in the Accept MED from external peer field then click Apply 9 Click the link for the peer IP address for Nokia Platform C under AS200 10 Enter 50 in the MED sent out text box 11 Cli...

Page 421: ... MED values correctly run the following commands in iclid show route show bgp neighbor peerid advertised show route bgp metrics For more information on these commands see Viewing Routing Protocol Information Changing the Local Preference Value Example This example shows how to set up two IBGP peers and how to configure routes learned using Nokia Platform A to have a higher local preference value o...

Page 422: ...es from BGP AS 100 field then click Apply To configure the static routes required for an IBGP session 1 Click Static Routes under Configuration Routing Configuration in the tree view 2 Enter 10 10 10 0 in the New static route text box 3 Enter 24 in the Mask length text box 4 Enter 20 10 10 2 in the Gateway text box then click Apply To configure the static routes required for Nokia Platform B 1 Con...

Page 423: ...a Platform C 1 Set up the confederation and the routing domain identifier a Click BGP under Configuration Routing Configuration in the tree view b Click Advanced BGP Options c Enter 65525 in the Confederation text box d Enter 65528 in the Routing domain identifier text box then click Apply 2 Create confederation group 65524 a Click BGP under Configuration Routing Configuration in the tree view b C...

Page 424: ...ased on ASPath Regular Expressions link c Enter 1 in the Import ID text box and enter in the ASPATH Regular Expression text box then click Apply d Click On in the Import All Routes From AS Path field then click Apply 5 Define route redistribution a Click Route Redistribution under Configuration Routing Configuration in the tree view b Click the BGP link in the Redistribute to BGP section c Click 6...

Page 425: ...Click On in the All Interface field then click Apply f Enter 192 168 35 1 in the Add a new peer text box then click Apply 4 Define BGP route inbound policy by using regular expressions for any AS path and from any origin a Click BGP under Configuration Routing Configuration in the tree view b Click the Based on ASPath Regular Expressions link c Enter 1 in the Import ID text box and enter in the AS...

Page 426: ...on Routing Configuration in the tree view b Enter 65526 in the AS number text box then click Apply 2 Create an external peer group a Click BGP under Configuration Routing Configuration in the tree view b Click Advanced BGP Options c Enter 65525 in the Peer Autonomous System Number text box d Click External in the Peer Group Type drop down list then click Apply 3 Enter the peer information a Click ...

Page 427: ...26 routing group h Select Reflector Client from the Peer type drop down list then click Apply Configuring Platform C as IBGP Peer of Platform B 1 Click BGP under Configuration Routing Configuration in the tree view on Platform C 2 Enter a router ID in the Router ID text box The default router ID is the address of the first interface An address on a loopback interface that is not the loopback addre...

Page 428: ...GP routes to BGP that section a different AS This is equivalent to configuring an export policy In this example as the diagram shows platform B which is part of AS 65526 is an EBGP peer to platform A which belongs to AS 65525 1 Click Route Redistribution under Configuration Routing in the tree view 2 Click the BGP Routes Based on AS link in the Redistribute to BGP section 3 Select 65526 in the Red...

Page 429: ...te redistribution policy for OSPF to BGP these changes also propagate to the redistribution policy for the interface routes into BGP 1 Follow the steps in the Redistributing OSPF to BGP Example 2 Match the following ASes with the following community IDs AS 4 with community ID 1 4 1 AS 5 with community ID 2 5 2 AS with no export by entering the AS values in the AS text box and the community IDs in ...

Page 430: ...he interface as in Ethernet Interfaces 2 Click Interface Configuration under Configuration in the tree view 3 Click the Logical Address Loopback link 4 Enter 1 2 3 4 in the New IP Address text box then click Apply Configuring a Loopback Address on Platform B 1 Configure the interface as in Ethernet Interfaces 2 Click Interface Configuration under Configuration in the tree view 3 Click the Logical ...

Page 431: ...or specific peer you configured in Step 1 This action takes you the page that lets you configure options for that peer 5 In the Nexthop field click on next to EBGP Multihop to enable the multihop option then click Apply 6 Optional Enter a value in the TTL text box to set the number of hops over which the EBGP multihop session is established The default value is 64 and the range is 1 to 255 Click A...

Page 432: ...or the interface whose IP address is 129 10 1 1 then click Apply 3 Select the backbone area in the drop down list for the interface whose IP address is 129 10 2 1 then click Apply 4 Enter 1 2 3 4 in the Add a new stub host column then click Apply Configuring OSPF on Platform B 1 Click OSPF under Configuration Routing in the tree view 2 Select the backbone area in the drop down list for the interfa...

Page 433: ...s over which the EBGP multihop session is established The default value is 64 and the range is 1 to 255 7 Click Apply Verification To verify that you have configured load balancing correctly run the following commands in iclid show bgp neighbor show route bgp For more information on these commands see Viewing Routing Protocol Information Adjusting BGP Timers Example 1 Configure a BGP neighbor as i...

Page 434: ...configure an EBGP peer with MD5 authentication 7 Enter 10 10 10 2 in the Add remote peer ip address text box then click Apply 8 Click the 10 10 10 2 link to access the BGP peer configuration page 9 Select MD5 as the authentication type from the AuthType drop down list then click Apply 10 Enter the MD5 shared key test123 for example in the Key text box then click Apply Configuring BGP Route Redistr...

Page 435: ...f flapping routes The value of this matrix increases as routes become more unstable and decreases as they become more stable Suppressed routes that are stable for long period of time are re advertised again This example consists of the following Enabling BGP function Enabling weighted route dampening 1 Click BGP under Configuration Routing in the tree view 2 Click the Advanced BGP Options link 3 E...

Page 436: ... with the largest local preference If the local preferences are the same prefer the route that has the shortest AS_path If all paths have the same AS_path length prefer the path with the lowest origin type Origin IGP EGP Incomplete If the origin codes are the same prefer the path with the lowest MED attribute if MED is not ignored If the paths have the same MED prefer the external path over the in...

Page 437: ...ute Monitor page or using the show IPv6 route command 2 Log in to Router 1 using Network Voyager and configure the connection as follows a Click BGP under Configuration Routing in the tree view b Enter AS number of the other router c In the Peer Group Type drop down list select External d Click Apply e Under AS2 External Group in the Add Remote Peer Address IPv6 text box enter the IPv6 address of ...

Page 438: ...ed on the same router Route redistribution is also useful for advertising static routes such as the default route or aggregates into a protocol Note Route metrics are not translated between different routing protocols Note You can also use route maps to redistribute routes from one protocol to another You can define route maps only using CLI commands For information on route maps see Route Maps on...

Page 439: ...terface and or source gateway Both OSPF and OSPF ASE routes may be redistributed into other protocols All routes may be redistributed by AS path When BGP is configured all routes are assigned an AS path when they are added to the routing table For all interior routes this AS path specifies IGP as the origin and no ASes in the AS path The current AS is added when the route is redistributed For BGP ...

Page 440: ... are excluded from being redistributed from AS 4 are redistributed to AS 100 To redistribute a single route 1 To restrict route redistribution to route 100 2 1 0 24 enter 100 2 1 0 in the New IP prefix to redistribute text box 2 Enter 24 in the Mask length text box then click Apply 3 Select Exact from the Match Type drop down list then click Apply This procedure enables redistribution of route 100...

Page 441: ...ibuted RIP version 1 assumes that all subnets of the shared network have the same subnet mask so they are able to propagate only subnets of that network RIP version 2 removes that restriction and is capable of propagating all routes when not sending version 1 compatible updates Redistributing RIP to OSPF Example In this example Nokia Platform A is connected to a RIP network and is redistributing R...

Page 442: ...onnect to Nokia Platform A using Network Voyager 2 Click Route Redistribution under Configuration Routing in the tree view 3 Click the RIP link under the Redistribute to OSPF External section 4 To redistribute all routes click Accept in the All RIP routes into OSPF External field Optional To change the cost metric for RIP Routes into OSPF Externals enter the new cost metric in the Metric text box ...

Page 443: ...onal To change the cost metric for RIP Routes into OSPF Externals enter the new cost metric in the Metric text box then click Apply 5 If you do not want to export all OSPF routes into RIP click Restrict and define a route filter to advertise only certain OSPF routes into RIP 6 Assume that Nokia Platform B has another interface not shown in the diagram and that it has two additional OSPF routes 10 ...

Page 444: ...lick Apply 6 To redistribute OSPF routes enter the IP prefix in the New IP Prefix to Redistribute text box and the mask length in Mask Length text box then click Apply Redistributing Routes with OSPF It is not possible to create OSPF intra area or inter area routes by redistributing routes from the IPSRD routing table into OSPF It is possible to redistribute from the IPSRD routing table only into ...

Page 445: ...f the filter is 10 8 then any network 10 route with a prefix length greater than 8 matches but those with a prefix length of 8 do not match Routes that match more specific prefixes and include the given prefix For example if the filter is 10 8 then any network 10 route with a prefix length greater than or equal to 8 matches Routes that match a given prefix with a prefix length between a given rang...

Page 446: ...ion begin again at step 3 BGP Route Inbound Policy Example You can selectively accept routes from different BGP peers based on a peer autonomous system or an AS path regular expression To configure route inbound policy on Nokia Platform D based on an autonomous system number 1 Click Inbound Route Filters under Configuration Routing in the tree view 2 Click the Based on Autonomous System Number lin...

Page 447: ...1 Click Inbound Route Filters under Configuration Routing in the tree view 2 Click the Based on ASPATH Regular Expressions link 3 Enter 500 in the Import ID edit box The import ID specifies the order in which the import lists are applied to each route For route filters based on AS path regular expressions the range of values is from 1 to 511 4 Enter a regular expression that identifies a set of AS...

Page 448: ...etailed description of how to create ASPATH regular expressions ASPATH Regular Expressions 1 To accept routes that transit through AS 3662 enter the following ASPATH regular expression in the ASPATH Regular Expression text box 3662 Select Any from the Origin drop down list then click Apply 2 To accept routes whose last autonomous system is 3662 enter this ASPATH regular expression in the ASPATH Re...

Page 449: ...line to the forwarding path You can configure ACLs and AGCs to process all incoming traffic from one or more interfaces or to process all outgoing traffic from one or more interfaces IPSO supports Access Control Lists for both IPv4 and IPv6 traffic Packet Filtering Description Traffic that is classified can be filtered immediately The actions for filtering are Accept The accept action forwards the...

Page 450: ...For this reason the Queue Class QC configuration provides an internetwork control queue by default some locally sourced traffic is prioritized to use that queue Prioritization is only relevant for outgoing traffic Incoming traffic is never prioritized Use the DSfield in the Access Control List ACL to set the value for marking traffic that matches a given ACL rule The QueueSpec is used to map a flo...

Page 451: ...g on whether you are using IPv4 or IPv6 click the following link a For IPv4 ACLs click Access List under Configuration Traffic Management in the tree view b For IPv6 ACLs click IPv6 Access List under Configuration IPv6 Configuration Traffic Management in the tree view 2 Click the link for the appropriate ACL in the ACL Name field The page for that ACL appears 3 To apply an interface to the ACL a S...

Page 452: ...orm packet filtering Accept Drop Reject The following additional actions can also be associated with a rule Skip skip this rule and proceed to the next rule Prioritize give this traffic stream preferential scheduling on output Shape coerce this traffic s throughput according to the set of parameters given by an aggregation class You can configure an access list to control the traffic from one or m...

Page 453: ... tree view 2 Click the link for the appropriate Access Control List in the ACL Name field The page for that ACL appears 3 Click the Add New Rule Before check box 4 Click Apply This rule appears above the default rule As you create more rules you can add rules before other rules If you have four rules rules 1 2 3 and 4 you can place a new rule between rules 2 and 3 by checking the Add Rule Before c...

Page 454: ...address to be used for matching this rule Source Mask Length Specifies the source filter mask length to be used for matching this rule Destination IP Address Specifies the destination IP address to be used for matching this rule Destination Mask Length Specifies the destination filter mask length to be used for matching this rule Source Port Range Specifies the source port range to be used for mat...

Page 455: ...ansmitted based on the configured meanrate Traffic that arrives consistently at a rate less than or equal to the configured meanrate will always be marked conformant and will not be delayed or dropped in the respective shaper or policer stages DSfield Specifies the DiffServ codepoint with which to mark traffic which matches this rule RFC 791 states that the least significant two bits of the DiffSe...

Page 456: ...lass select the Delete check box next to the aggregation class that you want to delete and click Apply This aggregation class disappears from the Existing Aggregation Classes section To associate an aggregation class with a rule 1 Depending on whether you are using IPv4 or IPv6 click the following link a For IPv4 ACLs click Access List under Configuration Traffic Management in the tree view b For ...

Page 457: ...figure an aggregation class This aggregation class functions as a policer that is non conforming traffic will be dropped You should configure the aggregation classes so that the aggregate of the NC and EF flows consumes no more than 50 of the output link bandwidth This action prevents lower priority traffic from being starved See RFC 2598 for more information The other policers should also be conf...

Page 458: ...following link a For IPv4 ACLs click Queue Class under Configuration Traffic Management in the tree view b For IPv6 ACLs click IPv6 Queue Class under Configuration IPv6 Configuration Traffic Management in the tree view 2 In the Existing Queue Class table click the name of queue class you want to configure The configuration page for that queue class appears listing the queues in the queue class Eac...

Page 459: ... 6 Click Apply 7 Click Save to make your changes permanent Configuring ATM QoS ATM networks can provide different quality of service for network applications with different requirements Unspecified Bit Rate UBR service does not make any traffic related guarantees It does not make any commitment regarding cell loss rate or cell transfer delay Constant Bit Rate CBR service provides continuously avai...

Page 460: ...on Traffic Management in the tree view 2 Select the Delete check box next to the name of the ATM QoS Descriptor that you want to delete Note You can delete an existing ATM QoS Descriptor only after you dissociate it from an existing permanent virtual channel PVC See the steps below 3 Click Apply The ATM QoS Descriptor disappears from the Existing QoS Descriptors field 4 Click Save to make your cha...

Page 461: ...nnel PVC you want to configure 5 Under Configure a New PVC field click the QoS Descriptor drop down list and select the QoS descriptor with which you want to associate the PVC you configured Note You cannot delete or modify a QoS Descriptor that has been associated with a permanent virtual channel PVC You must first disassociate the PVC from the QoS descriptor See To delete an ATM QoS descriptor f...

Page 462: ...the COPS Security configuration section Note You can configure multiple client IDs Only one client ID can be active at a time 4 To configure a COPS client click on the Client ID drop down list and select a client name Click Apply 5 Enter either the IP address or domain name the server to act as the Policy Decision Point PDP in the Primary PDP edit box 6 Optional Enter the IP address or domain name...

Page 463: ...an configure up to 5 receive key IDs 9 Click Apply 10 Click Save to make your changes permanent Assigning Roles to Specific Interfaces The Nokia COPS implementation lets you assign roles to specific interfaces A role refers to a logical name assigned to a group of objects within a network The role name lets you group objects to which you want to assign a particular policy You can also assign a com...

Page 464: ...tion Traffic Management in the tree view 2 Click the Diffserv PIB link in the Configured COPS Module section This action takes you to the COPS Diffserv specific configuration page 3 In the Diffserv PIB specific configuration section click the Client ID drop down window and select the client ID name you now want to run Click Apply The name of the client ID you selected now appears in the Client ID ...

Page 465: ...lick Apply 8 Select Shape from the Action drop down window 9 Click Apply Second you create an Aggregation Class 1 Click on the Aggregation Class Configuration link on the Access Control List Configuration page 2 Enter the name of the new Aggregation Class in the Name edit box in the Create a New Aggregation Class section 3 Click Apply and then click Save to make your change permanent 4 Enter 100 i...

Page 466: ...are the relative performance of the QoS and non QoS configurations a Click Configuration Sets under Configuration System Management in the tree view b Enter pre QoS in the Save Current State to New Configuration Database edit box c Click Apply and then click Save to make your change permanent 2 Create an Aggregation Class a Click Aggregation Class under Configuration Traffic Management in the tree...

Page 467: ...rioritize telnet traffic a Click Access List under Configuration Traffic Management in the tree view b Enter wan_1_telnet in the Create a New Access List edit box c Click Apply d Select ser s3p1 from the Add Interfaces drop down window e Select Output from Direction drop down window f Click Apply g In the Existing Rules for wan_1_telnet section click on the Add New Rule Before check box h Click Ap...

Page 468: ...or the Packets Passed and Bytes Passed counters in the Expedited Forwarding row 3 Use the telnet session to generate traffic and then check each Nokia Platform s interface statistics a Click Interfaces under Configuration Interface Configuration in the tree view b Click on the link for ser s3p1 in the Physical column c Click on the Interface Statistics link d Examine the statistics for input and o...

Page 469: ...uration requests to be forwarded to and serviced from configuration servers located outside the single LAN BOOTP Relay has the following advantages over standard BOOTP It makes it possible to bootstrap load from redundant servers by allowing multiple servers to be configured for a single interface If one of the redundant configuration servers is unable to perform its job another takes its place It...

Page 470: ...to relay BOOTP requests to more than one server 7 Click Save to make your changes permanent Table 28 BOOTP configuration parameters Parameter Description Primary IP If you enter an IP address in the Primary IP text box all BOOTP requests received on the interface are stamped with this gateway address This can be useful on interfaces with multiple IP addresses aliases Wait Time Specifies the minimu...

Page 471: ...ed IP address While the IP Broadcast Helper forwards the UDP packet to the IP address without modification the BOOTP implementation is more complex the client sends a broadcast BOOTP packet to the router which sends a modified packet to the server The router modifies the packet by inserting its IP address in the giaddr field of the BOOTP packet this field is used by the server to identify the netw...

Page 472: ...r IP address appears under the UDP port To delete forwarding for a server select Off and then click Apply 6 Verify that each interface UDP port or server is enabled On or disabled Off for IP helper support according to your requirements 7 Click Save to make your changes permanent Router Discovery The ICMP Router Discovery protocol is an IETF standard protocol that allows hosts running an ICMP rout...

Page 473: ...en fall back to every few minutes In addition a host can send a router solicitation to which the router responds with a unicast router advertisement unless a multicast or broadcast advertisement is due in a moment Each router advertisement contains an advertisement lifetime field indicating for how long the advertised addresses are valid This lifetime is configured such that another router adverti...

Page 474: ...maximum time in seconds allowed between sending unsolicited broadcast or multicast ICMP Router advertisements on the interface Range 4 1800 Default 600 Advertisement Lifetime Specifies the time in seconds to be placed in the Lifetime field of Router Advertisement packets sent from the interface Range Between the value in the Maximum advertisement interval field and 9000 seconds Default 3 times the...

Page 475: ...ng cron jobs execute at the correct time and ensuring that applications that use system time to validate certificates find the correct time NTP runs as a continuous background client program on a computer sending periodic time requests to the servers that you configure obtaining server time stamps and using them to adjust the client s clock You should configure several servers for redundancy When ...

Page 476: ...a recommends that you use the default setting of v3 6 To add another new server repeat step 4 and click Apply 7 Optional Enable the NTP reference clock by clicking Yes in the NTP Master field and click Apply The Stratum edit box and Clock source drop down list appear By default the Stratum value is 1 and the Clock source is set to Local Clock Nokia recommends that you keep these defaults 8 To conf...

Page 477: ...he NTP Master field Note Only enable the NTP reference clock if you cannot reach an NTP server 11 Click Apply The Stratum and Clock source fields appear By default the Stratum value is 1 and the Clock source is set to Local Clock Nokia recommends that you keep these defaults 12 Click Save to make your changes permanent ...

Page 478: ...11 478 Nokia Network Voyager for IPSO 4 0 Reference Guide ...

Page 479: ...g files to a remote system To view statistical information on system utilization click either CPU Memory Live Utilization Disk and Swap Space Utilization or Process Utilization under Monitor System Utilization in the tree view CPU Memory Live Utilization The CPU Memory Live Utilization page shows system resources usage including CPU and memory usage This page retrieves the updated CPU and memory u...

Page 480: ...ation page shows the status of processes You must monitor and control processes to manage CPU and memory resources This page retrieves the updated process status every 30 seconds When you access this page a table displays the following fields for each process USER User who initiated or executed the process PID Identifier used by the kernel to uniquely identify the process CPU Percentage of CPU use...

Page 481: ...ng behavior of the PM is not user configurable Process Description inetd Internet daemon This daemon helps manage Internet services on IPSO by monitoring port numbers and handling all requests for services ipsrd Routing daemon This daemon is a user level process that constructs a routing table for the associated kernel to use for packet forwarding With a few exceptions IPSRD completely controls th...

Page 482: ...ion to optimize network performance or troubleshoot issues network traffic congestion Inclusion of packet throughput byte throughput broadcast packets and multicast packets for each interface is configurable by the administrator By default all are included Network Throughput Similar to the interface throughput report except that the query is based on the network address rather than interface name ...

Page 483: ...aggregation class and associate it with an access control list for the name to appear as a choice in the Aggregation Class list For more information see Chapter 10 Configuring Traffic Management 4 For the Interface Throughput Network Throughput or Interface Link State reports select All Logical or a specific interface name from the Select Interface drop down list 5 Under Select Format choose Graph...

Page 484: ...eue due to lack of buffer space VRRP Service Statistics Shows per interface and per virtual router VRRP send and receive packet statistics Monitoring System Logs The system logs links allow you to display updated system logs To view system logs click the appropriate link under Monitor System Logs in the tree view To refresh the information in a log reload the Web page System logs include the follo...

Page 485: ...For more information see To set the system configuration audit log on page 164 Note You do not need to configure the Web Server Access log or the Web Server Error log Viewing Cluster Status and Members To view information about cluster status and members click Clustering Monitor under Monitor in the tree view This page summarizes information about a configured IPSO cluster including information ab...

Page 486: ...inks OSPF Monitor BGP Monitor RIP Monitor IGRP Monitor VRRP Monitor PIM Monitor DVMRP Monitor IGMP Monitor To monitor routing protocol information for IPv6 you can select from the following links under Monitor IPv6 Monitor OSPFv3 Monitor RIPng Monitor IPv6 VRRP Monitor IPv6 Router Discovery Monitor IPv6 Route Monitor IPv6 Forwarding Table Displaying the Kernel Forwarding Table To view the IP forwa...

Page 487: ... is in use Cryptographic Accelerator Statistics of cryptographic accelerator if one is installed on your IP security platform These include the following statistics Packet statistics Packets Received number of packets passed to the driver for processing Packets Dropped number of packets that could not be processed by the device Packets Processed number of packets successfully processed by the devi...

Page 488: ...ful of information You can temporarily defeat this automatic paging by typing ctl S although when you resume scrolling by selecting any key you might lose a page of information At any point in iclid you can type to display possible command completions You can also abbreviate commands when an abbreviation is not ambiguous The help command takes as arguments iclid commands and top level iclid catego...

Page 489: ...ummary information about peer firewalls detailed Detailed information about each peer firewall in the event of an excessively long list type q summary Summary table about peer firewalls redistribution to AS as number Shows detailed redistribution data from BGP to the designated AS to AS as number from proto Shows detailed redistribution data to the designated AS from the specified protocol statist...

Page 490: ...y of statistical information about transmitted DVMRP packets error A summary of DVMRP packets with errors Element Category Subcategory Description igmp State of IGMP groups State of the IGMP groups maintained for each network interface if stats Summary of information about IGMP interface packets transmitted and received for each network interface interface IGMP settings for each network interface ...

Page 491: ...all link states as well as link connections asbr summary A summary of the OSPF firewall external Information on the OSPF external database summary Summary of OSPF database checksum Statistical data on the OSPF checksum database network Data on OSPF database network type Data on the state of firewall link parameters errors brief Provides basic data on OSPF errors dd OSPF dd errors hello OSPF hello ...

Page 492: ...distribution Shows a comprehensive list of redistributions to various protocols and autonomous systems and includes detailed distribution data Element Category Subcategory Description resource A comprehensive listing of resource statistics Element Category Subcategory Description rip A summary of information on the RIP routing process errors A list of various RIP errors packets Statistics on vario...

Page 493: ... suppressed BGP routes direct Directly connected routes and their status igrp Displays IGRP routes inactive Inactive routes aggregate Inactive aggregate routes bgp Inactive BGP routes direct Inactive direct routes igrp Inactive IGRP routes ospf Inactive OSPF routes rip Inactive RIP routes static Inactive static routes ospf OSPF route data rip RIP route data static Static route data summary Display...

Page 494: ...ns the system log displays the following message log records lost The lost records are those that should have been recorded in the FW 1 log message file typically located in the FWDIR log directory You can use one or both of the following solutions to resolve this issue Reduce the number of rules that are logged by Disabling as many accounting rules as possible Changing as many long logging rules ...

Page 495: ...age indicates that you have insufficient resources to accommodate a larger buffer size take appropriate actions and try this procedure again For further information contact Nokia Technical Assistance Center TAC 4 After you verify that the change is appropriate issue the same command without the n option modzap _fw_logalloc FWDIR boot modules fwmod o 0x20000 A confirmation message is displayed whic...

Page 496: ... written to the FW 1 log message file Nokia recommends that you do the following to prevent depleting the disk space allocated for the FW 1 log message file 1 Move your log files from the system hard drive to a server 2 Configure the relocated files by using the Check Point management client GUI Smart Dashboard as follows a Select the Check Point gateway object you are configuring b Under Gateway ...

Page 497: ...ddress 255 aggregate routes configuring 399 described 398 IPv6 273 weight 401 aggregation class 454 aggregation classes associating with rules 456 configuring 455 Apply button 26 area border routers 355 areas OSPF defined 354 ARP changing global parameters 128 configuring for ATM interfaces 130 deleting dynamic table entries 130 flushing dynamic entries 130 table entries 128 viewing dynamic entrie...

Page 498: ... 426 VRRP 184 with clusters 413 with VRRP 412 BIOS 28 black hole static routes 395 BOOTP relay about 469 enabling on interfaces 470 Bootp relay disabling 471 Bootp Relay Bootp enabling 470 bootstrap protocol 469 broadcast traffic forwarding 469 C cadmin password resetting 233 cadmin user 288 calling line identification screening 56 CCLI 209 210 Certificate Signing Request 303 chargen service 297 c...

Page 499: ...d 488 common open policy server 461 communities BGP 407 community strings 254 confederations BGP 409 configuration change log 485 saving 166 traps 257 configuration file creating 167 configuration locks described 25 log in with 25 overriding 25 configuring Ethernet interfaces 34 IP addresses 31 mail relay 157 network devices 30 NTP 476 OSPF 109 356 S key 291 Secure Shell SSH 305 309 SSH 305 T1 88 ...

Page 500: ...ed 154 DNS spoofing 304 documentation conventions 21 related 22 domain name service 154 DSA generating host keys 306 user identities 310 DSfield 452 455 duplex mode ethernet interface 34 duplex settings changing FDDI 50 duplicate IP addresses error message 190 DVMRP configuring 391 described 390 overview 352 DVMRP tunnels 125 DVRMP timers 391 Dynamic Host Configuration Protocol DHCP enabling 470 E...

Page 501: ...gateway cluster object 241 Generic Routing Encapsulation GRE 118 GetBulkRequest 262 GetNextRequest 262 GetRequest error messages 261 Getting Started Guide and Release Notes 22 GRE tunnels 118 groups adding 293 described 292 editing 293 group ID 293 ID 289 other group 292 SSH privileges 307 viewing list of 292 wheel 292 H hardware management MIB 251 monitoring 487 viewing summary information 28 HDL...

Page 502: ...ce queue statistics 484 interface link state report 482 interface link state report configuring 177 interface mode VMAC 190 interface throughput report configuring 177 Interface type changing in frame relay 115 interfaces ATM logical IP subnet 79 enabling Ethernet 34 LIS 79 logical 31 loopback 117 overview 29 point to point link over ATM 75 prefixes 30 see also Ethernet see also FDDI see also HSSI...

Page 503: ...Place and Receive Calls 57 Receive Calls 55 Removing an Incoming Number 57 troubleshooting 65 ISDN interfaces 51 ISDN MIB 250 J jobs scheduling 167 joining cluster 229 join time shared features 212 226 235 K keepalive changing interval for Cisco HDLC 111 changing interval in frame relay 114 changing interval in PPP 112 maximum failures 113 L link aggregation configuring 39 configuring switches for...

Page 504: ...age sensors 487 watchdog timer 487 monitoring cryptographic accelerator 487 MSS clamping 46 MTU setting for GigE Interfaces 42 MULTI_EXIT_DISC path attribute 405 multicast mode 213 214 215 multicast routers 392 multicast routing protocol 352 multicast tunnels changing endpoint address 119 configuring addresses 391 multi exit discriminator MED 406 autonomous system AS 404 BGP 404 multihop feature E...

Page 505: ... 404 path attributes BGP definitions 405 PC card installing 155 logging to 161 storing logs on 156 PCMCIA login 297 PDU address 259 performance rating clusters 234 physical interfaces 30 PIM advanced options for dense mode 375 candidate bootstrap 379 configuring sparse mode 376 debugging 383 described 370 disabling 374 high availability mode 377 in clusters 214 rendezvous point 379 VRRP 184 with c...

Page 506: ...6 RFC1583 compatibility 361 RIP aggregating routes 369 auto summarization 369 configuring 367 example 369 MIB 250 overview 352 365 redistributing routes to 440 RIPng for IPv6 273 timers 368 VRRP 184 rlogin utility vs SSH 305 role based administration overview 293 roles 295 adding 294 assigning to users 295 cluster 293 295 deleting 295 described 293 editing 294 overview 294 predefined system 294 ty...

Page 507: ...ice profile AAA 314 session management described 311 enabling 301 312 Log Off link 24 specifying timeout 301 session timeout configuring 312 setting time date 158 shell user s 289 show mcvr 201 show vrrp 201 slots monitoring 487 SMTP 157 SNMP agent address 255 contact information 260 daemon 254 described 249 enabling 254 enabling traps 256 259 error messages 260 framework MIB 250 location informat...

Page 508: ...nfiguring for PPP 90 example 94 T1 Interface Example 94 T1 with built in CSU DSU Interfaces 88 TACACS 321 TCP MD5 authentication 411 TCP MIB 250 TCP packets 349 TCP IP stack tuning 180 TCP establishment flag 454 telnet configuring for 290 enabling access 297 vs SSH 305 temperature trap 258 temperature sensors monitoring 487 TFTP access 297 time setting system 159 synchronizing on clusters 239 time...

Page 509: ...n 192 authentication method 188 auto deactivation 195 backup address 189 192 changing backup address 195 Check Point configuration rules 199 Check Point NGX 197 CLI commands 201 configuring VRRPv2 196 deleting IP address from interface 193 effective priority 186 election protocol 183 established master vs equivalent priority 188 firewall state 203 full method 193 full method monitored circuit 186 ...

Page 510: ...Reference Guide VSZ 480 VTI 140 W watchdog timer 487 WCHAN wait channel 480 web servers access log 485 wheel group 292 X X 21 configuring for Cisco HDLC 83 configuring for frame relay 85 example 87 interfaces 83 xntpd process 481 xpand process 481 ...

Reviews: