background image

Connecting the Mediamaster

GB 6

Common Connections 

In this section, you will see some of the most 

common

 ways to 

connect your equipment. 

If you have problems with your connections and need help, contact

your retailer or Nokia Support

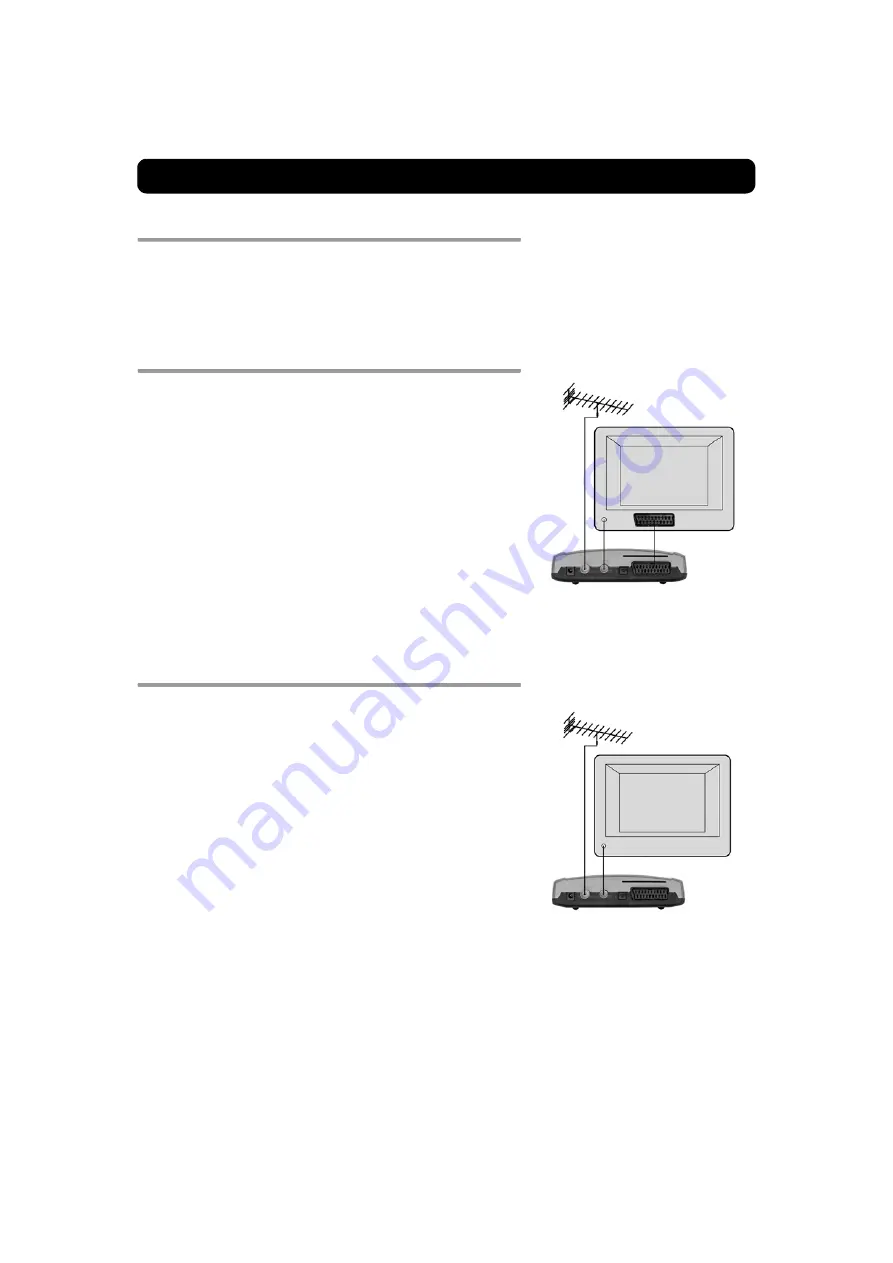
Connecting to the TV with SCART 


• Connect the antenna cable to the TV aerial input on the Media-

master.

• Connect an RF cable from the TV/VCR output on the Mediamaster

to the antenna input socket on the TV. 

• Connect a SCART cable between the main SCART socket on the TV

and the TV SCART socket on the Mediamaster. 

• Switch on your TV, then plug in and switch on your Mediamaster. 

You may need to select the AV (SCART) channel on your TV to
watch digital TV. In some cases, your TV will automatically se-
lect this channel when the Mediamaster is switched on. 

NOTE: The RF lead will need to be connected in order to watch
analogue channels (the old 1, 2, 3, 4, 5) 

It is always advisable to consult the user guide that came
with your TV. 

Connecting to the TV without SCART 

• Remove the aerial lead from your TV and connect this to the TV

aerial input socket on the Mediamaster. 

• Connect an RF cable from the TV/VCR output on the Mediamaster

to the RF input socket on the TV. 

• Switch on your TV, plug in and switch on your Mediamaster. 

• Select a programme number on the TV that is not currently used

for other TV channels. 

• Follow the instructions in your TV manual to tune the TV to the

channel where you see the First-time installation menu from the
Mediamaster. 

• Follow the instructions in your TV manual to store this channel. 

• When the First-time installation menu is visible, press the 

ok

button on the Mediamaster's remote control to start the instal-
lation procedure. 

If the picture quality is bad, you can later change the pre-defined
UHF channel 43 to any other number between 21 and 69. You will
also have to tune your TV to the same (= the new) channel number. 

Summary of Contents for Mediamaster 112T

Page 1: ...User Guide ...

Page 2: ...d company names mentioned herein may be trademarks or trade names of their owners Nokia operates a policy of continuous development Therefore we reserve the right to make changes and improvements to any of the products described in this manual without any prior notice Copyright 2004 Nokia All rights reserved ...

Page 3: ...aster Do not use any power supply other than the original unit delivered with the Mediamaster Allow 10 cm of space around the Mediamaster for sufficient ventilation Do not cover the Mediamaster s ventilation openings with items such as news papers tablecloths curtains etc Do not place the Mediamaster on top of a heat emitting unit Do not place naked flame sources such as lit candles on the Mediama...

Page 4: ...e the volume level in viewing mode opt To display temporary settings options while watching TV Activate Channel Filtering Sorting in Navi Bars mode info Three different functions Pressing once will show current programme name Pressing twice will show information about the current and next programme Pressing three times will give the 7 day programme guide EPG back To go back one level at a time wit...

Page 5: ...om the battery compartment at the bottom of the remote control Insert the 2 AAA 1 5 V batteries as shown in the diagram taking care to observe the and markings indicated inside Replace the cover The TV SCART Socket When you connect other devices to this socket always use a fully connected SCART cable like the one supplied There are SCART cables available that do not have all the pins connected whi...

Page 6: ...to watch analogue channels the old 1 2 3 4 5 It is always advisable to consult the user guide that came with your TV Connecting to the TV without SCART Remove the aerial lead from your TV and connect this to the TV aerial input socket on the Mediamaster Connect an RF cable from the TV VCR output on the Mediamaster to the RF input socket on the TV Switch on your TV plug in and switch on your Mediam...

Page 7: ...nel on your TV In some cases your TV will automatically select this channel when the Mediamaster is switched on NOTE In this set up your VCR has to be switched on or in standby mode to watch digital TV To record a digital channel you will need to select the AV SCART channel on your video It is always advisable to consult the user guides that came with your video and TV Connecting a Video recorder ...

Page 8: ... by buildings mountains and the terrain Depending on if the receiver is located in a valley behind a mountain or in a concrete building the quality of recep tion may vary considerably As with most other transmissions bad weather affects reception quality Connecting to the TV aerial You can connect the Mediamaster to the following type of aerials 1 Standard outdoor aerial Where possible use an outd...

Page 9: ...signals The 5 V power for the active antenna The Nokia active indoor antenna must be powered with 5 V from the TV aerial connector on the rear of the Mediamaster If your Mediamaster is connected to a local antenna system e g in a rented flat the 5 V power might disturb the antenna system in the building when it is switched ON You can switch OFF the 5 V from the TV menu First time installation gene...

Page 10: ...dio channels All channels found will be listed on the screen NOTE the search procedure may take a few minutes You can cancel the search at any time by pressing ok When the search procedure has ended a message will tell you how many TV and radio channels have been found Press ok to start watching digital TV channels If no TV channel is automatically shown after you have finished the installation pr...

Page 11: ...mation banner is displayed for a few seconds You can also press the info button while watching TV to display the banner The programme information may include the current time a channel list the channel name and number the names of the current and next programmes the start and stop times of the current programme a bar indicating the elapsed time of the current programme the start and stop times for...

Page 12: ...at Fullscreen will fill up the screen vertically but cut some information from the left and right sides of the picture Letterbox will give a complete picture but leave black areas at the top and bottom Press opt or back to return to TV radio mode Programme Guide EPG By pressing the info button three times while watching a channel you get access to the Mediamaster EPG Electronic Programme Guide In ...

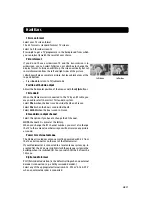
Page 13: ...onnection Sorting channels You can select how the channels shall be sorted in the TV and Radio folders When any of the TV or Radio folders are in focus in the Navi Bars press the opt button on the remote control Select to show the channels in alphabetical or numerical suc cession in the folders Select the channel names you want to be shown in the TV Radio folders Free channels Only channels that d...

Page 14: ...last two pages that you have most recently watched Press info to hide everything on a teletext page apart from its headline Fig 2 Sometimes a teletext page may contain subpages When subpages are available they are numbered on the lower part of the screen Fig 3 To view a subpage press ok when no page numbers have been highlighted Move to the different subpages with cursor left right NOTE it may tak...

Page 15: ...utton Below the horizontal folder bar there is an Information box for the currently highlighted bookmark When scrolling through TV or radio channels the programmes can be marked with the following symbols in the Information box a new channel you have not yet visited the channel is locked by the user the channel is encrypted Info displays extended information if available for a highlighted programm...

Page 16: ...ns In order to make the bookmark lists for TV and Radio channels shorter you can hide the icons and only show the channel names Automatic channel update Select On if you want the Mediamaster to automatically search for and download new channels However this search procedure will only be performed on the specific transponder frequency from where you are currently watching a channel To search and do...

Page 17: ...standard system Select PAL G when the box is used outside the UK and France Select PAL I when the box is used inside the UK Select SECAM when the box is used in France RF modulator output channel Select this option if you have to change the RF channel NOTE Channel 43 is preset at the factory When you change the RF channel number you must also change the TV to the same value otherwise you will not ...

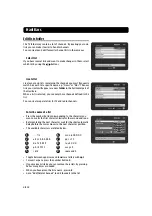
Page 18: ...e list You can create separate lists for TV and radio channels Enter the name of a list Press the number button corresponding to the character you want once for the first character twice for the second and so on Before entering the next character wait for the short automatic delay before the cursor moves to the next character position The available characters are listed below Toggle between upperc...

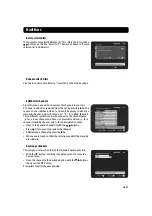
Page 19: ...ed channel and will contain an for added channels Three different symbols can be shown next to the channel name for a new channel you have not previously visited for a channel locked by the user and for an encrypted channel Move to the desired channel s with the buttons Press opt if you want to preview the channel Add remove a channel by pressing info When you are ready confirm the selections and ...

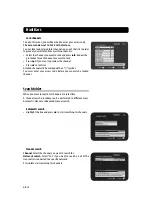
Page 20: ...el Press ok to confirm A locked channel will be marked with an symbol You must enter your access code before you can watch a locked channel Search folder When you want to search for channels at a later time A channel search procedure can be performed in different ways Automatic Manual or Advanced manual search Automatic search Highlight the line and press ok to start searching for channels Manual ...

Page 21: ...new channel or back if you do not want to save it Access folder Receiver lock To open this menu you will be asked to enter your access code The access code is set to 1234 at the factory If you select Yes you will have to enter the access code every time you start the Mediamaster from standby Age rating control If you want everybody to have access to all available types of programmes select No If y...

Page 22: ...reen asking you to press ok to start the download You are strongly advised to accept the download as this might enable you to receive new features and or services that may be available to you You can choose to postpone the download for a more convenient time by pressing the back button The message will appear again provided that the software is still being broadcast NOTE These messages will only a...

Page 23: ...ning the Conax Viaccess smart card will be shown in this menu Channel info Select this folder press ok and you will receive channel information about frequency symbol rate etc The information is given for the channel you are currently watching ...

Page 24: ...nt at any time by returning at Your own costs this Nokia digital TV receiver and all related materials provided by Nokia Your end user rights automatically and immediately terminate without notice from Nokia if You fail to comply with any provision of this Agreement In such an event You must immediately return at Your own cost this Nokia digital TV receiver and all related material to the place of...

Page 25: ...MHz 3 dB Fast blanking output Internal Status output 0 6 12 V RL 10 k Ω Ω Ω Ω Front panel One LED indicator External power supply Input 230 V 10 50 60 Hz Power consumption max 11 W Power consumption in standby mode max 2 W General data The model code variant and serial number are located on a label on the underside of the receiver The Viaccess Conditional Access CA System is embedded in 112 T and ...

Page 26: ...Nokia is a registered trademark of Nokia Corporation www nokia com ...

Reviews: