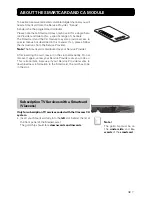
background image

S 1

Bruksanvisning

Owner’s Manual

MEDIAMASTER

9820 T

Summary of Contents for Mediamaster 9820 T

Page 1: ...S 1 Bruksanvisning Owner s Manual MEDIAMASTER 9820 T ...

Page 2: ...f TV or Radio Channels 17 Options Green Button 17 TV Release 0 18 Video Recording 18 The TEXT Button Teletext 18 Main Menu 19 General Information 19 Channels 19 Edit Channels 19 Guide 23 System Configuration 23 Channel Search 23 Antenna Configuration 23 TV Settings 24 Modem Configuration 24 Receiver Upgrade 25 Reinstall 25 User Preferences 25 Language Preferences 25 Parental Control 26 Change acce...

Page 3: ...l including the Problem Solving or alternatively call your dealer or a customer service adviser Please not The first thing to do before sending the Mediamaster to service is to 1 Perform Diagnostic procedure in System Information menu 2 Try downloading new software into the Mediamaster With this procedure the new software may solve the problem in the quickest and most efficient way See the relevan...

Page 4: ...U To display or exit from the Main Menu screen GUIDE To obtain a list of present and following programmes for the available channels This information is only shown if your Service Provider transmits programme information EPG in formation P P To change channels up and down To change page in a menu list text if more than one page is available To browse through teletext history To move up down in the...

Page 5: ...l con ventional TV aerial or an additional small indorr antenna TV VCR for an RF cable to the aerial input of the TV or VCR TELEPHONE for modem connection to the telephone wall socket MENU EXIT OK Slot for a CA module with a Smartcard for several functions e g selecting channels highlighting an option within a menu or scrolling through channels Display shows channel information error messages remo...

Page 6: ...rvice Provider Senda Senda is the the programme distributor Please note that a Smartcard may only be valid for a single Serv ice Provider and due to this a specific range of channels The Smartcard and the CA module may also provide access to special menus not described in this manual If so please follow the instructions from the Service Provider Note The Smartcard is distributed by your Service Pr...

Page 7: ...e agrement RF lead Preparing the Remote Control Remove the cover on the battery compartment at the bottom of the remote control Insert the 2 AAA 1 5 V batteries as shown in the diagram taking care to observe the and markings indicated inside Replace the cover Telephone modem cable Connecting to the TV aerial You can connect the Mediamaster to the following antennas 1 Standard outdoor antenna Where...

Page 8: ...ier is recommended as it may pro vide a stronger signal Attenuation of the TV signal varies according to the building material The signal penetrates thick stone or concrete walls poorly A window improves reception However a wooden building is no barrier to digital TV signals About antennas Radio and TV signals can be blocked by buildings mountains and the terrain If the receiver is located in a de...

Page 9: ...Connecting a TV and VCR Refer to your VCR s manual for full instructions If your TV and VCR have two SCART sockets Connect a SCART lead between the main SCART socket on the TV and the TV SCART socket on the Mediamaster Connect a SCART lead between the VCR and the AUX SCART socket on the Mediamaster Connect a SCART lead between the VCR and the second SCART socket on the TV Connect an RF lead from t...

Page 10: ... TV Connect an RF lead from the RF output on the satellite receiver to the RF input socket on the VCR Connect an RF lead from the TV VCR output on the Mediamaster to the RF input socket on the satellite receiver Connect the TV aerial to the TV AERIAL input socket on the Mediamaster Connect the coaxial cable between the LNB and the LNB socket on the satellite analogue digital receiver Both the VCR ...

Page 11: ...nt panel of the Mediamaster or on the remote You will see the UHF channel number displayed on the front panel of the Mediamaster Then you tune the TV channel selector to the same UHF channel When you have correctly changed the UHF channel number you will see the Welcome menu on the TV screen If there is interference from other channels you will have to change the chosen UHF channel Follow the inst...

Page 12: ...settings on the different lines Then confirm them all simultane ously by pressing OK You can always go back to the previous menu by pressing the BACK button Use the buttons to move upwards and downwards from one line to another Use to change settings You can also use the numeric buttons on the remote control to select a line in a menu and to enter numeric values FIRST TIME INSTALLATION The Welcome...

Page 13: ... Yes if you want to search on all fre quencies in a specific network Press OK to start searching for channels Automatic Search Start the Automatic Search on the digital terrestrial network by pressing OK Channel Search Progress In the Channel Search Progress Menu you can start searching for terrestrial digital channels offered by the TV transmitter for which your antenna has been configured All TV...

Page 14: ...ful func tions which will be explained in this part of the manual From this functions you can always go back to the previous menu by pressing the BACK button or return to TV mode by pressing EXIT Programme Information Every time you change channels you will receive programme in formation for a few seconds In the User Preferences menu you can select how long this information will be shown The infor...

Page 15: ... return to viewing TV by pressing EXIT Guide Press MENU Select GUIDE Press OK and you get access to the Nokia EPG which will give the titles of the current and next pro grammes on different channels Use the buttons to move the cursor to another programme Use the buttons to get information about next programmes Use the double arrow buttons to move a page at a time up and down When a line is highlig...

Page 16: ...th You can change channel by stepping with the buttons or enter the channel number with the numeric buttons on the re mote control To change one channel list page at a time use the double ar row buttons Press OK when a channel name is highlighted to start watch ing to it You can also get more information about a marked highlighted channel by pressing the i button VIEWING MODE Options Green Button ...

Page 17: ...s with the numeric buttons on the remote control You can also quickly step to the different page alternatives shown in any page by pressing Press OK on a selected number to go to that page Press EXIT BACK or TEXT to return to TV mode The 0 button will show the index page normally page 100 will show the next or previous teletext page You can use the double arrow buttons to browse through the pages ...

Page 18: ...e the order of the channels within the lists In the All TV list the channels are presented network by net work First the name Marknätet terrestrial network Then the name of the network region TV transmitter for which your an tenna has been configured The All TV list can contain a lot of channels By creating your own favourite lists you can make channel handling a bit more con venient Important whe...

Page 19: ...o delete a Favourite list completely select the list and press OK Rearrange lists If you have created several Favourite lists you can determine the sequence in which the lists will appear MAIN MENU How to give a specific name This procedure is the same whether you enter a name for the first time or change an existing Move to a new character position by using To delete the last character use Enter ...

Page 20: ... MENU Lock Channels To get to this menu you first have to enter your access code From here you can lock and later unlock channels in any of the lists in order to prevent e g your children from watching Select the channel you want to lock and press OK Repeat the procedure for each channel you want to lock When you lock a channel in any list the channel will automatically be locked in all other list...

Page 21: ...ttons to move the selected channels to a new position within the list When the channels are in the position you want press OK MAIN MENU Delete Channels From here when the All TV list is selected in the Edit Chan nels menu you can delete channels Please note Channels deleted this way will be permanently deleted The only way to get them back is to perform a new channel search To delete channels Mark...

Page 22: ...system to suit you better you can specify some settings from the submenus in the System Con figuration menu Please note that many of these functions are the same as in the First Time Installation Channel Search The Channel Search procedure can be performed in different ways You can perform an Automatic or a Manual Search Manual Search Refer to page 14 Automatic Search Refer to page 14 Guide Press ...

Page 23: ...The RF Modulator affects a chan nel s audio If you get picture but no sound the RF modulator se lection might be wrong Select UK PAL I if the Mediamaster is used in the UK Select Normal if it is used elsewhere Position of the RGB output Adjust the horizontal position of the TV picture with the but tons The TV signal see above must be set to RGB for this function to work The RF channel number will ...

Page 24: ...wnload procedure This can damage the software and the receiver will have to be sent in for service Reinstall Use this option only if you have to start the complete installation procedure from scratch If you continue from here all your pre vious settings parental code and favourite channels etc will be erased If you do not want to change any settings you can leave this menu when the warning is disp...

Page 25: ...eceiver lock If you select On you will have to enter the access code every time you start the Mediamaster from stand by Age Rating Control If you want everybody to have access to all available types of pro grammes select Off If you select On you may block programmes unsuitable for children Select an age limit between 4 and 18 years on the line that appears However you should be aware that not all ...

Page 26: ...cture and sound if the value is over 18 20 dB In bad weather atmospheric disturbances or other inter ferences in the transmission the signal strength should be higher System Information This gives general information about which hardware and soft ware version your Mediamaster is running on Picture format If you have a TV set with the 4 3 picture format and the transmis sion is in 16 9 you can sele...

Page 27: ...ard that supports this standard can be used in the left slot on the front panel Different CA modules with their Smartcards supporting the DVB Common Interface CI standard can be used in the right slot Viaccess embedded In this menu you select Subscription information or Change Smart Card Code Subscription information In this menu you get subscription information from a Smartcard supplied by a Viac...

Page 28: ...nisation to provide the ba sis for a picture coding and compression system Network A number of digital channels transmitted from one source Grouped under separate headings in the channel list OFDM Orthogonal Frequency Division Multiplexing Modulation method used in digital terrestrial networks in Europe PCMCIA Personal Computer Memory Card International Associa tion The Common Interface slot follo...

Page 29: ...ial may be weak Your aerial may need adjusting or your local transmitter may not be working The system is connected by SCART leads and the TV is not in AV EXT mode The system is connected by RF leads and the TV is not set to the channel tuned for digital terrestrial TV What to do Check that the mains cable is plugged in to the power socket Press the standby button or any number button to bring the...

Page 30: ... not correctly inserted What to do If you make a recording of digital terrestrial TV your Mediamaster has to be left on the channel you like to record If the system is connected by SCART leads switch the VCR to appropriate AV input If the system is connected by RF leads switch the VCR to the channel for digital terrestrial TV If you have not manually tuned in the VCR you may do this first Please l...

Page 31: ... Return channel Telephone line Connector Modular jack 6 pin Protocol V32 bis 14400 baud Conditional access system Embedded Viaccess and PCMCIA one interface for a Common Interface CA module DVB Standard Smart Card Interface Interface for one card according to ISO 7816 Supports embedded descrambler Viaccess Front panel 4x7 segment numeric LED display Buttons OK EXIT MENU General data Article code T...

Page 32: ...put OK Channel Search 1 Automatic Search 2 Manual Search TV Settings 1 TV Screen Format 2 TV Signal 3 RF Channel 4 RF Modulator type 5 Position of the RGB Output Modem Configuration 1 Pulse or tone 2 Prefix digit 3 Digits after pause Picture Manual Search 1 Select Channel 2 Transmission Mode 3 SGuard Interval 4 Network Search Main Menu 1 2 7 2 3 4 5 4 1 5 6 3 1 2 1 2 MENUS SCREEN STRUCTURE Edit Ch...

Page 33: ...938 11 0008 44 10285 230 V 15 50 Hz WARNING DO NOT OPEN ELECTRICAL SHOCK HAZARD DIGITAL AUDIO AUDIO R L TV AERIAL TELEPHONE SERIAL AUX TV TV VCR Nokia is a registered trademark of Nokia Corporation www nokia se ...

Reviews: