6
INSTALLATION
The frame of your solar panel has pre-drilled screw holes for easy
mounting onto any surface.
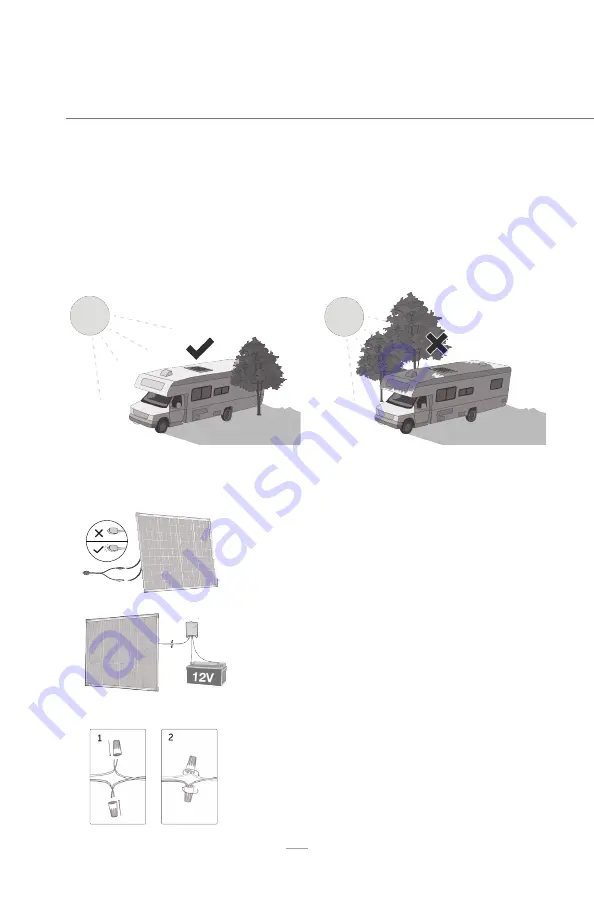
Example of potential application
Ensure your solar panel is placed so that its exposure to sun
is optimized. Be aware of objects such as trees or property
overhangs that may impede the panel’s ability to generate a
charge.
INSTALLING YOUR SOLAR PANEL
The 75 W solar panel will require a solar charge controller
(not included) in order to charge a 12 V battery.
Always follow the instructions included with the charge
controller to ensure a safe battery charging process.
CONNECTING TO CHARGE CONTROLLER
Connect the red (positive) wire from the solar panel to
the positive terminal on the solar charge controller. Make
the same connection on the black (negative) wire.
To connect these wires it is advisable to use a wire nut
connector (not included).
TESTING YOUR SOLAR PANEL
Under direct sun, connect the solar panel to the green
LED voltage tester. If the LED illuminates, proceed with
installation.
05
not included
not included
CHARGE
CONTROLLER


