6
9
10
11
12a
12b
13
Toll-free: 1-866-827-4985 • model no. 052-6972-6
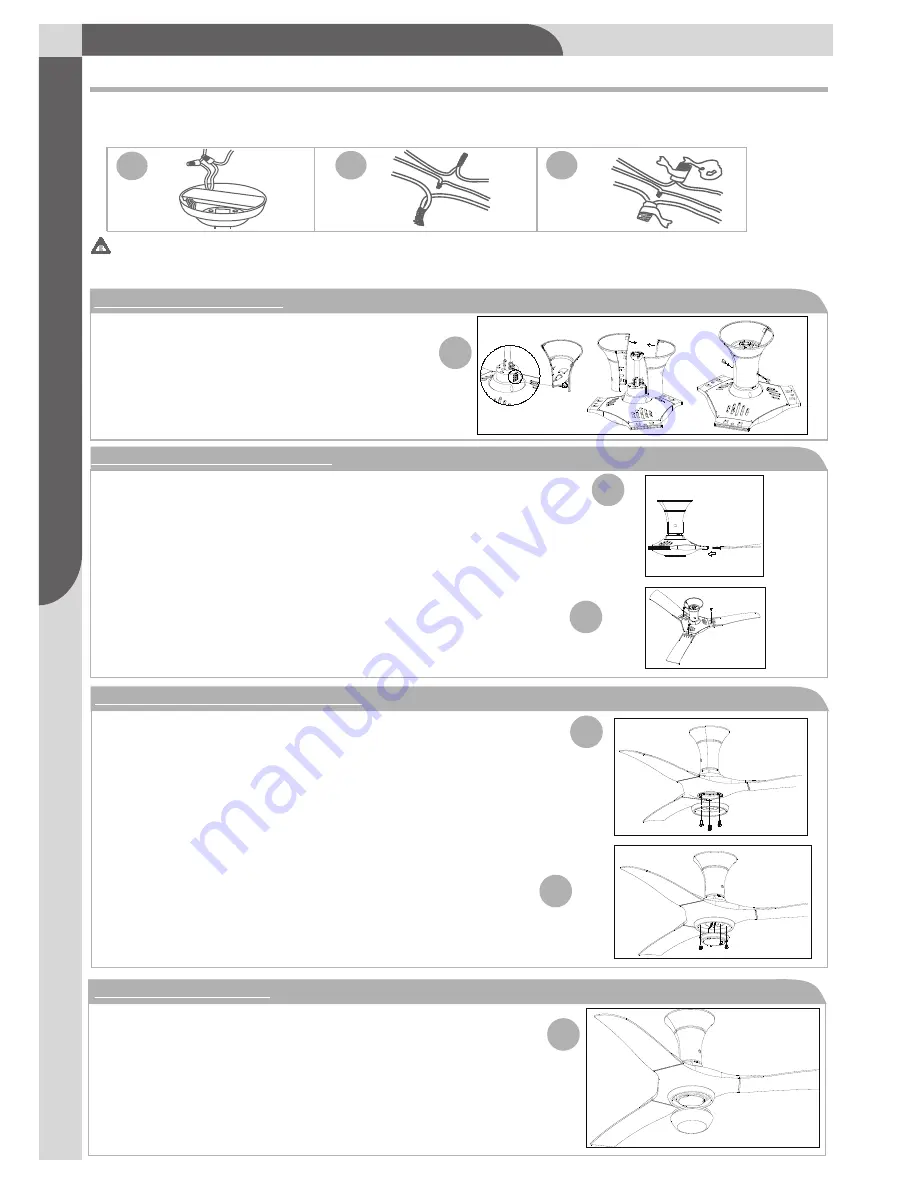
4. Attach canopy to motor
. Insert fan blade into slot of motor assembly
(see Fig. 10).
. Raise the upper canopy and tighten it.
Be sure the upper canopy does not touch
the ceiling. Insert the screw cover (2 pcs)
as shown (see Fig. 9).
5. Attach blade assembly to motor
. Ensure all screws holding the blades are tightly
secured (see Fig. 11).
6. Connect switch housing and light kit
.
Make wire connection. Plug the connector
from the motor into the connector from the
fan light.
Carefully put the wires into the switch box.
Secure the fan light up to the bottom of the
motor with fan light screws (see Fig. 12b).
.
Secure the fan light up to the bottom
of the motor with fan light screws (see
Fig. 12a).
7. Mounting light kit glass
. Install the glass shade by screwing it onto
the central fan fixture. Make sure the glass
shade is securely attached, but DO NOT over
tighten (see Fig. 13).
ASSEMBLY
Assembly
· When wires are matched up, connect them by twisting frayed ends together (see Fig. 8a).
· Screw wire connectors (3 are provided) onto the tops of the twisted wires (see Fig. 8b).
· Fasten them with electrical tape (see Fig. 8c).
WARNING:
Be sure no bare wire or wire strands are visible after making connections. Place
green and white connections on opposite side of box from the black and blue (if applicable)
connections.
8c
8a
8b


