4
Thank you for selecting the revolutionary Nomad Run 8.0 treadmill. The Nomad Run 8.0
treadmill offers an impressive selection of features designed to make your workouts at home
more effective and enjoyable. And when you’re not exercising, the unique treadmill can be
folded up, requiring less than half the floor space of other treadmills.
For your benefit, read this manual carefully before using the treadmill. If you have questions
after reading this manual, please see the front cover of this manual. To help us assist you,
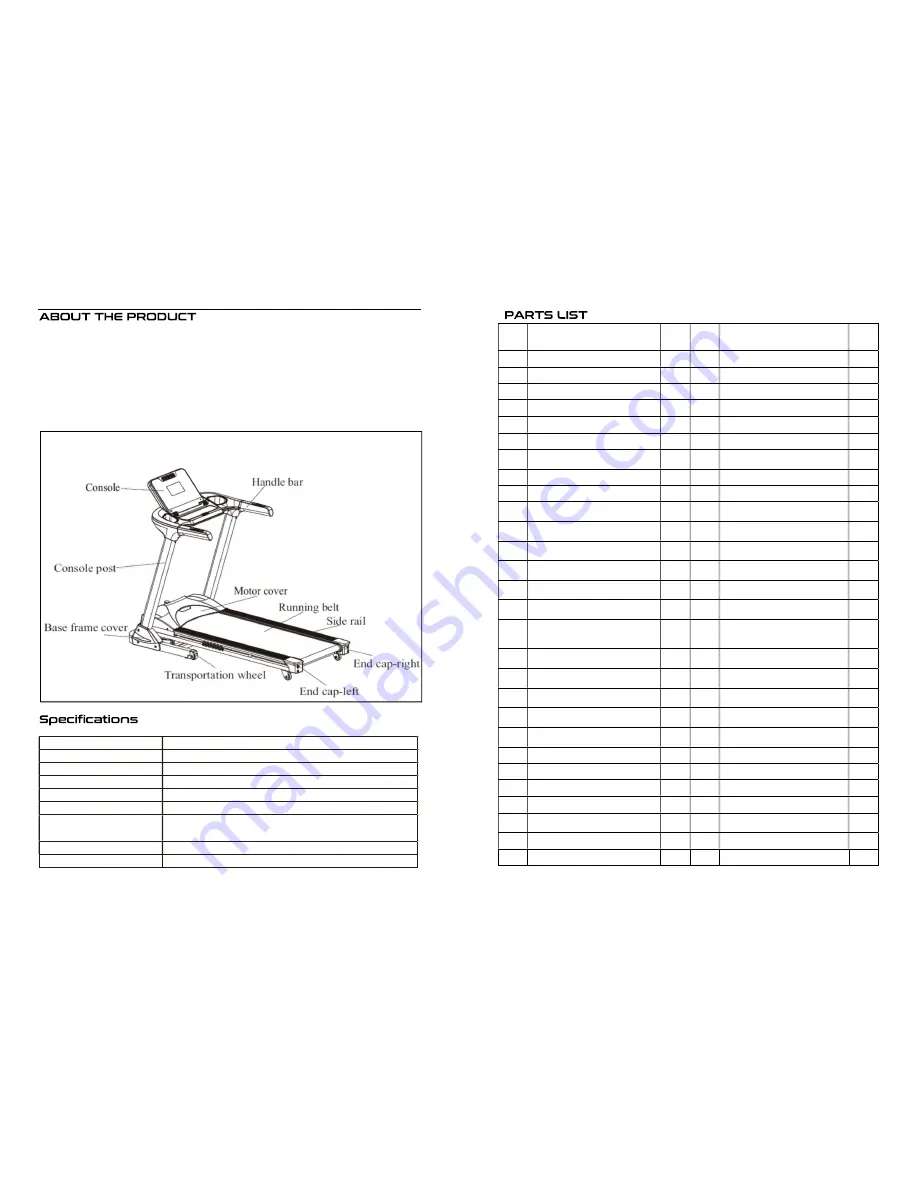
please note the product model number before contacting us. Before reading further, please
review the drawing below and familiarize yourself with the labelled parts.
Model
NOMAD RUN 8.0
Dimensions
1750*800*1300mm
Operating voltage
220V 50/60 Hz
Max User Weight
130kg
Running Area
1300*480mm
Peak Power
3.0HP
Console
7 inch LCD display, Mp3&USB interface, heart rate testing,
pre-set programs, touch buttons
Speed range
1-18km/h
Incline
1-12%
17
No.
Part Description
QTY
No.
Part Description
QTY
1
Base frame
1
43
Side rail
2
2
Main frame
1
44
Motor
1
3
Incline frame
1
45
Pad
2
4
Connection frame
1
46
Incline motor
1
5
Left console post
1
47
Pad left
1
6
Right console post
1
48
Pad right
1
7
Console frame
1
49
Running board pad
4
8
Console small frame
1
50
Motor cover
1
9
Motor base
1
51
End cover left
1
10
Console screen
1
52
End cover right
1
11
M6*15 Hexagon screws
3
53
Frame cover left
1
12
ST4 .2*16 Recessed tapped
screw
35
54
Frame cover right
1
13
M10*60 Hexagon screws
1
55
Console cover top
1
14
M10*45 Hexagon screws
1
56
Console cover bottom
1
15
M10*25 Hexagon screws
4
57
Console screen cover
1
16
M10*30 Hexagon screws
2
58
Console screen cover back
1
17
M8*55* 20 Hexagon half
threaded screws
3
59
Handle left
1
18
M8*40* 20 Hexagon half
threaded screws
2
60
Handle right
1
19
M8*30* 20 Hexagon half
threaded screws
1
61
Bottle holder left
1
20
M8*20 Hexagon screws
14
62
Bottle holder right
1
21
M8*12 Hexagon coarse
threaded screw
2
63
20x12.5x6.5 Washer
8
22
M8*105 Hexagon screws
1
64
Air outlet
1
23
M8*75 Hexagon screws
3
65
Wheel cover
2
24
M6*50 Counter sunk screw
4
66
Pulse sensor
2
25
M6*30 Counter sunk screw
2
67
Gas strut
1
26
M5*10 Counter sunk screw
11
68
Rubber protection
4
27
M5*15 Counter sunk screw
8
69
Wheel
2
28
M4*15 Screw
8
70
Rubber pad
6
Summary of Contents for Run 8.0
Page 1: ...USER S MANUAL...


