74
EN
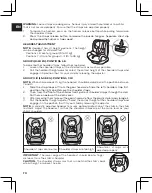
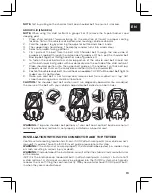
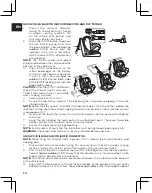
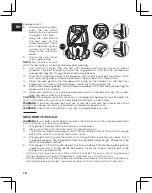
GROUP I (9-18 KG) WITH ISOFIX CONNECTOR AND TOP TETHER
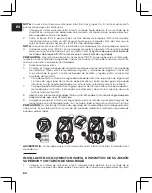
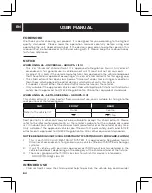
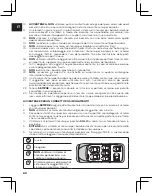
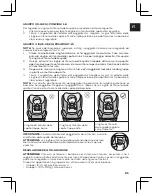
1.
Place child restraint forward-
facing (in the direction of travel)
in proper seating location, flat
on the vehicle seat bottom and
touching vehicle seat-back.
2.
Press the ISOFIX button to pull out
the two ISOFIX locking arms from
the base bottom.
You will hear an
audible CLICK!
Ensure that the
indicator turns into a red colour,
which means ISOFIX attachments
are unlocked.
NOTE:
The ISOFIX attachment points
are located between the surface and the
backrest of the vehicle seat.
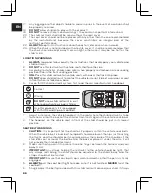
3.
Align ISOFIX attachments to the
metal anchorages at the bottom
of the car seat's backrest and push
it until it clicks.
You will hear an
audible CLICK! Ensure both sides
of the ISOFIX locking arms turn into
green safety colour.
CAUTION:
After the ISOFIX installation
check if the child restraint is securely
fitted. If the child restraint is not stable
and is shaking, reinstall.
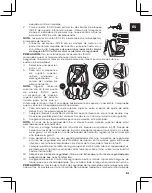
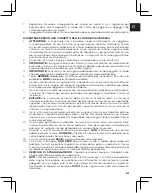
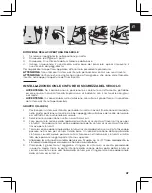
4.
Select a position from 1 to 4.
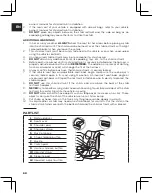
5.
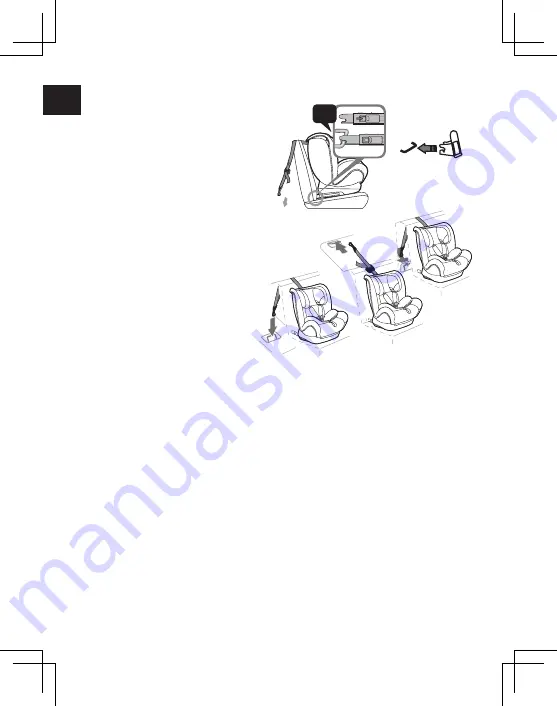
To use the top tether, remove it by loosening the strap and unclipping it from the
storage anchor.
NOTE:
Some vehicles have a third ISOFIX attachment point for a top tether, behind the
rear seat to stop the child restraint tipping forward in an accident. Check whether you car
is equipped with it.
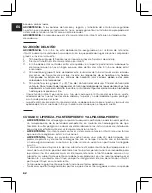
6.
To extend the top tether, press the top tether adjuster button and pull to lengthen
the strap.
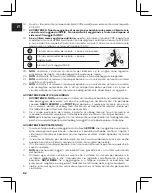
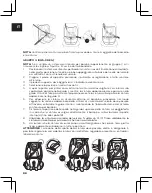
7.
Hang the latch behind the rear seat on the attachment point. There are 3 possible
options on how to fix the latch. Refer to the illustration.
8.
Ensure the top tether clip is tightened up.
NOTE:
For the safety of your child, the top tether must be tightened up during driving.
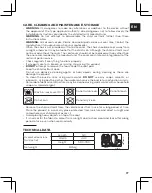
WARNING:
Check that child restraint is securely installed before each use.
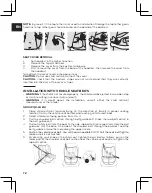
GROUP II, III (15-36 KG) WITH ISOFIX CONNECTOR
NOTE:
When using this child restraint in groups II or III, remove the 5-point harness and
sleeping pad.
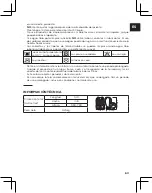
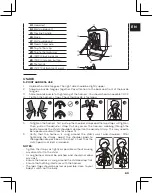
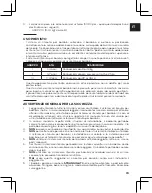
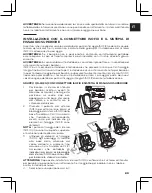
1.
Place child restraint forward-facing (in the direction of travel) in proper seating
location, flat on the vehicle seat bottom and touching vehicle seat-back.
2.
Press the ISOFIX button to pull out the two ISOFIX locking arms from the base bottom.
You will hear an audible CLICK!
Ensure that the indicator turns into a red colour, which
means ISOFIX attachments are unlocked.
NOTE:
The ISOFIX attachment points are located between the surface and the backrest
of the vehicle seat.
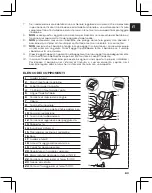
3.
Align ISOFIX attachments to the metal anchorages at the bottom of the car seat's
backrest and push it until it clicks.
You will hear an audible CLICK! Ensure both sides of
CLICK

