99
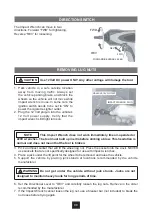
8. Remove wheel.
IMPORTANT INFORMATION FOR USE OF IMPACT WRENCH
To maintain the life of your Impact Wrench, it is recommended that you do not continuously
remove more than ten lug nuts. After ten lug nuts, let the Impact Wrench cool down for
approximately 15 minutes before attempting to remove additional lug nuts.
In general, after
10 minutes of operation, let the Impact Wrench cool down for approximately 15 minutes
before attempting to remove additional lug nuts.
REINSTALLING LUG NUTS
1. Slide lug nuts onto the wheel bolts in the order recommended by the lug nut manufacturer.
2. Hand tighten the lug nuts until securely fastened.
3. Do not tighten the lug nuts with the impact wrench. Excessive torque may cause
damage.
4. Use a torque wrench to check that the lug nuts are tightened enough per the manufacturer’s
recommendations.
5. Remove jack stands. Carefully lower vehicle and remove the jack. Unplug the impact wrench
and store.
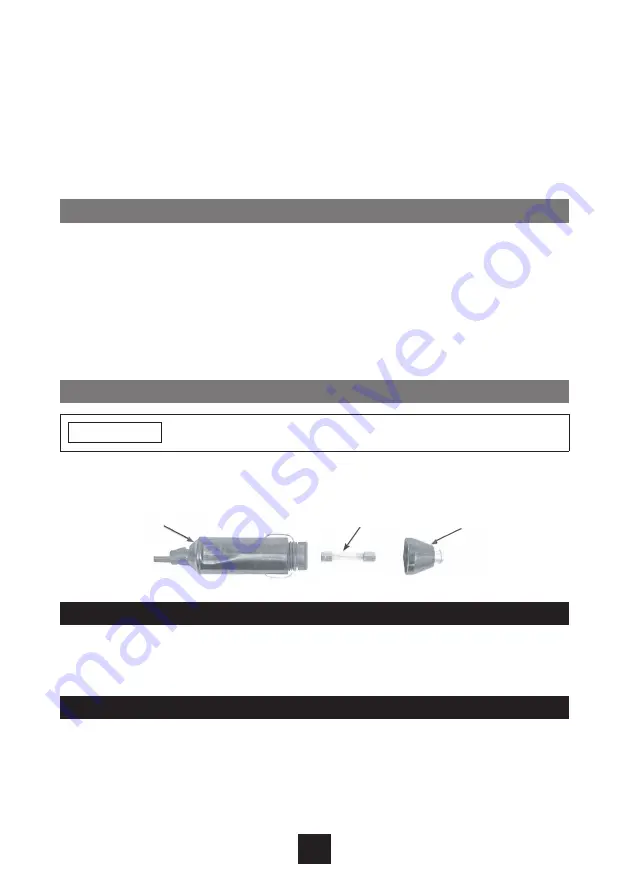
CHANGING THE FUSE
NOTE
Always replace fuse with a 15 A-250 V fuse of the same style.
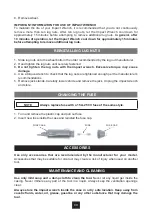
1. Turn and remove the plastic cap and pull out fuse.
2. Insert new fuse inside the case and reinstall the fuse cap.
FUSE
FUSE CAP
FUSE CASE
ACCESSORIES
Use only accessories that are recommended by the manufacturer for your model.
Accessories that may be suitable for one tool may create a risk of injury when used on another
tool.
MAINTENANCE AND CLEANING
Use only mild soap and a damp cloth to clean the tool.
Never let any liquid get inside the
casing. Never immerse any part of the tool in a liquid. Always keep the ventilation openings
clear.
Always store the impact wrench inside the case in a dry safe location. Keep away from
caustic fluids, water, oil, grease, gasoline or any other substance that may damage the
tool.
Summary of Contents for 46866
Page 1: ...12V DC FR 1 12 NL 13 23 ES 24 34 IT 35 45 PT 46 56 PL 57 67 RO 68 78 RU 79 89 EN 90 101...
Page 62: ...62...
Page 66: ......
Page 79: ...79 80 80 80 81 81 82 83 83 83 84 84 85 86 86 86 87 87 88 88 88 89 89...
Page 80: ...80...
Page 81: ...81...
Page 82: ...82 III...
Page 83: ...83...
Page 84: ...84 V A Kg...
Page 86: ...86...
Page 87: ...87 12 1 2 12 12 12 3 4 5 220...
Page 88: ...1 2 3 4 5...
Page 89: ...89 12 1 2 inch 12 7 mm Square 380 Nm 2500 5500...
Page 101: ...101...
Page 102: ...102...
Page 103: ...103 deren Seriennummer ist wie folgt siehe Seite 101...
Page 104: ...waarvan het serienummer is Verwijs naar p 101 104...
Page 105: ...consulte la p gina 101 105...
Page 106: ...cujo n mero de s rie veja p gina 101 106...
Page 107: ...Numer seryjny kt rych przedstawia si nast puj co patrz strona 101 107...
Page 108: ...patrz strona 101 108...
Page 109: ...vezi pagina 101 109...


