BIM 1030/2005/03
2
www.nord.com
INSTALLATION OF UNIT
To ensure Iong service and dependabIe performance, an encIosed gear drive must be rigidIy supported and the shafts accurateIy aIigned.
The foIIowing describes the minimum precautions required to accompIish this end.
FOUNDATION
The responsibiIity for the design and construction of the
foundation Iies with the user. The foundation must be adequate
to withstand normaI operating Ioads and possibIe overIoads whiIe
maintaining aIignment to attached system components under
such Ioads.
MOUNTING POSITION
UnIess a unit is specificaIIy ordered for incIined mounting, the
foundation must be IeveI and fIat. The Iubrication system may
not operate properIy if the unit is not mounted in the position for
which it is designed. It may be desirabIe to eIevate the
foundation to faciIitate oiI drainage.
CONCRETE FOUNDATION
If a concrete foundation is used, steeI mounting pads and boIts of
sufficient size to distribute the stress into the concrete shouId be
grouted into the foundation.
STEEL FOUNDATION
If a structuraI steeI foundation is used (i.e. wide fIange beams or
channeIs), a base pIate or soIe pIate of suitable thickness shouId
be used and shouId extend under the entire unit.
FOOT MOUNTED UNITS
Use shims under the feet of the unit to aIign the output shaft to
the driven equipment. Make sure that aII feet are supported so
that the housing wiII not distort when it is boIted down. Improper
shimming wiII reduce the Iife of the unit and may cause faiIure.
DoweI pins may be instaIIed to prevent misaIignment and ensure
proper reaIignment if removed for service.
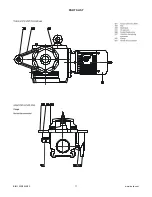
SHAFT MOUNTED UNITS
Shaft mounted drives should be mounted as close to the driven
equipment bearing support as possible to minimize bearing loads
due to overhung load. Design of the joint connection between the
torque reaction arm and the foundation is the user’s responsibility.
HoIIow Shaft Diameter toIerance
Metric (mm)
≤
∅
18 = +0.018/-0.000
>
∅
18
≤
∅
30 = +0.021/-0.000
>
∅
30
≤
∅
50 = +0.025/-0.000
>
∅
50
≤
∅
80 = +0.030/-0.000
>
∅
80
≤
∅
120 = +0.035/-0.000
>
∅
120
≤
∅
180 = +0.040/-0.000
Inch
≤
∅
4.375 = +0.0010 / -0.0000
>
∅
4.375 = +0.0015 / -0.0000
Customer shaft diameter toIerances with keyed hoIIow shafts
Metric (mm)
≤
∅
18 = +0.000/-0.011
>
∅
18
≤
∅
30 = +0.000/-0.013
>
∅
30
≤
∅
50 = +0.000/-0.016
>
∅
50
≤
∅
80 = +0.000/-0.019
>
∅
80
≤
∅
120 = +0.000/-0.022
>
∅
120
≤
∅
180 = +0.000/-0.025
Inch
≤
∅
1.500 = +0.000/-0.002
>
∅
1.500
≤
∅
2.500 = +0.000/-0.003
>
∅
2.500
≤
∅
7.000 = +0.000/-0.004
Shaft finish to be 125 micro inches or smoother.
Customer shaft diameter toIerance with Shrink Disc fit h6
Metric (mm)
≤
∅
18 = +0.000/-0.011
>
∅
18
≤
∅
30 = +0.000/-0.013
>
∅
30
≤
∅
50 = +0.000/-0.016
>
∅
50
≤
∅
80 = +0.000/-0.019
>
∅
80
≤
∅
120 = +0.000/-0.022
>
∅
120
≤
∅
180 = +0.000/-0.025
Inch
≤
∅
0.750 = +0.0000/-0.0004
>
∅
0.750
≤
∅
1.125 = +0.0000/-0.0005
>
∅
1.125
≤
∅
2.000 = +0.0000/-0.0006
>
∅
2.000
≤
∅
3.000 = +0.0000/-0.0007
>
∅
3.000
≤
∅
4.750 = +0.0000/-0.0008
>
∅
4.750
≤
∅
7.000 = +0.0000/-0.0010
Shaft finish to be 125 micro inches or smoother.
Customer shaft diameter toIerance with Shrink Disc fit f6
(Iooser fit)
Metric (mm)
≤
∅
18 =-0.016/-0.024
>
∅
18
≤
∅
30 = -0.020/-0.029
>
∅
30
≤
∅
50 = -0.025/-0.036
>
∅
50
≤
∅
80 = -0.030/-0.043
>
∅
80
≤
∅
120 = -0.036/-0.051
>
∅
120
≤
∅
180 = -0.043/-0.061
Inch
≤
∅
0.750 = -0.0006/-0.0011
>
∅
0.750
≤
∅
1.125 = -0.0008/-0.0013
>
∅
1.125
≤
∅
2.000 = -0.0010/-0.0016
>
∅
2.000
≤
∅
3.000 = -0.0012/-0.0019
>
∅
3.000
≤
∅
4.750 = -0.0014/-0.0023
>
∅
4.750
≤
∅
7.000 = -0.0017/-0.0027
Shaft finish to be 125 micro inches or smoother
FLANGE MOUNTED UNITS
If a structuraI steeI foundation is used (i.e. wide fIange beams or
channeIs), a base pIate or soIe pIate of suitabIe thickness shouId
be used and shouId extend under the entire unit. If a buIk head
pIate is used it shouId be of proper strength to minimize buckIing
distortions.
FIange PiIot ‘AK’ or ‘AK1’ toIerance
Metric (mm)
>
∅
50
≤
∅
80 = +0.012/-0.007
>
∅
80
≤
∅
120 = +0.013/-0.009
>
∅
120
≤
∅
180 = +0.014/-0.011
>
∅
180
≤
∅
230 = +0.016/-0.013
>
∅
230
≤
∅
315 = +0.000-0.032
>
∅
315
≤
∅
400 = +0.000/-0.036
>
∅
400
≤
∅
500 = +0.000/-0.040
Inch
>
∅
1.969
≤
∅
3.150 = +0.005/-0.0003
>
∅
3.150
≤
∅
4.724 = +0.005/-0.0004
>
∅
4.724
≤
∅
7.087 = +0.006/-0.0004
>
∅
7.087
≤
∅
9.055 = +0.006/-0.0005
>
∅
9.055
≤
∅
12.402 = +0.000/-0.0013
>
∅
12.402
≤
∅
15.748 = +0.000/-0.0014
>
∅
15.748
≤
∅
19.685 = +0.000/-0.0016
BOLT STRENGTH
BoIt size, strength and quantity shouId be verified to insure proper
torque reaction capacity whatever the mounting arrangement.
LUBRICATE SHAFTS
Both the hollow shaft and the driven shaft should be liberally
lubricated before assembly. The unit must slide freely onto the
driven shaft. Do not hammer or force the unit into place. For
shrink disc, follow instructions below.


