background image

SHUNT NE356T

GB

GB

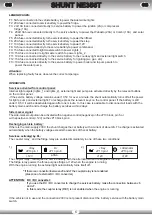
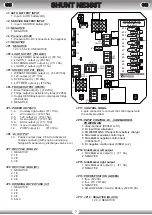
LEGEND FUSES:

F1:  5A fuse connected to the vehicle battery to power the side marker lights 
F2:  20A fuse connected to service battery to power the fridge.
F3:  2A/10A fuse connected directly to service battery to power the ignition (2A) or compressor 
       fridge (10A)
F4:   20A/10A fuse connected directly to the service battery to power the Webasto (20A) or Combi (10A)   and solar 

pannel

F5:  25A fuse connected directly to the service battery to power the lift bed
F6:  20A fuse connected directly to the service battery to power the step
F7:  10A fuse connected directly to the service battery to power 12V
F8:  1A fuse connected directly to the service battery to power combi panel
F9:  15A fuse connected to light master switch to power Lights_1
F10: 15A fuse connected to light master switch to power Lights_2
F11: 10A fuse connected directly to the service battery to the courtesy light and external light switch
F12: 15A fuse connected directly to the service battery for igniting (wc, gas, etc)
F13: 10A fuse connected directly to the service battery to power boiler and to pump switch to
        power the water pump.

 
Attention:


When replacing faulty fuses, observe the correct amperage.

OPERATION:

Services activated from control panel:

Internal light outputs (lights_1 and lights_2), external light and pump are activated directly by the relevant buttons 
on the control panel. 
-If the service battery voltage remains under 10,5V for over a minute, the shunt automatically turns off all the power 
for lights, pump and external light. To recharge press the relevant keys on the control panel. If the battery is still 
under 10,5V, it will be deactivated again after one minute.  In this case is advisable to disconnect all loads with the 
battery main switch and recharge the battery services within 2 days.

Side marker signal:

The side-marker output can be activated with a negative control (negative) on the JP13 block, pin 5, or
 with a positive control (+12V) on the JP13 block, pin 4.

Recharging vehicle  battery:

If there is the main supply 230V, the shunt charges the car battery with a current of about 2A. The charge is activated 
automatically when the battery voltage exceeds the services of the car battery.

Services activated by D+:

The coupler relay  and the fridge relay are enabled immediately in one of these two conditions:

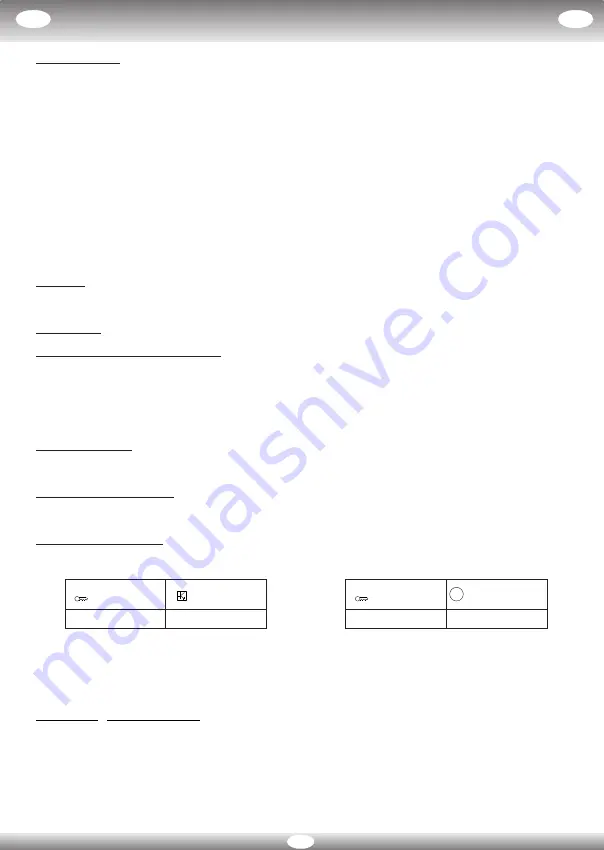
(1)

 1)                                                                                               2)

The coupler relay  recharges the service battery with the alternator when the engine is running.   

(1)

The fridge relay powers the three purpose fridge at 12V when the engine is running.
With the engine running the external light automatically turns itself off.


(1)  

If there is a connection between J6 and J7 the coupler relay is not enabled.


   (presence of external DC / DC converter)

ATTENTION:   DC / DC converter:

If you use the DC / DC converter to charge the services battery, make the connection between J6 
and J7.
In this mode the coupler relay (RE1) is not enabled when

 the engine is running.

If the vehicle not in use and the connection 230V is not present disconnect the   battery service with the battery main 
switch.

+Key

JP13 pin 1

D+ 

JP13 pin 6

D+

KEY-ON

+12V

attivo

+Alternator

JP13 pin2

+12V

G

+Key

JP13 pin 1

KEY-ON

+12V

6

Summary of Contents for NE356T

Page 1: ...0 Rev 0 I GB ISTRUZIONI D USO INSTRUCTIONS MANUAL NE356T I F E D INSTRUCTIONS D EMPLOI BEDIENUNGSANLEITUNG INSTRUCCIONES PARA EL USO PANNELLO COMANDI CONTROL PANEL PANNEAU DE CONTROLE BIEDENPANEL PANEL DE MANDOS ...

Page 2: ...2 ...

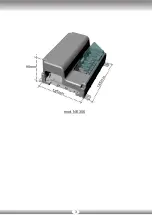
Page 3: ...1 8 5 m m 185mm 90mm mod NE356 3 ...

Page 4: ...ia servizi rimane sotto i 10 5V per più di 1minuto il derivatore spegne automaticamente tutte le utenze luci luce esterna e pompa Per riattivare i carichi bisogna premere i corrispondenti tasti sul pannello comandi ma se la batteria permane sotto i 10 5V dopo un minuto si disattiveranno nuovamente In questo caso è consigliabile staccare tutti i carichi con il maniglione stacca batteria e ricaricar...

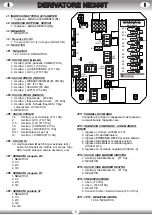
Page 5: ...ZIONE 1 Libero F2 20A 2 Libero F3 2A 10A 3 NEGATIVO 4 Pannello Solare Batteria Servizi F4 20 10A JP17 JP18 NEGATIVO NERO 1 2 3 4 NEGATIVO J1 INGRESSO BATTERIA AVVIAMENTO 1 Ingresso batteria AVVIAMENTO B1 J2 INGRESSO BATTERIA SERVIZI 1 Ingresso batteria SERVIZI B2 J3 NEGATIVO 1 NEGATIVO J6 Presenza DC DC 1 Presenza DC DC si collega al NEGATIVO J7 NEGATIVO JP1 NEGATIVO 1 2 3 4 5 6 7 8 9 NEGATIVO JP2...

Page 6: ...ns off all the power for lights pump and external light To recharge press the relevant keys on the control panel If the battery is still under 10 5V it will be deactivated again after one minute In this case is advisable to disconnect all loads with the battery main switch and recharge the battery services within 2 days Side marker signal The side marker output can be activated with a negative con...

Page 7: ...ee F2 20A 2 free F3 2A 10A 3 NEGATIVE 4 SOLAR PANEL Service Battery F4 20 10A JP17 JP18 NEGATIVE BLACK 1 2 3 4 NEGATIVE J1 AUTO BATTERY INPUT 1 Input AUTO battery B1 J2 SERVICE BATTERY INPUT 1 Input SERVICE battery B2 J3 NEGATIVE 1 NEGATIVE J6 Presence DC DC 1 Presence DC DC connects to the negative J7 NEGATIVE JP1 NEGATIVE 1 2 3 4 5 6 7 8 9 NEGATIVE JP2 LIGHT OUTPUT YELLOW 1 Supply COMBI panel ou...

Page 8: ...nnées directement depuis les touches respectives du panneau de commande Si la tension de la batterie de service reste inférieure à 10 5V pendant plus un minute le dérivateur coupe automatiquement les éléments suivants éclairages pompe aux F12 Pour en rétablir les fonctions presser les touches correspondantes sur le panneau de commande mais si la batterie reste inférieure à 10 5V pendant plus un mi...

Page 9: ...REDISPOSITIONS VERT 1 libre F2 20A 2 libre F3 2A 10A 3 NEGATIF 4 Ponneau Solaire Batterie Service F4 20 10A JP17 JP18 NEGATIF NOIR 1 2 3 4 NEGATIF J1 ENTREE BATTERIE VÈHICULE 1 Entrée batterie véhicule B1 J2 ENTREE BATTERIE de SERVICE 1 Entrée batterie SERVICE B2 J3 NEGATIF 1 NEGATIF J6 Présence de DC DC 1 Présence de DC DC se connecte au NÉGATIF J7 NEGATIF JP1 NEGATIF 1 2 3 4 5 6 7 8 9 NEGATIF JP...

Page 10: ... Abzweigdose automatisch alle Lichter die Pumpe und Aux aus Zum erneuten Einschalten die entsprechenden Tasten auf dem Schaltfeld drücken bleibt die Batterie nach einer Minute immer noch unter 10 5V schalten sie automatisch wieder aus In diesem Fall ist es ratsam alle Lasten mit dem Batterie Hauptschalter unterbrechen und Aufladen der Batterie Service innerhalb von 2 Tagen Side Marker Signal Der S...

Page 11: ...2 20A 2 frei F3 2A 10A 3 NEGATIV 4 Verkleidung Solar SERVICEBATTERIE F4 20 10A JP17 JP18 NEGATIV SCHWARZ 1 2 3 4 NEGATIV J1 EINGANG FAHRZEUGBATTERIE 1 Eingang FAHRZEUGBATTERIE B1 J2 EINGANG SERVICEBATTERIE 1 Eingang SERVICEBATTERIE B2 J3 NEGATIV 1 NEGATIV J6 DC DC Präsenz 1 DC DC Präsenz verbindet sich mit dem NEGATIV J7 NEGATIV JP1 NEGATIV 1 2 3 4 5 6 7 8 9 NEGATIV JP2 LICHTAUSGANG GELB 1 Ausgang...

Page 12: ...icios permanece por debajo de los 10 5V durante más de un minuto el derivador apaga automáticamente todas las utilizaciones luces bomba Para reactivar las cargas hay que pulsar las teclas correspondientes en el panel de mandos pero si la batería permanece por debajo de los 10 5V transcurrido un minuto se desactivarán nuevamente En este caso es aconsejable desconectar todas las cargas con el interr...

Page 13: ... JP16 PREDISPOSICIÓN VERDE 1 libre F2 20A 2 libre F3 2A 10A 3 NEGATIVO 4 PLACA SOLAR batería Servicios F4 20 10A JP17 JP18 NEGATIVO NEGRO 1 2 3 4 NEGATIVO J1 ENTRADA BATERÍA AUTO 1 Entrada batería AUTO B1 J2 ENTRADA BATERÍA SERVICIOS 1 Entrada batería SERVICIOS B2 J3 NEGATIVO 1 NEGATIVO J6 Presencia DC DC 1 Presencia DC DC se conecta al NEGATIVO J7 NEGATIVO JP1 NEGATIVO 1 2 3 4 5 6 7 8 9 NEGATIVO ...

Page 14: ...1 1 10 7 4 1 JP5 12 11 9 6 8 5 3 2 RE5 RE4 JP13 RE7 3 1 2 6 4 5 RE3 1 2 3 4 4 3 2 1 1 2 3 4 1 2 3 4 1 2 3 4 1 2 3 4 www nordelettronica it MOD NE356 DISTRIBUTION 12V 12V DISTRIBUTION F1 5A F2 20A F3 F4 F5 25A F6 20A F7 10A F8 1A F9 15A F10 15A S M F12 15A F11 10A 10A F13 2 1 20A 10 12V 12V 10A 2 J7 J6 RE9 D _NEG KEY ON G KEY ON D _NEG KEY ON G KEY ON 1 1 RE1 disabled if J6 J7 jumper is present scr...

Page 15: ... JP13 RE7 3 1 2 6 4 5 RE3 1 2 3 4 4 3 2 1 1 2 3 4 1 2 3 4 1 2 3 4 1 2 3 4 www nordelettronica it MOD NE356 DISTRIBUTION 12V 12V DISTRIBUTION F1 5A F2 20A F3 F4 F5 25A F6 20A F7 10A F8 1A F9 15A F10 15A S M F12 15A F11 10A 10A F13 2 1 20A 10 12V 12V 10A 2 J7 J6 12V CAR BATTERY 12V SERVICE BATTERY 1 2 3 4 S1 S2 JUMP J6 J7 D DC DC CONVERTER MOD NE325 IN OUT LIN D 30A DC DC NE325 NE356 DC DC CONVERTER...

Page 16: ...ue celle pour laquelle le produit a été fabriqué non respect du mode d emploi négligence imprudence ou impéritie lors de l installation et à l usage NORDELETTRONICA décline toute responsabilité dans le cas de dommages à des personnes ou à des choses dans le cas de maintenance effectuée par des tiers non expressément autorisés par elle Les réparations de produits non couverts ou hors garantie seron...

Reviews: