
29
1
4
7
28
25
24
102
38
38
40
41
41
43
43
46
48
50
52
47
51
42
54
25
58
59
59
53
61
57
60
60
56
61
61
61
66
61
70
72
71
71
74
74
103
103
79
79
77
83
83
82
82
61
107
100
91
11
5
106
84
94
96
68
98
99
93
97
99
99
73
84
109
84
77
99
61
11
2
11
2
55
105
11
8
98
61
61
61
11
4
108
55
104
33
33
81
81
17
17
17
48
17
17
61
75
98
125
98
75
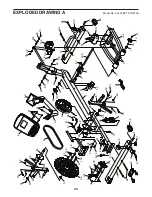
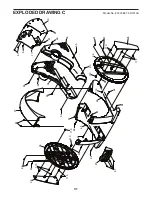
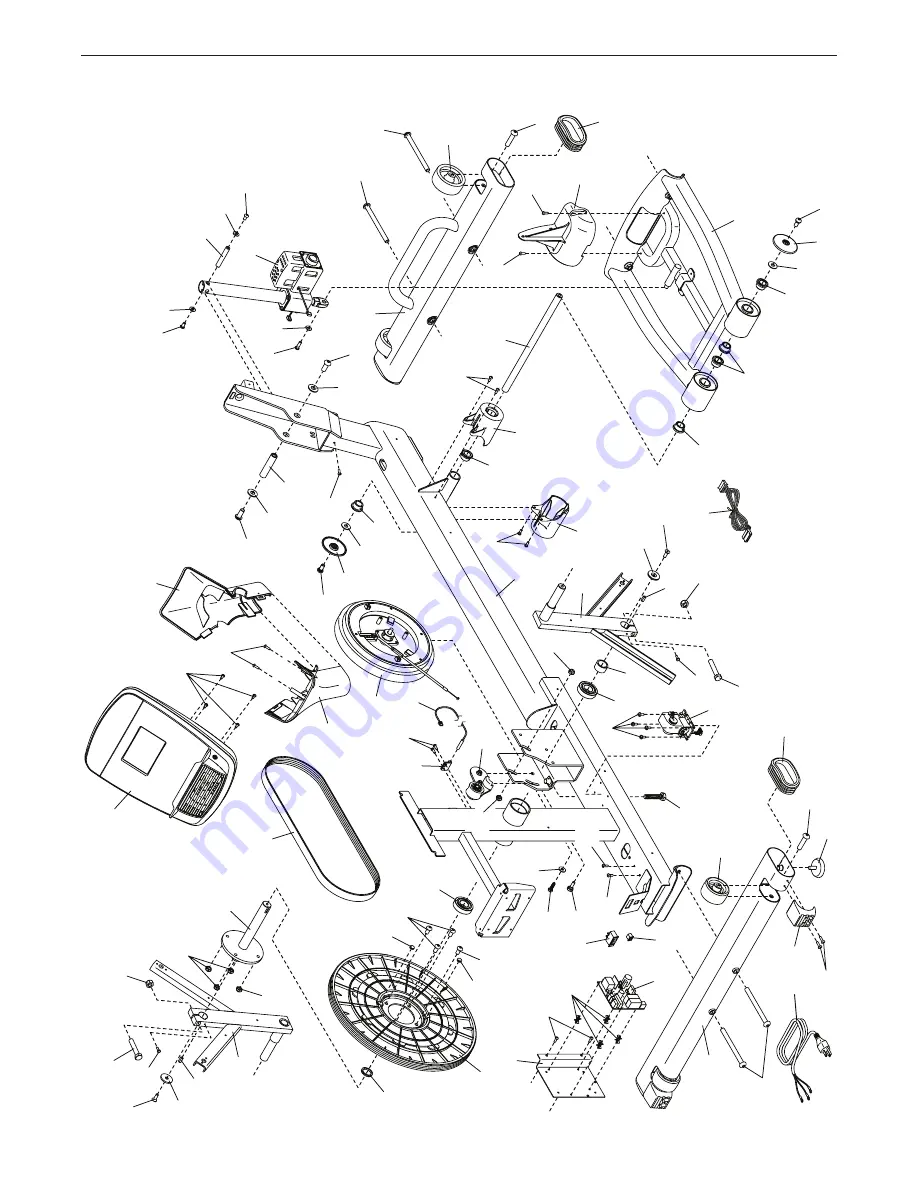
EXPLODED DRAWING A
Model No. 831.23887.0 R1213A
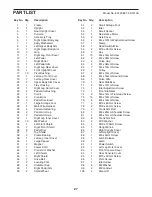
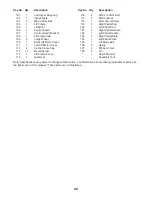
Summary of Contents for 831.23887.0
Page 4: ...4 ...


