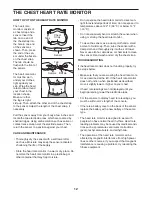
background image

17

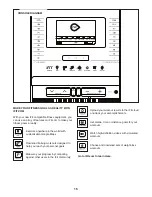
 HOW TO USE THE TOUCH SCREEN

The console features a tablet with a full-color touch 
screen. The following information will help you become 
familiar with the tablet’’s advanced technology: 

••  The console functions similarly to other tablets. You 

can slide or flick your finger against the screen to 
move certain images on the screen, such as the 
displays in a workout. However, you cannot zoom in 
and out by sliding your fingers on the screen. 

••  To type information into a text box, first touch the text 

box to view the keyboard. To use numbers or other 
characters on the keyboard, touch the ?123 but-
ton. To view more characters, touch the Alt button. 
Touch the Alt button again to return to the number 
keyboard. To return to the letter keyboard, touch the 
ABC button. To use a capital character, touch the 
button with an upward-facing arrow. To use multiple 
capital characters, touch the arrow button again. To 
return to the lowercase keyboard, touch the arrow 
button a third time. To clear the last character, touch 
the button with a backward-facing arrow and an X.

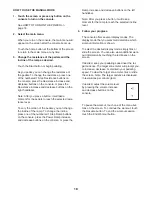
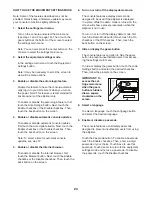
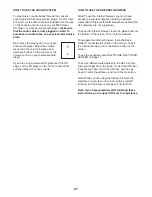
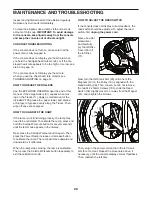
••  Use these buttons on 

the console to navigate 
the tablet. Press the 
home button to return 
to the main menu. Press the center button to access 
the settings menu (see page 23). Press the back 
button to return to the previous screen. 

••  If it is difficult for you to touch the correct buttons 

on the screen, the screen may not be properly 
calibrated. To calibrate the screen, see step 5 on 
page 25.

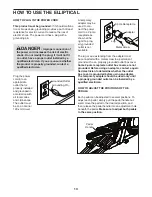
 HOW TO SET UP THE CONSOLE

Before using the elliptical for the first time, set up the 
console. 

1.  Connect to your wireless network.


 Note: In order to access the Internet, download iFit 
workouts, and use some other features of the con-
sole, you must be connected to a wireless network. 
See HOW TO USE THE WIRELESS NETWORK 
MODE on page 26 to connect the console to 
your wireless network.

2.  Check for firmware updates. 


 First, see step 1 on page 23 and step 2 on page 
25 and select the maintenance mode. Then, 
see step 3 on page 25 and check for firmware 
updates.

3.  Calibrate the incline of the ramp.


 See step 4 on page 25 and calibrate the incline 
of the ramp.

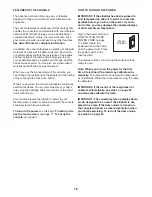
 4.  Create an iFit account.


 Touch the globe button at the bottom of the screen 
and then touch the iFit button.


 Note: For information about navigating in the 
Internet browser, see page 27.  


 The Internet browser will open to the iFit.com home 
page. Follow the prompts on the website to sign up 
for your iFit membership. If you have an activation 
code, select the code activation option.

The console is now ready for you to begin working out. 
The following pages explain the various workouts and 
other features that the console offers.

To use the manual mode,

 see page 18. 

To use 

an onboard workout,

 see page 20. 

To use a 

set-a-goal workout,

 see page 21. 

To use an iFit 

workout,

 see page 22.

To use the equipment settings mode,

 see 

page 23. 

To use the maintenance mode,

 see page 

25. 

To use the wireless network mode, 

see 

page 26.

 To use the sound system,

 see page 

27. 

To use the Internet browser,

 see page 27.

Note: If there is a sheet of plastic on the screen, 
remove the plastic. 

Note: The console can display speed and distance in 
either miles or kilometers. To find which unit of mea-
surement is selected, see step 13 on page 24. For 
simplicity, all instructions in this section refer to miles.

Summary of Contents for 831.23954.0

Page 1: ...o Write the serial number in the space above for reference www nordictrack com To register your product and activate your warranty today go to www nordictrackservice com registration For service at an...

Page 2: ...E THE ELLIPTICAL 13 FCC INFORMATION 28 MAINTENANCE AND TROUBLESHOOTING 29 EXERCISE GUIDELINES 31 PART LIST 32 EXPLODED DRAWING 34 ORDERING REPLACEMENT PARTS Back Cover LIMITED WARRANTY Back Cover This...

Page 3: ...g the power cord into a grounded circuit 10 Do not modify the power cord or use an adapter to connect the power cord to an improper receptacle Keep the power cord away from heated surfaces Do not use...

Page 4: ...4...

Page 5: ...5 UTS all STANDARD SERVICE PLANS...

Page 6: ...ned to make your workouts at home more effec tive and enjoyable For your benefit read this manual carefully before you use the elliptical If you have questions after reading this manual please see the...

Page 7: ...drawings below to identify the small parts needed for assembly The number in parentheses below each drawing is the key number of the part from the PART LIST near the end of this manual The number foll...

Page 8: ...istration provides the following benefits activates your product manufacturer s warranty saves you time if you ever need to contact Customer Care allows us to notify you of upgrades and offers Note If...

Page 9: ...ont of the Frame 1 Have the second per son hold the Frame to prevent it from tipping while you complete this step Identify the Right Front Stabilizer 6 and orient it as shown Attach the Right Front St...

Page 10: ...e Shield Cover 56 downward onto the Rear Shield 75 104 142 56 1 4 8 75 5 Orient the Front Stabilizer Cover 8 as shown and route the Power Cord not shown over the top of the Front Stabilizer Cover Then...

Page 11: ...it so that it is flush with the Right Upper Body Leg 36 Attach the Left Upper Body Arm 47 in the same way 7 Locate the Right Upper Saddle Bracket 121 on the Right Roller Arm 45 Next locate the Lower...

Page 12: ...tures above 122 F 50 C or below 14 F 10 C Do not excessively bend or stretch the sensor when using or storing the heart rate monitor To clean the sensor use a damp cloth and a small amount of mild soa...

Page 13: ...ptacle outlet box covers are not grounded Before using an adapter contact a quali fied electrician to determine whether the outlet box cover is grounded before using an adapter The temporary adapter s...

Page 14: ...ON THE ELLIPTICAL To mount the elliptical hold the upper body arms or the handlebars and step onto the pedal that is in the lower position Then step onto the other pedal Push the pedals until they be...

Page 15: ...stomizable Google Maps Download training workouts designed to help you reach your personal goals Measure your progress by competing against other users in the iFit community Upload your workout result...

Page 16: ...owse the Internet or listen to your favorite workout music or audio books with the console sound system while you exercise To turn on the power see this page To learn how to use the touch screen see p...

Page 17: ...sole 1 Connect to your wireless network Note In order to access the Internet download iFit workouts and use some other features of the con sole you must be connected to a wireless network See HOW TO U...

Page 18: ...incline press one of the numbered 1 Step Ramp buttons on the console press the Power Ramp increase and decrease buttons on the console or press the Ramp increase and decrease buttons on the left handl...

Page 19: ...positioned as described Be careful not to move your hands excessively or to squeeze the contacts tightly For optimal perfor mance clean the contacts using a soft cloth never use alcohol abrasives or c...

Page 20: ...ANT The target cadence is intended only to provide motivation Your actual pedaling speed may be slower than the target cadence Make sure to pedal at a speed that is comfort able for you If the resista...

Page 21: ...l and or incline level for the current segment is too high or too low you can manually override the setting by pressing the Resistance buttons or the Ramp buttons If you press a Resistance button you...

Page 22: ...d touch the Compete button To view your Workout History touch the Track button To use a set a goal workout touch the Set A Goal button see page 21 Note You can also press one of the iFit buttons on th...

Page 23: ...disable the Internet browser To enable or disable the Internet browser first touch the Browser button Next touch the Enable checkbox or the Disable checkbox Then touch the back button on the screen 6...

Page 24: ...the back button on the screen 12 Select an update time To select a time for automatic console updates touch the Update Time button and select the desired time Then touch the back button on the screen...

Page 25: ...cline level lower to the minimum incline level and then return to the starting position This will calibrate the incline Press the Cancel button to return to the maintenance mode When the incline is ca...

Page 26: ...etworks appears touch the desired network Note You will need to know your network name SSID If your network has a password you will also need to know the password An information box will ask if you wa...

Page 27: ...ote To use the Internet browser you must have access to a wireless network including a wireless router 802 11b g n with SSID broadcast enabled hid den networks are not supported To open the Internet b...

Page 28: ...and on try to correct the interference by one or more of the following measures Reorient or relocate the receiving antenna Increase the separation between the equipment and the receiver Connect the e...

Page 29: ...ioning properly the ramp may need to be calibrated To calibrate the ramp press and hold the Calorie Workouts button for several seconds until the test mode appears in the display Next press the Calori...

Page 30: ...driver and pry off the Shield Cover 56 and slide it upward Then remove the four M4 x 16mm Screws not shown from the upper and lower ends of the Rear Shield 75 and remove the Rear Shield Then look betw...

Page 31: ...c Exercise If your goal is to strengthen your cardiovascular system you must perform aerobic exercise which is activity that requires large amounts of oxygen for prolonged periods of time For aerobic...

Page 32: ...ight Pedal 50 1 Right Lower Grip 51 4 Large Roller 52 1 Left Lower Grip 53 2 Axle Cover 54 1 Left Roller Arm Cover 55 2 Disc Cover 56 1 Shield Cover 57 4 Small Bushing 58 1 Right Pedal Arm 59 1 Left U...

Page 33: ...29 4 M10 Large Washer 130 4 M8 x 18mm Bolt 131 2 M8 Flat Head Screw 132 8 M10 x 20mm Screw 133 4 M6 Washer 134 1 M10 x 48mm Bolt 135 1 M10 x 36mm Bolt 136 4 M10 Washer 137 10 M6 x 12mm Screw 138 16 M4...

Page 34: ...4 56 59 66 68 65 62 11 67 69 72 76 73 75 77 80 88 85 89 90 92 92 91 95 95 97 105 106 107 129 136 136 132 132 104 99 132 144 122 99 140 135 144 144 104 104 129 132 104 104 104 104 142 104 104 104 146 1...

Page 35: ...6 98 98 93 95 95 100 103 129 99 99 117 139 104 101 147 102 102 145 145 141 132 136 104 104 128 131 117 118 130 130 108 112 114 115 109 104 104 148 148 148 148 104 132 138 137 138 102 102 110 111 113 3...

Page 36: ...for a minimal trip charge This warranty does not extend to freight damage to the product This warranty will automatically be voided if the product is used as a store display model if the product is p...

Reviews: