9
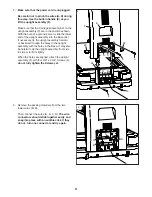
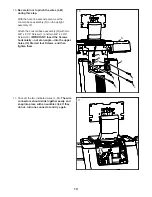
2. Make sure that the power cord is unplugged.
Be careful not to pinch the wires (A–D) during
this step. Use the built-in handle (E) as you
lift the upright assembly (F).
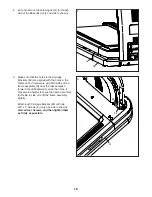
Make sure that the Carriage Brackets (82) on the
upright assembly (F) are in the positions shown.
With the help of a second person, slide the lower
end of the upright assembly into the Base (64).
If necessary, tip the upright assembly forward
or backward to align the holes in the upright
assembly with the holes in the Base. It may also
be helpful to tip the upright assembly from side
to side or to lift it slightly.
When the holes are aligned, attach the upright
assembly (F) with four 3/8" x 3 3/4" Screws (3);
do not fully tighten the Screws yet.
3
3
3
3
82
82
64
F
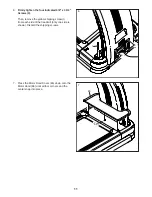
3. Remove the packing materials from the two
lower wires (B, D).
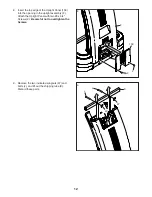
Then, connect the wires (A, B, C, D). The wire
connectors should slide together easily and
snap into place with an audible click. If they
do not, turn one connector and try again.
3
A
D
B
C
2
C
E
A
D B


