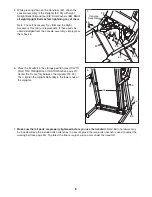
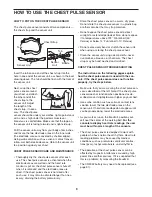
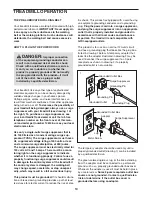
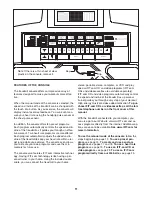
background image

18

HOW TO USE A CUSTOM PROGRAM

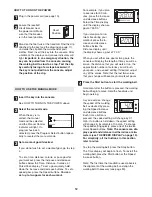
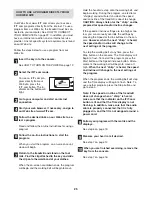
Insert the key into the console. 

See HOW TO TURN ON THE POWER on page
12. 

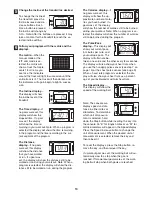
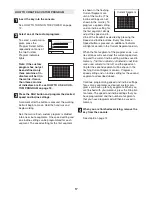
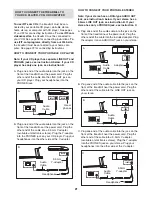
Select one of the custom programs.

To select a custom pro-
gram, press the
Program Select button
repeatedly until one of
the two Custom
Program indicators
lights.

When a custom program is selected, the Incline
display will show the maximum incline setting of
the program and the Speed display will show the
maximum speed setting. The Time display will
show how long the program will last. 

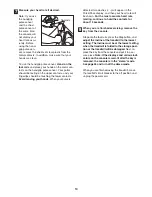
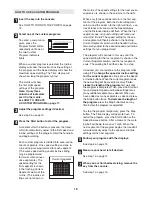
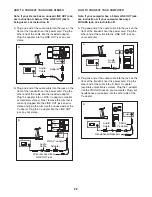
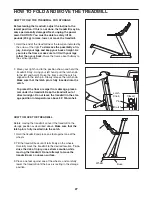
The matrix will show
the first eight speed
settings of the program.

Note: If only three
columns of indicators
are lit in the matrix,
see HOW TO CREATE
A CUSTOM PROGRAM on page 17.

Adjust the program settings if desired.

See step 3 on page 15.

Press the Start button to start the program.

A moment after the button is pressed, the tread-
mill will automatically adjust to the first speed and
incline settings of the program. Hold the handrails
and begin walking. 

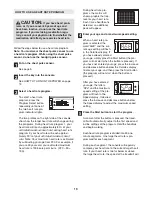
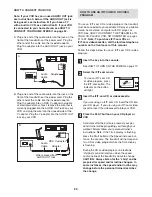
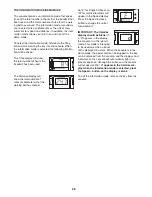
Each custom program is divided into several one-
minute segments. One speed setting and one in-
cline setting are programmed for each segment.
(The same speed setting and/or incline setting
may be programmed
for two or more consec-
utive segments.) The
speed setting for the
first segment is shown
in the flashing Current
Segment column of the
matrix. (The incline set-
tings are not shown in

the matrix.) The speed settings for the next seven
segments are shown in the columns to the right.

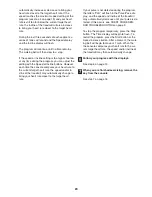
When only three seconds remain in the first seg-
ment of the program, both the Current Segment
column and the column to the right will flash, a se-
ries of tones will sound, and the Speed display
and the Distance display will flash. When the first
segment ends, 

all speed settings will move one

column to the left

. The speed setting for the sec-

ond segment will then be shown in the flashing
Current Segment column and the treadmill will au-
tomatically adjust to the second speed and incline
settings that you programmed. 

The program will continue in this way until the
speed setting for the last segment is shown in the
Current Segment column and the last segment
ends. The walking belt will then slow to a stop.

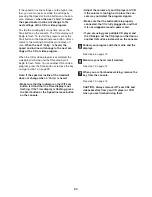
If desired, you can redefine to the program while
using it. 

To change the speed or incline setting

for the current segment,

simply press the Speed

or Incline buttons. When the current segment ends,
the new setting will be saved in memory. 

To in-

crease the length of the program,

first wait until

the program is completed. Then, press the Start but-
ton and program speed and incline settings for as
many additional segments as desired. When you
have added as many segments as desired, press
the Stop button twice. 

To decrease the length of

the program,

press the Stop button twice at any

time before the program is completed. 

To stop the program temporarily, press the Stop
button. The Time display will begin to flash. To
restart the program, press the Start button or the
Speed increase button. After a moment, the walk-
ing belt will begin to move at 1 mph. When the
next segment of the program begins, the treadmill
will automatically adjust to the speed and incline
settings for the next segment.

Follow your progress with the displays.

See step 6 on page 13.

Measure your heart rate if desired.

See step 7 on page 14.

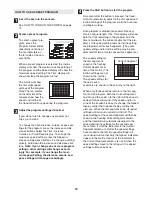
When you are finished exercising, remove the
key from the console.

See step 7 on page 16.

7

6

5

4

3

2

1

Current Segment

Summary of Contents for NTL18905.0

Page 1: ...future reference Serial Number Decal QUESTIONS As a manufacturer we are com mitted to providing complete customer satisfaction If you have questions or if parts are damaged or missing PLEASE CONTACT O...

Page 2: ...SENSOR 9 TREADMILL OPERATION 10 HOW TO FOLD AND MOVE THE TREADMILL 27 TROUBLESHOOTING 29 EXERCISE GUIDELINES 32 PART LIST 34 ORDERING REPLACEMENT PARTS 35 LIMITED WARRANTY Back Cover Note An EXPLODED...

Page 3: ...see your local NordicTrack dealer or call the toll free telephone number on the front cover of this manual and order part number 146148 or see your local electronics store 11 Failure to use a properl...

Page 4: ...eaning the treadmill and before performing the main tenance and adjustment procedures de scribed in this manual Never remove the motor hood unless instructed to do so by an authorized service represen...

Page 5: ...ad ing this manual please see the front cover of this man ual To help us assist you please note the product model number and serial number before contacting us The model number of the treadmill is NTL...

Page 6: ...wrench and your own phillips screwdriver For help identifying assembly hardware see the drawings below Note If a part is not found in the part bags check to see if the part has been preattached IMPORT...

Page 7: ...pright 95 Next insert the front ends of the brackets on the console assembly into the Right Upright and the Left Upright 90 Then insert the back ends of the brackets into the Uprights Make sure that t...

Page 8: ...rights 90 95 with eight Upright Bolts 86 and four 3 8 Star Washers 88 Start all eight Upright Bolts before tightening any of them Note The Left Accessory Tray 38 and the Right Accessory Tray 43 are re...

Page 9: ...pose the chest pulse sensor to direct sunlight for extended periods of time do not expose it to temperatures above 122 Fahrenheit 50 Celsius or below 14 Fahrenheit 10 Celsius Do not excessively bend o...

Page 10: ...down grounding provides a path of least resistance for electric current to reduce the risk of elec tric shock This product is equipped with a cord having an equipment grounding conductor and a ground...

Page 11: ...l trainer in your home Using the included audio cable you can connect the treadmill to your home stereo portable stereo computer or VCR and play special iFIT com CD and video programs iFIT com CDs and...

Page 12: ...for 30 min utes press the increase and decrease buttons below the Time display until the display shows a goal of 30 00 If you also plan to run two miles during your workout press the in crease and dec...

Page 13: ...alories display If no goals were set this display will show the ap proximate number of calo ries you have burned If a goal was set the display will show the number of calories still to be burned durin...

Page 14: ...ppear in the Pulse Pace display and then your heart rate will be shown For the most accurate heart rate reading continue to hold the contacts for about 15 seconds When you are finished exercising remo...

Page 15: ...eed and incline settings of the program Hold the handrails and begin walking Each program is divided into several time seg ments of equal length The Time display will show both the time remaining in t...

Page 16: ...settings for the next seg ment To stop the program temporarily press the Stop button The Time display will begin to flash To restart the program press the Start button or the Speed increase button Aft...

Page 17: ...ogram a speed setting and an incline setting for the first segment simply adjust the speed and in cline of the treadmill as desired by pressing the Speed and Incline buttons Every few times a Speed bu...

Page 18: ...f tones will sound and the Speed display and the Distance display will flash When the first segment ends all speed settings will move one column to the left The speed setting for the sec ond segment w...

Page 19: ...cted the word AGE and the cur rent age setting will flash in the Calories display If you have already entered your age simply press the Start button the pro gram will not start when the button is pres...

Page 20: ...heart rate to the current target heart rate the speed and or in cline of the treadmill may automatically change to bring your heart rate closer to the target heart rate If your pulse is not detected...

Page 21: ...t electronics stores Plug the Y adapter into the PHONES jack on your CD player Plug your headphones into the other side of the Y adapter HOW TO CONNECT YOUR PORTABLE STEREO Note If your stereo has an...

Page 22: ...he Y adapter Plug the Y adapter into the LINE OUT jack on your stereo HOW TO CONNECT YOUR COMPUTER Note If your computer has a 3 5mm LINE OUT jack see instruction A If your computer has only a PHONES...

Page 23: ...ocassettes call the toll free telephone number on the front cover of this manual Follow the steps below to use an iFIT com CD or video program Insert the key into the console See HOW TO TURN ON THE PO...

Page 24: ...step 1 on page 23 Note If the speed or incline of the treadmill does not change when a chirp is heard Make sure that the indicator on the iFIT com button is lit and that the Time display is not flashi...

Page 25: ...n walking During the program an electronic chirping sound will alert you when the speed and or incline of the treadmill is about to change CAUTION Always listen for the chirp and be prepared for speed...

Page 26: ...ance display will show the total number of miles or kilometers that the walking belt has moved An E for English miles or an M for metric kilometers will appear in the Speed display Press the Speed inc...

Page 27: ...catch is aligned with the latch pin Slowly release the latch knob Make sure that the latch pin is fully inserted into the catch To protect the floor or carpet from damage place a mat under the treadm...

Page 28: ...r left hand pull the latch knob to the left and hold it Pivot the frame down until it is past the latch pin Then slowly release the latch knob 2 Hold the frame firmly with both hands and lower it to t...

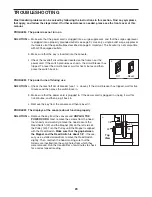
Page 29: ...he power cord is plugged in unplug it wait for five minutes and then plug it back in c Remove the key from the console and then reinsert it PROBLEM The displays of the console do not function properly...

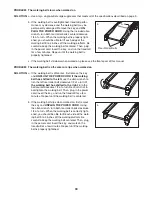
Page 30: ...ing belt is off center or slips when walked on SOLUTION a If the walking belt is off center first remove the key and UNPLUG THE POWER CORD If the walking belt has shifted to the left use the allen wre...

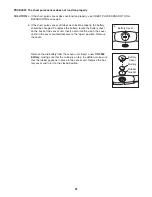
Page 31: ...tery locate the battery cover on the back of the sensor unit Insert a coin into the slot in the cover and turn the cover counterclockwise to the open position Remove the cover Remove the old battery f...

Page 32: ...unts of oxygen for prolonged periods of time This increases the demand on the heart to pump blood to the muscles and on the lungs to oxygenate the blood For aerobic exercise adjust the speed or inclin...

Page 33: ...Stretch With one leg in front of the other reach forward and place your hands against a wall Keep your back leg straight and your back foot flat on the floor Bend your front leg lean forward and move...

Page 34: ...Tray 44 1 Reed Switch Clip 45 4 Hood Bracket 46 1 Ground Wire 47 1 Lift Frame 48 2 Motor Bolt 49 1 Jack 50 1 Filter Wire 51 1 Controller Plate 52 2 Small Star Washer 53 1 Lift Motor Bolt Top 54 8 Elec...

Page 35: ...ulse Receiver Screw 117 2 Cable Tie 118 2 Shock Clip 119 1 Console Ground Wire 1 8 Black Wire 2 Ring 1 8 Blue Wire 2 F 1 User s Manual These parts are not illustrated Specifications are subject to cha...

Page 36: ...5 52 54 59 51 56 54 63 63 63 63 82 63 1 66 66 66 2 3 12 13 2 11 12 19 18 2 74 75 76 2 73 2 75 74 2 76 72 2 2 73 70 54 46 96 1 66 66 66 2 65 16 15 14 25 24 47 35 12 12 28 29 28 29 6 7 79 33 4 33 113 11...

Page 37: ...7 86 84 85 83 86 90 86 86 100 98 97 91 98 25 94 86 95 97 99 104 103 25 102 100 98 97 98 97 86 91 25 86 86 92 93 25 25 93 92 81 101 101 54 106 105 107 88 88 88 88 108 55 39 5 49 38 43 8 2 20 20 86 58 6...

Page 38: ...on and your continued satisfaction HOW TO GET PARTS AND SERVICE Simply call our Customer Service Department at 1 888 825 2588 and tell them your name and address and the serial number of your Product...

Reviews: