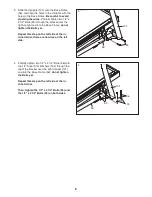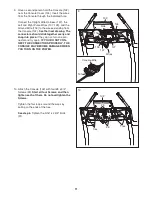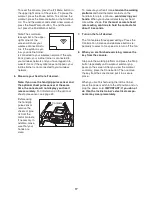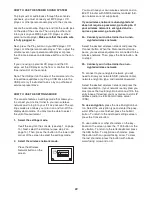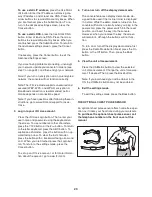
12. Press the Left and Right Accessory Trays (118,
123) into the Console Cover (104).
Slide the two Handrail Covers (100) down
against the Handrails (105).
12
123
118
100
105
105
100
104
14.
Make sure that all parts are properly tightened before you use the incline trainer.
Keep the included hex
key in a secure place. The hex key is used to adjust the walking belt (see page 28).
To protect the floor or
carpet from damage, place a mat under the incline trainer.
11
106
131
29
104
131
29
29
29
29
29
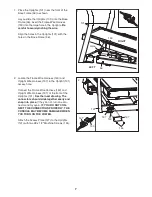
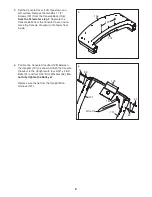
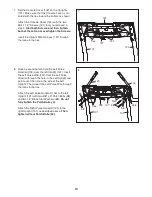
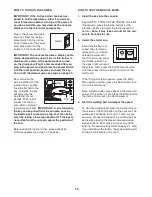
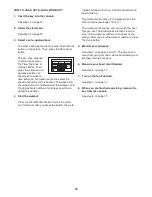
11. Attach the Console Back (106) to the Console
Cover (104) with two #8 x 1 1/2" Screws (131)
and twelve #8 x 3/4" Screws (29).
Start all four-
teen Screws, and then tighten each of them.
Do not overtighten the Screws. Make sure no
wires are pinched.
13
138
38
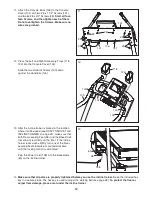
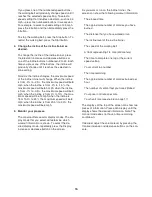
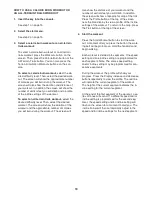
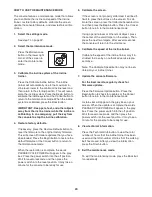
13. After the incline trainer is placed in the location
where it will be used (see HOW TO MOVE THE
INCLINE TRAINER on page 25), make sure that
both Rear Leveling Feet (38) and the Base Pads
(not shown) rest firmly on the floor. If the incline
trainer rocks even slightly, turn one of the Rear
Leveling Feet clockwise or counterclockwise
until the rocking motion is eliminated.
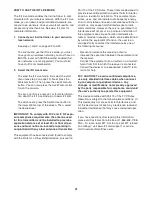
Plug the Power Cord (138) into the Receptacle
(65) on the incline trainer.
65
12

