24
Most treadmill problems can be solved by following the steps outlined in this section. Find any symptoms
that apply, and follow the steps listed. If further assistance is needed, please call Customer Service
Department toll-free at 1-888-825-2588, Monday through Friday, 6 a.m. until 6 p.m. Mountain Time.
1. SYMPTOM: THE POWER DOES NOT TURN ON
a. Make sure that the power cord is fully plugged into the treadmill. In addition, make sure that the power cord
is plugged into a surge suppressor, and that the surge suppressor is plugged into a properly grounded out-
let (see page 9). Use only a single-outlet surge suppressor that meets all of the specifications described on
page 9. Important: The treadmill is not compatible with GFCI-equipped outlets.
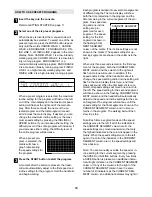
b. Make sure that the key is inserted into the console.
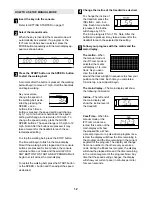
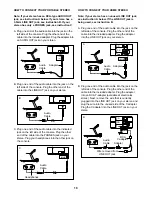
c. Check the circuit breaker located on the treadmill near the
power cord. If the switch protrudes as shown, the circuit breaker
has tripped. To reset the circuit breaker, wait for five minutes
and then press the switch back in.
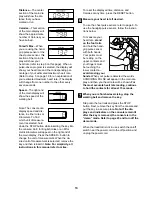
d. Check the on/off switch located on the treadmill near the power
cord. The switch must be in the on position.
2. SYMPTOM: THE POWER TURNS OFF DURING USE
a. Check the circuit breaker located on the treadmill frame near the power cord (see c. above). If the circuit
breaker has tripped, wait for five minutes and then press the switch back in.
b. Make sure that the power cord is plugged in. If the power cord is plugged in, unplug it, wait for five minutes,
and then plug it back in.
c. Remove the key from the console. Reinsert the key fully into the console.
d. Make sure that the on/off switch is in the on position.
e. If the treadmill still will not run, please call our Customer Service Department, toll-free.
3. SYMPTOM: THE WALKING BELT SLOWS WHEN WALKED ON
a. Use only a single-outlet surge suppressor that meets all of the specifications described on page 9.
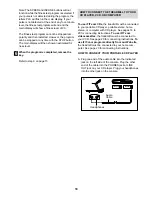
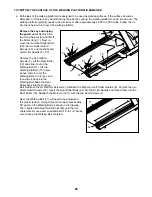
b. If the walking belt is overtightened, performance may de-
crease and the walking belt may be damaged. If the walking
belt is properly tightened, you should be able to lift each
side of the walking belt 1 to 2 inches off the walking plat-
form. If adjustments need to be made, first remove the
key and unplug the power cord. Using the included allen
wrench, turn both roller adjustment bolts counterclockwise
1/4 of a turn. Be careful to keep the walking belt centered.
Plug in the power cord, insert the key, and use the treadmill
for a few minutes. Repeat until the walking belt is properly
tightened.
c. If the walking belt still slows when walked on, please call our Customer Service Department toll-free.
TROUBLESHOOTING
Tripped
c
Reset
On
Position
d
b
Roller
Adjustment
Bolts
1”–2”


