background image

EN 

15

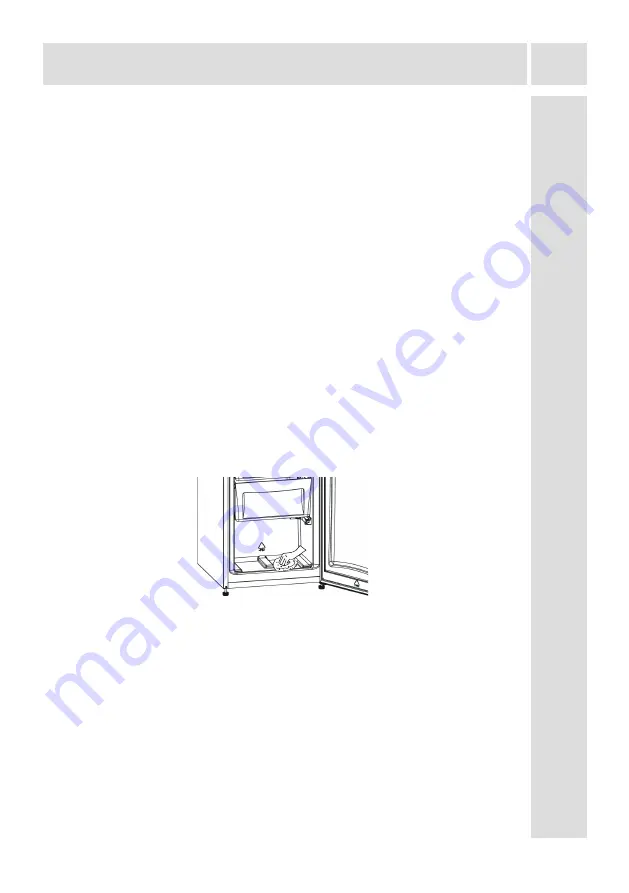
Defrosting  the Freezer compartment

Freezer defrost process

• 

Small amounts of frost will accumulate inside the freezer depending upon the 

length of time during which the door is left open or the amount of moisture 

introduced. It is essential to ensure that no frost or ice is allowed to form 

at  places  where  it  will  affect  the  close  fitting  of  the  door  seal.  This  might 

allow air to penetrate the cabinet, thus encouraging continuous running of 

the compressor. Thin frost formation is quite soft and can be removed with 

a brush or plastic scraper. Do  not use metal or sharp scrapers, mechanical 

devices or other means to accelerate the defrosting process. Remove all 

dislodged frost from the cabinet floor. For the removal of thin frost it is not 

necessary to switch off the appliance.

• 

For the removal of heavy ice deposits disconnect the appliance from the 

mains supply and empty the contents into cardboard boxes and wrap in thick 

blankets or layers of paper to keep them cold. Defrosting will be most effective 

if carried out when the freezer is nearly empty, and it should be carried out as 

quickly as possible to prevent undue increase in temperature of the contents.

• 

Do not use metal or sharp scrapers, mechanical devices or other means to 

accelerate the defrosting process. An increase in temperature of frozen food 

packages  during  defrosting  will  shorten  the  storage  life.  Provided  that  the 

contents are well wrapped and placed in a cool area they should keep for 

several hours.

• 

Dry the inside of the compartment with a sponge or a clean cloth.

• 

To accelerate the defrosting process place one or more basins of warm water 

in the freezer compartment.

•  Examine the contents when replacing them in the freezer and if some of the 

packages have thawed out it should be eaten within 24 hours or be cooked 

and re-frozen.

•  After defrosting has finished clean the inside with a solution of warm water 

with a little bicarbonate of soda and then dry thoroughly. Wash all removable 

parts in the same way and reassemble. Reconnect the appliance to the mains 

supply and leave for 2 to 3 hours on setting number 24 before introducing the 

food back into the freezer.

CLEANING AND MAINTENANCE

Summary of Contents for RTF247WHA+

Page 1: ...EN Freezer User manual RTF247WHA TM DE Gefrierschrank Bedienungsanleitung...

Page 2: ...EN 2...

Page 3: ...TION 12 Control panel 12 Freezer partition temperature setting button 12 Alarm light 12 Super Freezer Mode 12 Freezer Temperature Settings 13 Warnings About Temperature Adjustments 13 CLEANING AND MAI...

Page 4: ...If your appliance uses R600a as a refrigerant you can learn this information from the label on the cooler you should be careful during shipment and montage to prevent your appliance s cooler elements...

Page 5: ...If there is no such socket in your house please have it installed by an authorized electrician This appliance can be used by children aged from 8 years and above and persons with reduced physical sen...

Page 6: ...not responsible of the damage occurred due to misuse Follow all instructions on your appliance and instruction manual and keep this manual in a safe place to resolve the problems that may occur in the...

Page 7: ...lace explosive or flammable material in your fridge for your safety Place drinks with higher alcohol amount vertically and by closing their necks tightly in the fridge department When taking ice made...

Page 8: ...them to prevent humidity on the outer surface Do not place anything on your freezer and install your freezer in a suitable place so that at least 15 cm is available on the upper side The adjustable fr...

Page 9: ...time or after transportation keep your freezer in the upright position for 3 hours and plug it on to allow efficient operation Otherwise you may damage the compressor Your freezer may have a smell whe...

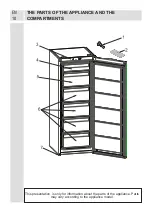
Page 10: ...EN 10 THE PARTS OF THE APPLIANCE AND THE COMPARTMENTS This presentation is only for information about the parts of the appliance Parts may vary according to the appliance model...

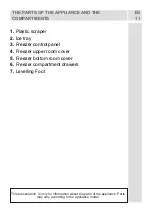
Page 11: ...raper 2 Ice tray 3 Freezer control panel 4 Freezer upper room cover 5 Freezer bottom room cover 6 Freezer compartment drawers 7 Levelling Foot This presentation is only for information about the parts...

Page 12: ...of food To freeze fast food To freeze food quickly To store seasonal food for a long time How to use Press temperature set button until super freezing light comes on Super freezing led will light dur...

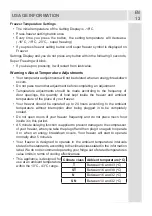
Page 13: ...f the place of your freezer Your freezer should be operated up to 24 hours according to the ambient temperature without interruption after being plugged in to be completely cooled Do not open doors of...

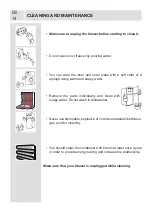
Page 14: ...r a sponge using warm and soapy water Remove the parts individually and clean with soapy water Do not wash in dishwasher Never use flammable explosive or corrosive material like thinner gas acid for c...

Page 15: ...ing will be most effective if carried out when the freezer is nearly empty and it should be carried out as quickly as possible to prevent undue increase in temperature of the contents Do not use metal...

Page 16: ...should be returned to the freezing surfaces of the unit in the shortest possible time If a package of frozen food shows the sign of humidity and abnormal swelling it is probable that it has been prev...

Page 17: ...ing bands during re positioning and transportation Carry your freezer in the upright position Repositioning the door It is not possible to change the opening direction of your freezer door if the door...

Page 18: ...performs poorly Check that You have not overloaded the appliance The freezer temperature set to 16 The doors are closed perfectly There is no dust on the condenser There is enough place at the rear a...

Page 19: ...iance 3 When placing drinks and slops they must be covered Otherwise humidity increases at the appliance Therefore the working time gets longer Also covering drinks and slops helps to save smell and t...

Page 20: ...ER TES 27 INFORMATIONEN ZUR VERWENDUNG 29 Bedienfeld 29 Temperatureinstelltaste des Tiefk hlbereichs 29 Alarmleuchte 29 Schnellgefriermodus 29 Tiefk hltemperatur einstellen 30 Warnungen zur Temperatur...

Page 21: ...rmeiden muss es gem der Anweisungen befestigt werden Wenn Ihr Ger t R600a als K ltemittel verwendet dies k nnen Sie dem Typenschild am Ger t entnehmen m ssen Sie bei Transport und Aufstellung des Ger...

Page 22: ...keine geeignete Steckdose haben lassen Sie eine solche von einem qualifizierten Elektriker installieren Dieses Ger t darf von Kindern ab 8 Jahren und lter und Personenmit eingeschr nktenk rperlichen s...

Page 23: ...uchliche Verwendung des Ger ts entstehen Befolgen Sie alle Hinweise am Ger t und in der Bedienungsanleitung und bewahren Sie diese Bedienungsanleitung an einem sicheren Ort auf damit Sie es bei event...

Page 24: ...e zu Ihrer eigenen Sicherheit keine explosiven oder brennbaren Materialien in den K hlschrank Geben Sie Getr nke mit h herem Alkoholgehalt liegend und fest verschlossen in das Gefrierfach Wenn Sie Eis...

Page 25: ...htigkeitsbildung an den Au enfl chen zu verhindern Legen Sie keine Gegenst nde auf den K hlschrank Stellen Sie ihn so an einem geeigneten Ort auf dass ber dem Ger t ein Freiraum von mindestens 15 cm v...

Page 26: ...in aufrechter Stellung stehen Stecken Sie ihn erst dann ein Dies stellt einen sicheren und effizienten Betrieb sicher Andernfalls k nnte der Kompressor besch digt werden Bei der ersten Inbetriebnahme...

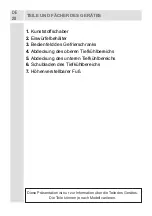
Page 27: ...DE 27 TEILE UND F CHER DES GER TES Diese Pr sentation ist nur zur Information ber die Teile des Ger tes Die Teile k nnen je nach Modell variieren...

Page 28: ...dienfeld des Gefrierschranks 4 Abdeckung des oberen Tiefk hlbereichs 5 Abdeckung des unteren Tiefk hlbereichs 6 Schubladen des Tiefk hlbereichs 7 H henverstellbarer Fu Diese Pr sentation ist nur zur I...

Page 29: ...LED rot Schnellgefriermodus Wann sollte er eingesetzt werden Beim Einfrieren gro er Mengen Lebensmittel Beim Einfrieren von Fertiggerichten Zum schnellen Einfrieren von Lebensmitteln Zur langfristige...

Page 30: ...ten Wert Warnungen zur Temperatureinstellung Ihre Temperatureinstellungen werden bei einem Stromausfall nicht gel scht Gehen Sie erst zu einer anderen Einstellung ber wenn die vorherige abgeschlossen...

Page 31: ...aklasse Aufgrund der K hleffizienz sollten Sie Ihr K hlger t nicht au erhalb der angegebenen Temperaturwerte verwenden Dieses Ger t ist f r den Einsatz bei einer Umgebungstemperatur von 10 C bis 43 C...

Page 32: ...bwischen Nehmen Sie die Innenteile einzeln heraus und reinigen Sie sie mit Seifenwasser WaschenSiediesenichtimGeschirrsp ler Verwenden Sie keine brennbaren explosiven oder tzenden Materialien wie Verd...

Page 33: ...t von der Stromversorgung und leeren Sie die Schubladen wickeln Sie die Lebensmittel in dicke T cher oder Papierschichten damit sie kalt bleiben Der Gefrierschrank l sst sich am effektivsten abtauen...

Page 34: ...as Natriumbikarbonat anschlie end gr ndlich abtrocknen Reinigen Sie alle herausnehmbaren Teile auf die gleiche Weise bringen Sie sie dann wieder an Schlie en Sie das Ger t wieder an die Stromversorgun...

Page 35: ...ch digt ist Gefrorene Lebensmittel sollten zur Gew hrleistung der Qualit t in geeigneten Beh ltnissen transportiert und so schnell wie m glich wieder tiefgek hlt werden Wenn eine Packung mit Tiefk hlk...

Page 36: ...DE 36 Achtung Sie k nnen Energie sparen indem Sie den eingestellten Wert beim Einfrieren kleiner Lebensmittelmengen auf den gew nschten Wert r cksetzen Empfehlung LEBENSMITTEL IM GER T VERSTAUEN...

Page 37: ...rank oder fixieren Sie diese mit Klebeband wenn Sie den K hlschrank umstellen oder transportieren Achten Sie darauf den Gefrierschrank nur in aufrechter Lage zu transportieren Wechsel des T ranschlags...

Page 38: ...ist Pr fen Sie ob Sie das Ger t berladen haben Die Tiefk hltemperatur auf 16 C eingestellt ist Die T ren richtig geschlossen sind Sich Staub am Kondensator abgelagert hat Gen gend Platz an der R ckse...

Page 39: ...nterst tzen die K hlung des K hlfachs Dadurch wird Energie gespart Durch Auftauen au erhalb des K hlschranks wird Energie verschwendet 4 Decken Sie Getr nke und fl ssige Nahrungsmittel zu Andernfalls...

Page 40: ...52199463...

Reviews: