15
GB
8. Warranty
For detailed description of the warranty conditions
see the enclosed warranty card or visit our website
www.nordpeis.com
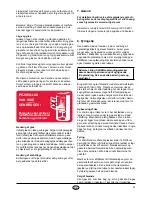
The inserts have a plaque with the
RRF number
29 09 2201.
The
CE mark
is situated on the back of the heat shield.
9. Advice on Lighting a Fire
The best way to light a fire is with the use of lightening
briquettes and dry kindling wood. Newspapers
cause a lot of ashes and the ink is damaging for the
environment. Advertising flyers, magazines, milk
cartons and similar are not suitable for lighting a fire.
Good air supply is important at ignition. When the flue is
hot the draught increases and door can be closed.
Warning: NEVER use a lighting fuel such as
petrol, paraffin, methylated spirits or similar for
lighting a fire. This could cause injury to you as
well as damaging the product.
Use clean and dry wood with a maximum moisture
content of 20% and minimum 16%. The wood logs
should dry for a minimum of 6 months after it is cut.
Humid wood requires a lot of air for the combustion,
as extra energy/heat is required for drying the humid
wood and heat effect is therefore minimal. In addition
this creates soot in the chimney with the risk of creosote
and chimney fire
.
Storing of Wood
In order to ensure that the wood is dry, the tree should
be cut in winter and then stored during the summer,
under roof and in a location with adequate ventilation.
The wood pile must never be covered by a tarpaulin
which is lying against the ground as the tarpaulin will
then act as a sealed lid that will prevent the wood from
drying. Always keep a small amount of wood indoors for
a few days before use so that moisture in the surface of
the wood can evaporate.
Firing
Lack of air to the combustion may cause the glass
to soot. Hence, supply the fire with air just after the
wood is added, so that the flames and gases in the
combustion chamber are properly burnt off. Open the
air vent and have the door slightly ajar in order for the
flames to establish properly on the wood.
Note that the air supply for the combustion also can
be too large and cause an uncontrollable fire that
very quickly heat up the whole hearth to an extremely
high temperature (when firing with a closed or nearly
closed door). For this reason you should never fill the
combustion chamber completely with wood.
Choice of Fuel
All types of wood, such as birch, beech, oak, elm, ash
and fruit trees, can be used as fuel in the fireplace.
Wood species have different degrees of hardness - the
higher the hardness of the wood, the higher the energy
value. Beech, oak and birch have the highest degree of
hardness.
NB! We do not recommend the use of fuel briquettes /
compact wood in our combustion chambers, as these
products may develop significantly higher temperature
than the combustion chamber can withstand. Burning
briquettes / compact wood is at your own risk and can
cause invalidity of the warranty.
Warning:
NEVER use impregnated wood, painted wood,
plywood, chipboard, rubbish, milk cartons,
printed material or similar. If any of these items
are used as fuel the warranty is invalid.
Common to these materials is that they during
combustion can form hydrochloric acid and
heavy metals that are harmful to the environment,
you and the fireplace. Hydrochloric acid can also
corrode the steel in the chimney or masonry in
a masonry chimney. Also, avoid firing with bark,
sawdust or other extremely fine wood, apart from
when lighting a fire. This form of fuel can easily
cause a flashover that can lead to temperatures
that are too high.
Warning: Make sure the fireplace is not
overheated - it can cause irreparable damage to
the product. Such damage is not covered by the
warranty.
Source: “Håndbok, effektiv og miljøvennlig vedfyring” by Edvard
Karlsvik SINTEF Energy Research AS and Heikki Oravainen, VTT.
http://www.eufirewood.info
Summary of Contents for CC-RIO00-100 Ronda
Page 38: ...38 2000 600 641 1240 336 Ronda mm Ronda air 625 135 140 ...
Page 41: ...41 X FIG 3 FIG 4 ...
Page 42: ...42 FIG 5A FIG 6 FIG 7 FIG 5B FIG 8 FIG 9A FIG 9B ...
Page 43: ...43 FIG 10 FIG 11A FIG 11B FIG 12 G H F I ...
Page 45: ...45 FIG 14 FIG 15 FIG 13 124 mm 2 1 3 FIG 16 2 165 FIG 15b ...
Page 46: ...46 FIG 18 FIG 19 FIG 20 5 6 2 mm 641 mm 4 4 FIG 17 ...


