
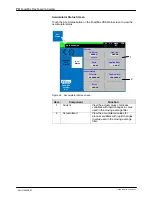

FoamMix Flex Foaming System
79
Part 1129048_01
E
2020
Nordson Corporation
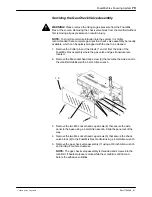
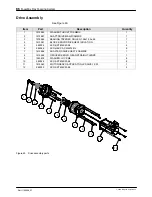
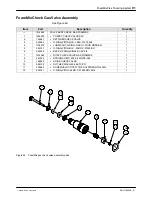
Servicing the Gas Check Valve Assembly
WARNING!
Please remove the nitrogen gas pressure from the FoamMix
Flex at the source. Removing the check valve block from the manifold without
first removing all gas pressure can result in injury.
NOTE:
To minimize moisture intrusion into the system, it is highly
recommended that a complete gas injection check valve assembly be readily
available, which can be quickly swapped with the one to be cleaned.
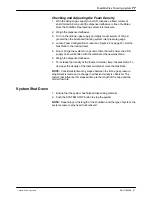
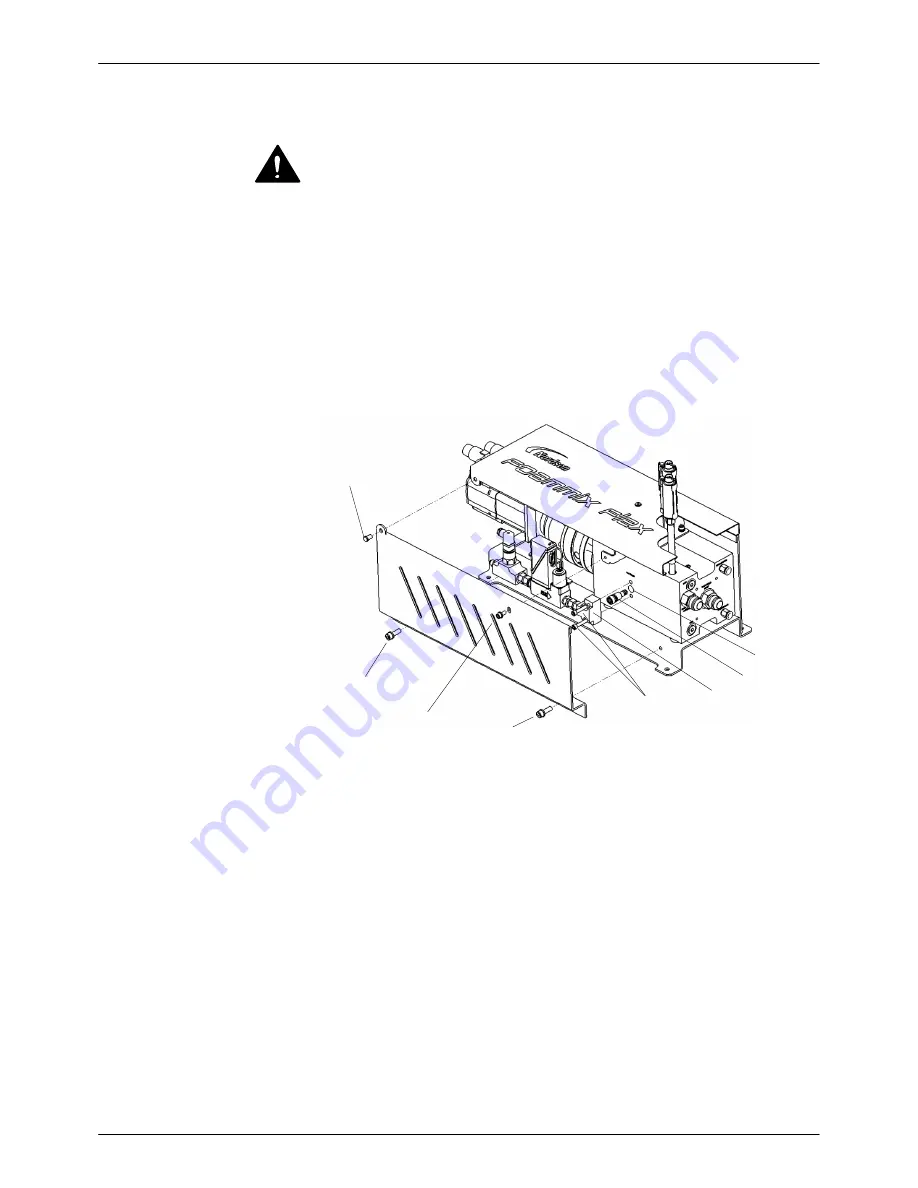
1. Remove the Cotter pin and the Clevis (1 and 2) from the side of the
FoamMix Flex assembly where the gas valve and gas transducer are
located.
2. Remove the M6 socket head cap screw (3) that secures the side panel to
the manifold stabilizer with a 5 mm Allen wrench.
4
5
3
7
1, 2
4
6
8
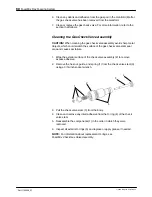
3. Remove the two M8 socket head cap screws (4) that secure the side
panel to the base using a 6 mm Allen wrench. Slide the panel out of the
way.
4. Remove the two M6 socket head cap screws (5) that secure the check
valve block (6) to the FoamMix Flex manifold using a 5 mm Allen wrench.
5. Remove the gas check valve assembly (7) using a 3/8 inch Allen wrench
and turning it counter-clockwise.
NOTE:
The gas check valve assembly is threaded and screws into the
manifold. If heated, please remove while the manifold is still hot and
before the adhesive solidifies.
Summary of Contents for FoamMix Flex
Page 6: ...Table of Contents iv Part 1129048_01 E 2020 Nordson Corporation...
Page 105: ......
Page 106: ......


