Repair
6-19
E
2003 Nordson Corporation
All rights reserved
106 966C
Issued 6/03
Manual 12-27
See
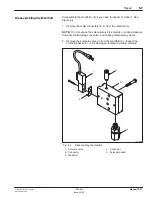
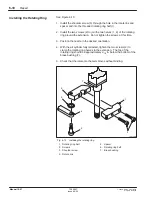
1. If you have previously removed the solenoid valve gasket, place the
gasket (convex side up) over the drilled ports in the top of the
manifold (3).
NOTE:
All three ports and two mounting holes must be visible through
the gasket. These are the dark holes shown in Figure 6-14.
1227022B
1
2
3
Fig. 6-14
Installing the solenoid valve gasket
1. Micro-adjust cap
2. Gasket
3. Mounting holes
2. Place the solenoid valve (1) on the manifold (3), over the gasket.
Place the solenoid mounting screws in the mounting holes (see
template) and tighten it with the miniature Phillips head screwdriver
shipped with the film coater. Do not over-tighten the screws.
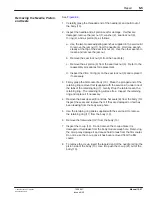
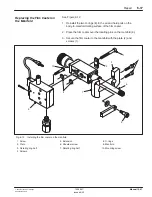
1. Mate the slots on the back side of the manifold with the locating pins
on the robot Z-axis slide. Reattach with the mounting screws (10).
2. Use screws (4) to reattach the front (unthreaded) half of the rotating
ring (7) to the film coater extension.
3. Reattach the airline and fluid line from the workcell to the film coater.
Plug in the solenoid valve connector.
Installing the Solenoid Valve
Attaching the Film Coater to
the Robot
Summary of Contents for Select Coat SC-204HS
Page 7: ...E 2003 Nordson Corporation All rights reserved Issued 11 95 A1EN 03 SF ELEC 2 Section 1 Safety...
Page 8: ...Safety 1 0 E 2003 Nordson Corporation All rights reserved Issued 11 95 A1EN 03 SF ELEC 2...
Page 28: ...Operation 3 0 E 2003 Nordson Corporation All rights reserved 106 966C Issued 6 03 Manual 12 27...
Page 42: ...Repair 6 0 E 2003 Nordson Corporation All rights reserved 106 966C Issued 6 03 Manual 12 27...
Page 64: ...Parts 7 0 E 2003 Nordson Corporation All rights reserved 106 966C Issued 6 03 Manual 12 27...

