Safety
1‐6
2014 Nordson Corporation
Safe_PPA1011LUE_EN
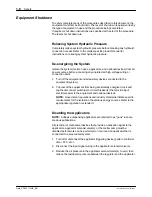
Equipment Shutdown
To safely complete many of the procedures described in this document, the
equipment must first be shut down. The level of shut down required varies by
the type of equipment in use and the procedure being completed.
If required, shut down instructions are specified at the start of the procedure.
The levels of shut down are:
Relieving System Hydraulic Pressure
Completely relieve system hydraulic pressure before breaking any hydraulic
connection or seal. Refer to the melter‐specific product manual for
instructions on relieving system hydraulic pressure.
De‐energizing the System
Isolate the system (melter, hoses, applicators, and optional devices) from all
power sources before accessing any unprotected high‐voltage wiring or
connection point.
1. Turn off the equipment and all auxiliary devices connected to the
equipment (system).
2. To prevent the equipment from being accidentally energized, lock and
tag the disconnect switch(es) or circuit breaker(s) that provide input
electrical power to the equipment and optional devices.
NOTE:
Government regulations and industry standards dictate specific
requirements for the isolation of hazardous energy sources. Refer to the
appropriate regulation or standard.
Disabling the Applicators
NOTE:
Adhesive dispensing applicators are referred to as “guns” in some
previous publications.
All electrical or mechanical devices that provide an activation signal to the
applicators, applicator solenoid valve(s), or the melter pump must be
disabled before work can be performed on or around an applicator that is
connected to a pressurized system.
1. Turn off or disconnect the applicator triggering device (pattern controller,
timer, PLC, etc.).
2. Disconnect the input signal wiring to the applicator solenoid valve(s).
3. Reduce the air pressure to the applicator solenoid valve(s) to zero; then
relieve the residual air pressure between the regulator and the applicator.
Summary of Contents for VersaBlue VA
Page 12: ...Table of Contents X P N 213828_11 2014 Nordson Corporation VersaBlue_PPA...
Page 28: ...Safety Instructions 1 14 P N 213828_11 2014 Nordson Corporation VersaBlue_PPA...
Page 40: ...Introduction 2 12 P N 213828_11 2014 Nordson Corporation VersaBlue_PPA...
Page 62: ...Installation 3 22 P N 213828_11 2014 Nordson Corporation VersaBlue_PPA...
Page 74: ...Operation 4 12 P N 213828_11 2014 Nordson Corporation VersaBlue_PPA...
Page 142: ...Operation 4 80 P N 213828_11 2014 Nordson Corporation VersaBlue_PPA...
Page 174: ...Maintenance 5 26 P N 213828_11 2014 Nordson Corporation VersaBlue_PPA...
Page 204: ...Troubleshooting 6 30 P N 213828_11 2014 Nordson Corporation VersaBlue_PPA...
Page 234: ...Repair 7 30 P N 213828_11 2014 Nordson Corporation VersaBlue_PPA...
Page 248: ...Password A 4 P N 213828_11 2014 Nordson Corporation VersaBlue_PPA...
Page 272: ...Glossary D 16 P N 213828_11 2014 Nordson Corporation VersaBlue_PPA...


