30
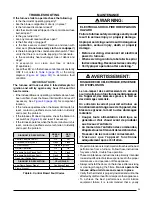
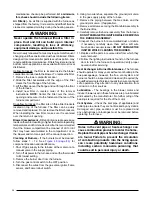
ELECTRICAL SHOCK, FIRE OR EXPLOSION
HAZARD
Failure to follow safety warnings exactly could
result in serious injury or property damage.
Improper servicing could result in dangerous
operation, serious injury, death or property
damage.
• Before servicing, disconnect all electrical
power to furnace.
• When servicing controls, label all wires prior
to disconnecting. Reconnect wires correctly.
• Verify proper operation after servicing.”
WARNING:
RISQUE DE CHOC ÉLECTRIQUE, D’INCENDIE
OU D’EXPLOSION
Le non-respect des avertissements de sécurité
pourrait entraîner
un fonctionnement dangereux
de l’appareil, des blessures graves, la mort ou
des dommages matériels.
Un entretein incorrect pourrait entraîner un
fonctionnement dangereux de l’appareil, des
blessures graves, la mort ou des dommages
matériels
• Couper toute alimentation électrique au
générateur d’air chaud avant de prodéder
aux travaux d’entretein.
• Au moment de l’entretien des commandes,
étiquetez tous les fils avant de les débrancher.
S’assurer de les raccorder correctement.
• S’assurer que l’appareil fonctionne
adéquatement aprés l’entretien.
AVERTISSEMENT
:
ELECTRICAL WIRING
• Electrical connections must be in compliance with all
applicable local codes with the current revision of the
National Electric Code (ANSI/NFPA 70).
• For Canadian installations the electrical connections
and grounding shall comply with the current Canadian
Electrical Code (CSA C22.1 and/or local codes).
IMPORTANT NOTE:
If replacing any of the original wires supplied with the
furnace, the replacement wire must be copper wiring
and have a temperature rating of at least 105°F (40°C).
For electrical specifications, refer to the furnace
nameplate or
2. Check all gas connections for leaks with a soap and
water solution. If the solution bubbles there is a gas
leak which must be corrected.
3. Turn on all electrical power to the furnace.
4. Turn the gas valve ON/OFF knob (
position.
5. Start the furnace by adjusting the thermostat 5 degrees
above room temperature.
6. Check the furnace for proper ignition and operating
sequence (See
).
7. After ignition, visually inspect the burner assembly to
verify that the flame is drawn directly into the center of
the heat exchanger tube.
NOTES:
In a properly adjusted burner assembly, the flame color
should be blue with some light yellow streaks near the
outer portions of the flame.
The ignitor may not ignite the gas until all of the air is bled
from the gas line. If the ignition control locks out, adjust
the thermostat to its lowest setting and wait one minute.
Adjust the thermostat 5 degrees above room temperature
and the ignitor will try again to ignite the main burners.
This process may have to be repeated several times
before the burners will ignite. Once the burners are lit,
check all gas connections for leaks again with the soap
and water solution.
WARNING:
Do not alter or remove the original rating plate
from the furnace.
8. Affix the conversion warning label (P/N 703935) to the
outside of the unit door and the conversion information
label (P/N 703942) near the rating plate inside the control
area.
9. Affix the gas conversion label from the conversion kit
on the gas valve. Each label should be prominent and
visible after installation.
10. Reinstall the appliance door.
11. Run the appliance through three complete cycles to
assure proper operation.
Summary of Contents for M4RC-072D-35C
Page 47: ...47...

