18
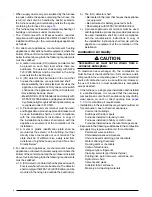
Figure 17
Figure 17.
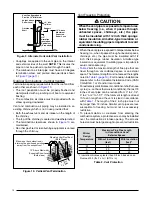
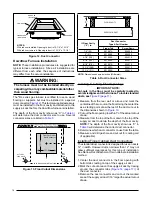
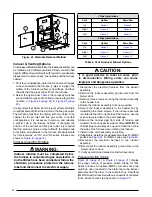
Narrow Ducts - Option 2
Narrow
Duct
Finger Tabbed
Duct Connector
Secure finger tabs to
side of air duct with staples
or sheet metal screws
Bend tabs tightly
against supply air duct
Supply Air Duct
Cut out & remove
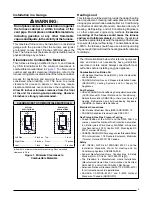
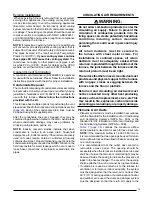
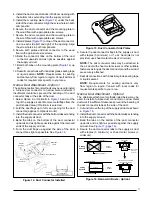
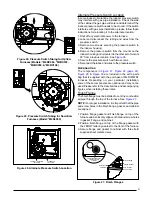
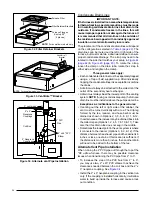
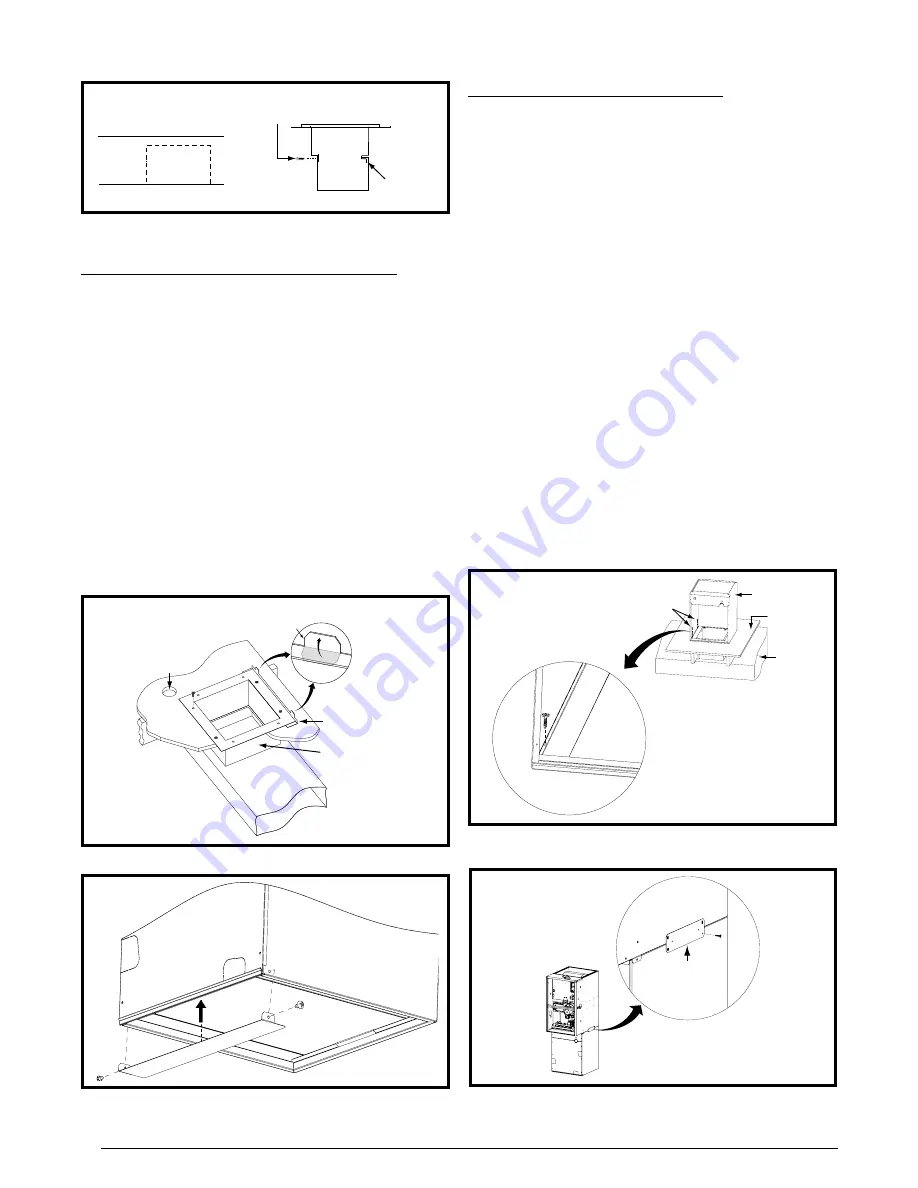
Installing Screw-Down Duct Connectors
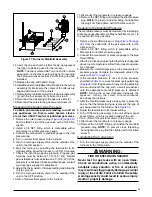
1. Bend both tabs (
) on the mounting plate up
90°.
2. Apply a bead of caulking, mastic, or other approved
sealant around bottom side of 1/2” flange and restrictor
plate (when applicable).
3. Locate the screw down duct connector over the duct
and carefully lower it into place. See
.
4. Secure the duct connector to the floor using flat head
screws or nails. NOTE: Make sure the duct connector
flanges stay in contact with the duct.
5. Secure the plenum to the duct using sheet metal screws
making sure a tight seal is made between the duct and
the duct connector. NOTE: Additional screws may be
added if required.
6. Cut away along edge of flange allowing the center to
drop into the duct. NOTE: Remove section of duct with
caution, as edges will be sharp.
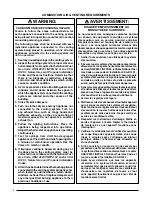
Figure 21
Figure 21.
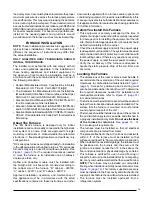
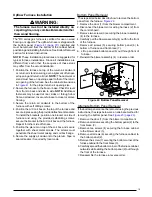
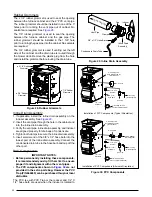
Attachment Bracket
Attachment
Bracket
Furnace
A/C Coil Box
Figure 19
Figure 19.
Close-Off Plate
Figure 18
Mounting
Plate
Screw Down
Duct Connector
Supply
Air Duct
Hole for
Gas Line
Wood Floor
Bend tabs
up 90°
Figure 18.
Screw-Down Duct Connector
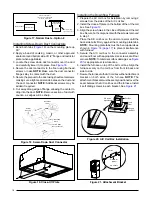
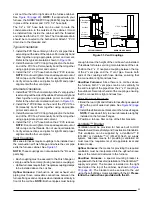
Figure 20
Figure 20.
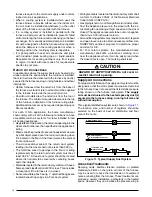
A/C Coil Box Installation
DO NO
T INST
ALL SCREWS
IN
THIS SURF
A
CE
Coil Box
Supply
Air Duct
2 Screws
both sides
Wood
Floor
Installing the Downflow Furnace
1. Prepare the AC coil box for installation by removing 2
screws from the sides of the A/C coil box.
2. Install the close-off plate on the bottom of the of the coil
box. See
.
3. Align the screw holes in the close off plate and the coil
box. Secure both components with the screws removed
in step 1.
4. Place the A/C coil box on the duct connector until the
back side butts firmly against the mounting plate tabs.
NOTE: Mounting plate tabs must be bent upwards as
shown in
to prevent interference
with furnace.
5. Secure the A/C coil box to the connector assembly
and wood floor with appropriate size screws at all four
corners. NOTE: To minimize coil box damage, see
for appropriate screw locations.
6. Install the furnace on top of the A/C coil box. Align the
furnace evenly on the coil box from front to back and
side to side.
7. Secure the furnace to the A/C coil box with an attachment
bracket on both sides of the furnace. NOTE: The
attachment brackets must be evenly positioned over the
seam between the A/C coil box and the furnace. Install
4 self drilling screws in each bracket. See
Summary of Contents for M4RC-072D-35C
Page 47: ...47...

